Watch how to draw with a pencil. Drawing Lessons for Beginners: Free Videos for Home Study
Who among us has not dreamed of becoming an artist at least once? Especially in childhood, many of us wanted to learn how to draw beautifully, and maybe even paint real pictures. But, as often happens, dreams were shattered by a banal lack of skills. Either due to a change of interests, or because of ordinary laziness, many lacked the desire and patience to continue developing in this direction.
So how to learn to draw with a pencil for beginners?
Like any creative occupation, the art of drawing contains many subtleties and helps its owner to reveal not only his creative potential, but also to realize his worldview in a beautiful form. These subtleties will be discussed further.
Stages and principles of training

Often, in order to fully learn how to draw, they resort to phased learning and practice in drawing various compositions of different plans. There is quite a difference if you are, for example, trying to draw a person, or trying to realize a landscape on paper. That is why in this case it is very important to master the skills of drawing a variety of objects.
Another basic principle in teaching drawing is regularity. It is practice that is the decisive factor in the development of drawing skills. It would not be bad to make yourself a specific schedule for the week, according to which you could devote at least 20 minutes a day to this lesson. From this it follows that you also need to show some patience in such training.
What is needed to get started?
So, first of all, find yourself notebook with fairly large leaves. There should be at least 50 sheets. The second item in your preparation should be the choice pencil taste. There are a great many pencils, so in your case the best choice will be the one you are used to using. For example, it can be a pencil with a soft lead. Naturally, a little later, one way or another, you will have to buy necessary pencils to improve the quality of your work.
Get yourself a calendar too. Where you will celebrate not only the schedule of classes, but also your successes. At first, you will have to force yourself to strictly follow the schedule, but over time it will become part of your lifestyle and will bring great pleasure.
Try to picture something on the first page. Do not worry about high quality drawing. Through certain time, you'll open a notepad on the first page and be surprised at the difference between how it was and what has changed.

Basics
Many people think that drawing is a skill that depends only on natural talent, so they easily find excuses for themselves in the format “not given” or “not working”. But the point is not only in talents, but also in acquired skills. A person who can draw well without knowing the basic principles is a rare exception. Every business needs to be learned. Therefore, further we will consider the basic laws and techniques of drawing.
There are 9 basic laws of drawing, having learned which you will learn how to draw on a pretty high level. Let's discuss them.
- The law of perspective. Objects that the author wants to visually bring closer are distorted in such a way that one part of it seems closer than another part of it.
- Location of items. Objects that are at the bottom of the sheet appear much closer than the rest.
- size law. The object in the picture, which, according to the author's intention, should be located closer, should, accordingly, look larger than those that are further away.
- overlap law. An object that is in front of another becomes visually closer to us.
- Law of penumbra. The conditionally unlit part of the object, which is located on the opposite side of the light source, should be darker.
- Shadow law. To make the drawn object seem voluminous, you need to add a casting shadow to it, also strictly on reverse side from a light source.
- The law of contours. It is necessary to accentuate the contours of rounded objects to give them depth.
- Horizon law. The case when the horizon is drawn so that the depicted objects appear at different distances from the observer.
- The law of density. To make it seem that objects are at different distances, it is also necessary to draw near objects in more detail and distant objects in less detail.
Using these 9 basic laws in practice, it will not be difficult for you to move to a new level in drawing.

Also, in order to avoid simple mistakes, a beginner needs to follow several important steps when creating a sketch of a drawing. Here they are:
Drawing from simple to complex
More or less known fact that drawing drawing is different. First of all, it means that drawing a person is far from the same as drawing, say, a tree. Different things require different approaches for perfect performance. That is why we will further consider in detail the technique of drawing various compositions.
Don't take it right away complex compositions. Because in the science of drawing, the attitude with which you start working is very important. If you immediately took complex pattern, and you didn’t succeed, then a bad mood is guaranteed to you. You may even lose the desire to pick up a pencil for good. Therefore, in our training, we will go from simple to complex, gradually learning new drawing techniques. Let's start simple.

Draw geometric shapes
Since looking for suitable layouts geometric shapes will be quite a long time, we will be based on our imagination. For convenience, you can even download ready-made pictures of various geometric shapes from the Internet.
Cube
Let's draw a cube. Take this picture as a base:
Repeat all the faces and sides of the geometric figure. Do not forget that the back wall of the cube is proportionally smaller than the front. Now let's pay attention to the shadow.
Imagine that the light source is in front. Thus, the front side of the cube will be lighter, and sides darker. Shade the sides. Highlight the lines of the front corner with a pencil, and leave the rest thin. He will collect all the attention of the observer.
To make the figure unique, you can slightly distort the proportions. So we end up with something like this.

Cylinder

Draw a plane on which your figure will be located. It should not be in the air, because the shadow should fall on something. Find on this plane perfect place to locate the center axis of your cylinder. Draw a vertical line straight up from this point. Draw ellipses around both ends of this line. Connect the lower and upper ellipses with the same vertical lines. The sketch is almost ready. For convenience, you can add a couple auxiliary lines. For example, in front, such a line can mark the border of the shadow. Draw a shadow outline on the horizontal plane where your shape is located. The result should be something like this:

When we're done with the frame, it's time shade the main parts of our figure. Again, given that the light should be in the exact opposite direction from the shadow, we mark by eye where the highlight will be. It is also worth considering that the glare on the cylinder will not form a spot, but a vertical stripe. We hatch with a darker shade the area from the shadow line to the rear border of the cylinder. Lubricate the hatching border to make the transition smooth. We shade the very shadow of the figure. Leave the top of the cylinder light.

Draw a sphere
Let's try to depict one of the basic geometric shapes, on the basis of which more complex objects will be drawn in the future. This figure is a sphere. She draws even easier than the rest. You need to draw a circle. Further, from the edges of this circle, you need to draw a few more concentric circles inside this figure. These circles may not be perfectly regular, in fact, they may take the form of an ellipse.
They will serve us in order to properly hatch. Refer to the picture below.

Shade the circles as shown. Draw another ellipse on the main plane. Shade this ellipse too to create a shadow. The sphere is ready.
Exercise
Try using the sphere drawing skill to draw more complex compositions, such as a plum. Notice what changes happened to the shadow? What happened in the end?
Answer
Shadow and light have changed places. As a result, the berry acquired the illusion of transparency.

So, we found out that drawing geometric shapes is not such a difficult task.
Based on a basic knowledge of geometry and the skill of drawing such shapes, you can create more complex compositions with their help.
Drawing utensils
The next most difficult step in pencil drawing is drawing dishes. At the same time, the main difficulty lies more in the correct placement of shadows, both on the subject and around it.
Let's draw simple vase. It will be great if you find a suitable example that you can study in advance.
At the very beginning, we need to designate the parameters of the subject using straight lines. Draw a small horizontal line at the bottom of the sheet. This line will be the bottom of our vase. From the center of the horizontal line, perpendicular to it, draw a vertical line. This line will indicate the height of the object. Draw another horizontal line at the top of the vertical one. If something is not clear to you, refer to the figure below:

As we can see, we will need another horizontal line marking the narrow neck of the vase. Draw her. Next, you need to draw ellipses with centers coinciding with the points of intersection of the vertical and horizontal lines. They are needed in order to give volume to the vase.
The next step is to draw the outline of the object. For example, it could be like this:

The final step will be the drawing of light and shadows. This is done in the same way as with geometric shapes. Simply, first you need to decide what underlies each part of the object, a sphere, a cylinder, a cone or a cube.
Try to ensure that the outline of your vase is symmetrical on both sides.

Draw a cup
First, according to the proven method, we need to draw a vertical and horizontal lines. This time, the base of the cup will be much smaller than its mouth, and not the same. Draw ellipses for the top and bottom.


Plants
Unlike geometric shapes and dishes, drawing various plants is a more difficult task than it might seem at the beginning. For example, in contrast to relatively simple items, in the case of flowers, bushes, trees and much more, it is better to always have a living example in front of your eyes. It is very difficult to accurately imagine such a number various details and display them correctly on paper. Or it can be a finished image of the original. With the degree of detail in the drawing, it is important to resolve the issue at the very beginning. After all, it can be as simple as possible, or, on the contrary, contain a large number of details.
Drawings by degree of detail:

Let's start drawing.
Make an initial sketch of your composition. If this is not one flower, but several, depict them so that the stems are slightly curved, and the buds look in different sides. Do not make all the lines perfectly correct.

One of the most interesting things is that the initial sketch can consist of geometric shapes, albeit a little distorted. Take a closer look.
What do you see? The picture contains at least a circle, ovals, a cylinder, a distorted diamond and cones. This tells us that sometimes, even complex images at the initial stage can be drawn using simple shapes.
Start drawing details. Draw the petals and add irregularities to the petals. Add leaves to the composition. Focus on the original.
A tulip flower usually has about 6-7 petals that partially overlap each other.


If you pay attention, then note that the thickness of the stems along the entire length is the same. The leaves are long, with a sharp end, curved. The leaves wrap around the stem. Also pay attention to attaching the stem to the bud. This is noticeable on a flower turned back.
The final step is to add light and shadow. With light strokes, make more shaded areas inside the flower, as well as on the inside of the leaves. Places where the petals intersect can also be slightly shaded. This will give the petals a translucent effect. Draw the stamens. They can be emphasized with a darker color.

As you can see from the last lesson, creating a simple composition is not a problem if you know the basic basics of drawing, from simple to complex.
Draw an oak
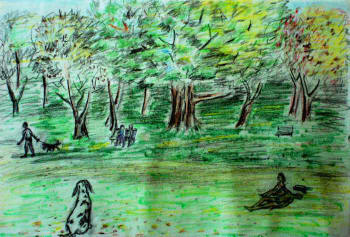
Trees are often integral part different complex pictures. For example, these can be landscapes where numerous trees echo images of animals, which will be discussed later.
Take hard pencil. It will be needed in order to draw very weakly general sketch tree. We will, as always, go from the general to the details.
Draw a tree trunk. Since we are drawing an oak, it must be thick. Draw branches from the tree trunk.


Add some leaf clouds inside the crown. It is necessary to leave empty areas on purpose so that some branches are visible.

Thicken the branches where they are not covered by leaves.

Start applying basic shadows. Before doing this, think about which side the light will fall on and how parts can be further shaded.


Draw the leaves. Add details to them and distribute the shadows correctly. Highlight a few leaves throughout the crown. This is to add volume to the picture. Oak is ready!

In the final image, it is not necessary to draw every leaf. You can simply thicken the contours of the leaves.
Did you know that learning to draw is easy? It is enough to allocate 20 minutes of time for 30 days! The desire to learn this is natural for absolutely any person. Lack of experience is not a stumbling block. Thanks to the basics of art, it is possible to learn aspects of the more voluminous methods of fine art with just one simple pencil. Moreover, over the past couple of years, more than 700,000 such paintings, including portraits, have been sold from exhibitions.
After all, it really turns out that the inner impulse to study practical developments in this kind of art for beginners is nothing more than an opportunity to earn money, which does not contradict one's own convictions. The pencil drawing school http://nizniy-novgorod.videoforme.ru/designschool/drawing will help to significantly increase the acquired skills.
What is needed for this?
In addition to the mentioned tool, you need to find or purchase:
- drawing paper, landscape sheet;
- diary;
It is necessary to mark each day and the allocated time. After all, the most common checkmark for drawing from scratch with a pencil can motivate no worse than fiery speeches.
- eraser;
- sharpener.
If there are a lot of basic tools, it is better to buy an automatic cutter.
How to learn to draw with a pencil in stages?
Step One: Schedule

Due to the busy working day, it is better to divide the daily twenty-minute lesson into two ten-minute ones. The main thing is to practice every day, 7 days a week! Even a more detailed consideration of two or three lessons “how to draw beautifully with a pencil for beginners” for one week is even considered optimal!
Step two: point of reference
It is necessary to depict up to five objects on the first page, any, completely taken from the head. This is necessary for further comparison of the acquired skills. If the desire to skip it prevails, ignore it! The step is required.
Step three: knowledge of simple geometric shapes and objects in three-dimensional space

This is done in accordance with the basic rules of perspective, light and shadow. The bottom line is to create a proportional object with a drop shadow. A more detailed consideration of this issue, with a division into a thirty-day course, is displayed in the book, practical guide Mark Kistler "Learn to draw in 30 days!"
So, for example, even a schoolboy with a ruler can depict a cube on a piece of paper, consisting exclusively of lines. A novice master uses only a pencil and imagination.
If daylight lies in the idea of the picture, the shadow from the object is equal to its third, while increasing by 1-2 mm near its right side. It is absolutely not necessary to display daylight in the picture - the main thing is to have an idea in your head. It is highly recommended that you read the above book.
Also, the third step provides for a personal definition of the artistic impulse that has arisen:
- portraits;
- landscapes;
- anime and manga;
- people.
Step Four: How to draw color theory with a pencil

By shifting the first colors (physical impact on the instrument in the desired area), it is possible to convey not only color saturation, but also emphasize the volume of the image. Thus, you can get the desired combination. If flaws were made in the process, using the eraser, you can point-wise scatter this or that area.
Note! It is better to use a white eraser. One side should always be pointed for spot adjustments.
Who said that mixing colors with just one simple pencil is impossible? It is enough to select the desired area (make it darker), while not pressing it strongly against the canvas. After that, tear off a small piece of paper or a dry napkin and start rubbing this area to the desired boundaries. As practice shows, long-term blending looks very effective in images with landscapes, as well as drapery backgrounds.
Step five: how to learn to draw the main objects with a simple pencil

You need to start training with large objects. If this is a portrait - the shape of the head, nose, eyes, ears, mouth. And only in that order. In general, it is very difficult to draw a portrait, since they can convey reality true masters your business. To convey the depth of the eyes, as well as their exact shape, will be unusual difficult stage. In this case, it takes up to 30 days to study each part of the body, starting with a schematic drawing of parallels, and ending with shadow recesses around the drawn object.
If we are talking about the landscape, then it is better to start with the largest tree, the building. After it schematic representation you need to select an area for the image of the shadow, and only then draw the terrain, geographical features. The latter always begin with drawing an inconspicuous horizon line. On the this stage it is important to make the correct division of the horizon line and the earth. Under the condition of an erroneous choice, the proportions of all other objects will increase significantly.
Lessons of right hemisphere drawing with a pencil for adults
Mila Naumova
The author of the project
professional drawing teacher
painting and composition.
Author of books:
"About kalyaks-paintings, or How to Become an Artist?"
"Learning to draw with a pencil" (PITER publishing house)
"A drop of courage"
Do family and friends think you're doing bullshit?
B basic drawing course for adults X
wanting to quickly learn how to draw
(result in 2-3 weeks)
Course №1 "LEARNING TO SEE AND DRAW AS AN ARTIST"
If you have a desire to quickly learn how to draw, so
so that your friends and acquaintances admire your drawings, then my course of 6 drawing lessons according to the method of one of the greatest draftsmen Albrecht Dürer, who worked at the turn of the 15th-16th centuries, will definitely help you.
Even if you can't draw at all!
And if you already draw well, then thanks to the course you will improve your technique and understand that you can draw anything from life - any still life, landscape, and even a portrait.
If you didn't have a good artistic base, then you will discover a lot of new things, because I talk about the basic basics of drawing, which are necessary for both graphic artists and painters.The most important thing for an artist is to learn to see like an artist, and then capture what you see on canvas or paper.
.
First of all, we will deal with the disclosure of artistic vision in the course, as well as let's learn to draw not objects and forms, but lines and dots.
ARTISTIC VISION
To teach a person to draw without developing his artistic vision is a meaningless occupation. Because when a common person looks at the landscape, he sees the street, houses, trees, people. And when the Artist looks at this landscape, he sees lines and spots. If the Artist at this moment draws with a pencil, he sees dark and light spots, if he writes with paints, he sees colored dark and colored light spots.The artist sees lines and spots, transfers them to the canvas, and the viewer distinguishes on the canvas - streets, houses, trees, people. Here is such a magical transformation, and without it, nowhere.
If you wish learn to draw from nature anything, regardless of shape and material, try to see not objects and objects, but lines and spots.
.
.WHAT DOES IT MEAN TO SEE SPOT AND LINES?
In the right teaching of drawing, the general principles (formulas) are taught, thanks to which the novice Artist can draw from life and from imagination all such objects.
For example?
For example, if you watched the site's lessons, you may have seen such a lesson: "SHADOWS ARE DIFFERENT, HOW TO TRANSFER VOLUME." In that lesson, I talked about how to make objects three-dimensional by placing light and dark spots correctly: highlight, light around the highlight, midtones (penumbra) around the light and shadow (the darkest places). it general formula to give volume to any shape, from a ball to a person's face.
And it doesn't even matter if you know how to hatch or not! The main thing is to correctly find the place of dark and light spots.
I will try to show with an example, as if I do not know how to hatch.
It looks something like this:
But if the object is at least a little transparent, then in our formula, light and shadow are reversed.
That is, there will always be a dark place around the highlight, and where opaque objects usually have the darkest shadow, transparent ones will have light.
Approximately like this:
Let's check this formula on grapes:
On the average bottle, everything is the same: there are dark places around the highlights, halftones around the dark places, and light spots in the shadow itself, only the shape of the spots changes:
And even the iris of the eye is drawn according to the principle (formula) of transparent objects:
So, just by swapping the shadow and light in places, drawing any object, you can create the illusion of transparency! I hope you noticed that the principle of drawing and the stages of drawing different objects were the same.
It is called general principles.
Knowing the general principles greatly facilitates the work of the Artist.
There is an even more general principle for drawing from life, and even more so from a photo, thanks to which you can learn to draw from life EVERYTHING, anything, in a couple of weeks! The main thing is that all this can pose for you for a while
About it general principle I tell on my already famous course
"LEARNING TO SEE AND DRAW LIKE AN ARTIST!"
basic course №1
BEFORE starting training, I ask you to do test drawings so that a person after training can see for himself what he learned during the course.
On the course, we do not learn to draw one picture, hand or landscape, but learn to draw EVERYTHING, anything.Total 6 learning tasksand you can draw like this!


|
R
drawings and feedback from students Vladimir Pritchenko (Servo-s):
I hoped that maybe they would not criticize me much, maybe even praise me, but to be suspected of a disguised artist pretending to be a teapot - I did not even dream of that! |
|
| BEFORE the course | AFTER the course |
 |
 |
Tamara Sh: |
|
| BEFORE the course | AFTER the course |

|
 |
 |
 |
Julia: |
|
| BEFORE the course | AFTER the course |
 |
 |
Larisa: |
|
| BEFORE the course | AFTER the course |
 |
 |
More drawings :) |
|
|
AFTER the course |
|
 |
 |
|
AFTER the course |
|
 |
 |
|
AFTER the course |
|
 |
 |
| BEFORE the course |
And this kid was drawn in the third lesson |
 |
 |
| AFTER the course | |
 |
 |
| AFTER the course | |
 |
 |
| AFTER the course | |
 |
 |
| Sixth task | |
 |
 |
| BEFORE the course |
AFTER the course |
 |
 |
| BEFORE the course |
AFTER the course |
 |
 |
| BEFORE the course |
AFTER the course |
 |
 |
BEFORE the course |
AFTER the course |
 |

|
What do you need to practice?
Need paper size A4 (landscape sheet) and A3 (as two landscape sheets),simple pencils and a soft eraser (preferably a nag).
ATTENTION!
I'm updating the course and it's not working yet.
You can take as a gift my book from the publishing house "PITER"
"Learning to draw with a pencil"
The book contains all the lessons of the basic course + hatching options.
Drawing is at least a great hobby for creative people. Many people think that for this you need to have some kind of special talent when, in fact, everyone can learn to draw - with a certain perseverance and systematic practice. We will help you figure out how to learn to draw with a pencil and what beginners need to know about this lesson.
Drawing supplies
You must have a set simple pencils. They are denoted by the letters H (T in Russian marking) - a hard pencil, B (M) - soft, and a number is placed in front of the letter that indicates the degree of hardness or softness, for example, 2B.
Beginners should start with an HB (TM) pencil - this is a standard pencil, medium degree hardness-softness. Once you get used to it, you will find it easier to control the pressure when using other types of pencils.
Take white and thick paper, best of all grainy - pencil shades will be clearly visible on it. If possible, buy one sheet of paper to check and rub it with an eraser - if it immediately becomes loose with spools, then the quality of such paper leaves much to be desired.
Remember to take a good eraser to correct future blots. Choose a soft eraser so that when erasing, the paper is not severely injured.
Where to begin
First of all, you need to familiarize yourself with the basic principles of drawing: composition, volume, perspective, dynamics. These basics apply to any style, not just pencil drawings.

After that, you should decide what exactly you are trying to learn and how you want to draw, which style to choose. Even if you want to be able to do a little of everything, stop at something specific first and don’t try to embrace the immensity - master one style, and then move on to another.
If you want to learn how to draw portraits, you will have to learn the basics of anatomy, proportions human face and bodies. To learn how to draw landscapes, you need to practice drawing natural objects - plants, mountains, sea waves, etc. If you want to draw anime, then you need to know the features of drawing characters in this genre.
From simple to complex
You must learn how to draw geometric shapes in 2D and then in 3D. It will become very milestone your practice, because, in fact, all objects, and even we ourselves, conditionally consist of different geometric shapes. And when you are just learning to draw objects and people, and even after gaining experience, you will still sketch circles, ovals, squares on paper, indicating the proportions of the objects you draw.

Draw a lot of simple objects, animals in a simplified form. Don't shy away from drawing seemingly boring objects like a cup, an alarm clock or an apple on a table - even a simple 2D outline drawing will require some skill from you.
Let's try to practice a little right now and draw a cute mouse.
1. Take soft pencil and draw two ovals next to each other, with a slight intersection. One of them will be smaller - this is the future mouse's head, and the second will become the body. 
2. Draw circles for the ears, outline the paws and outline the curly tail. 
3. Now let's draw a muzzle for the mouse - an eye in the form of an inverted droplet, a nose with a ball, a smile, and also do not forget to draw the ears. 
4. Erase the inner contours on the muzzle and make a more saturated stroke. Color the pupil and nose with black, with a white highlight in the middle. 
5. Draw paws for the mouse and shape the tail by erasing the auxiliary contours along the body. Circle the rest of the mouse. 
After two-dimensional images, start mastering three-dimensional ones, with the transfer of volume. Studying the black and white drawing, start with the classic task - draw a ball with a falling shadow. If you do not have a suitable ball at home, use as an object egg. How to perform such a drawing can be seen in the following video.
At first, it is very important to learn how to draw from life - you must develop a sense of form on real objects, observe shadows and light, and see volume.
The main principle in drawing is the movement from the simple to the complex, from the general to the details.
Do not rush and do not expect that after a couple of drawing sessions you will be able to create ingenious paintings. Be patient: sometimes you will have to learn how to draw the same shape over and over again until you achieve a decent result and only then move on to more difficult tasks, for example, to drawing people.
Basic pencil drawing techniques
The main pencil drawing techniques include shading and hatching.
On the early stages it will be easier for you to master shading. Although sometimes students of art schools, for example, use only shading, and shading is considered the wrong technique. In any case, it will be useful to master both techniques, as they help to achieve different results in the drawing.
Hatching
Hatching is done by applying short fine lines pencil on a piece of paper. The lines are placed at the same distance from each other. At the same time, the pencil comes off the sheet: after drawing one line, you do not pull it across the paper in a zigzag to its original position, but return it back without leaving marks. It is important to hatch the drawing in one direction.
The degree of saturation of the tone is controlled by the different frequency of strokes and their direction - strokes can be vertical, horizontal, diagonal. Increasing color depth is achieved with cross strokes different direction, for example, diagonal strokes are superimposed on top of vertical strokes.

There are also relief strokes - they are used to convey the relief and are performed with curved, arcuate, broken, but not straight strokes.
Through shading with a pencil, both light and shade and tones are transmitted, as well as various textures: backgrounds, surfaces, materials, etc.
The hatching technique is quite complicated for beginners and requires a large number workouts. It will likely take a long time before you can work out own style hatching. Therefore, for beginners, the shading technique is suitable, which will help to correct the flaws in the shading if necessary.
It is with the help of shading that the realism of the image is achieved with a smooth gradation of tone.
It is carried out as follows: hatching lines are applied to the paper with a pencil, and then rubbed with a special tool - blending, or cotton swab, a piece of soft paper, cloth or suede. You should not shade the lines with your finger in order to avoid the appearance of greasy spots in the drawing.

In fact, shading is an optional stage after hatching, but with its own peculiarity: it is better to hatch before shading with cross zigzag lines. Do not do horizontal shading - rub the pencil lines only in the direction from top to bottom.
It is important that the shading is uniform. In extreme cases, you can carefully shade the light areas with a pencil again, and weaken the dark ones with an eraser.
In this video you can see how to do different types hatching and shading.
When the basics are learned, pencil techniques are mastered, it remains only to practice drawing more often. Remember that practice is the key to your success.
There are a lot of tutorials for beginner artists, where you will see special drawing lessons. individual items or pencil drawings. You can either buy these publications in a specialized store or take lessons from the Internet. The main thing is to practice as much and as often as possible. Let drawing become for you, first of all, a pleasant leisure.
"Life is too short to spend it on things that do not bring pleasure" - says Richard Branson. And if you've always wanted to learn how to draw, but never found the time or opportunity to go to art school, check out our new collection of helpful online courses and programs. They will help you find a new hobby - drawing.
Sites for learning to draw

On the online platform there is a course "The ABC of Drawing", where both an adult and a child can learn everything about the basics of drawing. What tools does the artist use, what concepts does he use, what are form and texture, contrast and nuance… There are 43 lectures and 8 modules in the course. At the end you have to do your homework.
Educational site, which tells about drawing from nature, human anatomy. True, the rollers English language, but this is a great opportunity to improve your English.
Website art school for adults Mila Naumova. Mila Naumova is the author of the project “Everyone can draw!”, as well as a teacher of master classes and drawing lessons. The site has paid and free courses, such as Learning to See and Draw Like an Artist.
English-language drawing resource. There are a lot of courses on the site that are built on the principle "from simple to complex". The courses offered are Drawing Secrets, Colored Pencil, Oil Painting, Watercolor Workshop, Pen and Ink, Creative Mix- media.” Each module includes HD video and related literature.
The project provides lessons step by step drawing animals, birds, favorite cartoon characters, people. Simple pencil technique.
Site by pencil drawing. Everything you wanted to know about drawing with a pencil is explained in stages. On the pages of the project you will find materials on completely various subjects: drawing lessons of a person, animals, flowers, trees, etc.
Free drawing academy, where everyone will find what inspires him and what he did not know yet. All videos are in English.

- a lot on the channel useful information from a monumental painter who graduated from the Moscow State Academic Art Institute named after Surikov. Here are video tutorials on academic drawing and painting, composition and art in general. - free video tutorials, thanks to which you can learn how to draw with a pencil, watercolor, portraits and landscapes. There are lessons for adults and separately for children.
A whole channel from the school of Veronika Kalacheva. The school has its own website, but they mainly offer paid drawing courses. There are free videos available on YouTube. It's saturated and interesting programs teaching drawing, watercolor, pastels and painting.
The channel was created for those who are not indifferent to fine arts And he really wants to start painting himself. If you don’t know where and how to start, you think that you have no talent, then open the video, pick up a brush and draw. The video tutorials are very clear and simple. On the channel there are lessons in watercolor, gouache, oil and pastels. - a lot of detailed video tutorials on cartoon characters and everything connected with them. The channel is updated frequently, so you will always find something useful and new. - Tom McPherson on his channel tells how to draw beautifully and competently with a pencil. Mostly presented lessons on drawing interiors and architectural structures.
If you feel the desire to draw, then do not think about the result - draw. Open any specified resource and follow the instructions, develop and improve. And soon you yourself will draw a masterpiece that will please your loved ones.


, poultry farming")


- Burns, Robert - short biography
- The concept of common vocabulary and vocabulary of limited use
- Nancy Drew: The Captive Curse Walkthrough Nancy Drew Curse of Blackmoore Manor Walkthrough
- Deadpool - Troubleshooting
- Won't start How to Survive?
- What to do if bioshock infinite won't start
- Walkthrough Nancy Drew: Alibi in Ashes
- Spec Ops: The Line - game review, review Spec ops the line crashes on missions
- Room escape level 1 walkthrough
- Processing tomatoes with boric acid How much will 2 grams of boric acid
- Cucumber Grass (Borago)
- Bioinsecticide Lepidocid: purpose, properties and application procedure Lepidocide waiting period
- How to change the language to Russian in steam
- Dendrobium noble: room care
- Morphology of plants general concepts - document
- Planting, propagation and care of bamboo at home, photo Growing bamboo from seeds
- How to strengthen the cellular signal for the Internet in the country
- Sanskrit reveals the forgotten meaning of Russian words (2 photos)
- The oldest language Sanskrit programming language of the future Dead language Sanskrit
- Who has dominion over all the earth?