Portrait drawing in pencil. How to learn how to draw portraits of people with a pencil for novice artists? We draw a portrait of a person with a pencil in stages from different angles: full face, profile and turn of the head
Very often, novice artists neglect the study of the human skeleton and muscles, mistakenly believing that “it will work out just fine”. But ignorance of human anatomy leads to the fact that the drawn person turns out to be unconvincing, and his facial expressions and movements look unnatural.
Therefore, today we will look at the basic principles that you should be guided by if you want to draw a good and high-quality portrait.
1. Proportions of the face
The skull and jaw are a slightly flattened sphere, so looking at human face in full face, we see something like an egg turned upside down. Two perpendicular lines passing through the middle divide this egg into four parts. Let's look at the details:
- Mark the midpoints of the right and left halves of the horizontal line. The eyes will be located exactly at these points.
- Divide the bottom half of the vertical line into five sections. The lower part of the nose will be located on the second mark from the top, and the line where the lips meet will be located one point lower.
- Divide the top half of the vertical line into four parts. The hairline will be located at the second or third mark, this feature varies. The ears are between the upper eyelid and the tip of the nose, but this rule is only true when the face is not down or up.
Helpful hint: the width of the face is usually five eyes wide or slightly less. The size of the distance between the eyes is equal to the width of one eye. Very rarely in humans, this distance is very different from the standard, but this feature will be easy enough to notice. The distance between lower lip and the chin is also equal to the length of one eye.
Another way to measure is to use the distance between the tip of the large and index finger. The figure below shows what distances can be measured in this way: ear height, distance from the hairline to the eyebrows, from the eyebrow to the nose, from the nose to the chin and from the pupil to the pupil.

Profile
In profile, we still see the shape of an egg, but the sharp side of it looks into a corner. Lines now separate the head into a face and skull.
On the skull:
- The ear is just behind the vertical line. In size and location, it is still located between the upper eyelid and the tip of the nose.
- The depth of the skull varies within the limits indicated in the picture below in paragraph 4 with dotted lines.
- Everything is located as mentioned above.
- The root of the nose coincides with the horizontal line or is slightly higher
- The most prominent part is the first point above the horizontal line that marks the brow line.

2. Features
Eyes and eyebrows
The eye is simply two arcs connected in an almond shape. Not certain rule in drawing eyes, because the shape of the eyes can be different, and there are a lot of such forms, but we can notice the following trends:
- The outer corner of the eye may be higher than the inner, but not vice versa.
- If the shape of the eye is almond, then the rounded part of the eye will be closer to the inner corner, and the elongated part will be closer to the outer.

Eye details
- The iris is partially hidden under outer eyelid. It touches the lower eyelid only if the person looks down, or if the eye is built so that the lower eyelid is higher than usual.
- Eyelashes grow from the inside out, not the other way around, and this is very important when drawing to make them look natural. Eyelashes on the lower eyelid are shorter.
- When trying to draw all the little things (tear ducts, lower eyelid, etc.), remember that drawing in detail does not always mean that the result will be beautiful.
In profile, the eye takes the form of an arrowhead (with convex or concave sides), with a slight hint of the upper and possibly lower eyelids. AT real life you will not see the iris from the side, you will only see the white of the eye. But an eye without an iris looks weird, so draw at least a hint of it.
As for the eyebrows, the easiest way to draw them is to follow the arch of the upper eyelid. Often the widest part of the eyebrow is closer to the inside, and the “tail”, tending to the outer part of the eye, gradually becomes thinner.
If you look in profile, the shape of the eyebrows changes dramatically and becomes more like a comma. The eyebrow, as it were, begins where the tips of the eyelashes are.
The nose of a person is approximately wedge-shaped, it is enough just to imagine and draw it in three-dimensional form before drawing the details.
The back and wings of the nose are flat surfaces that are only outlined at the end, but it is still very important to take these surfaces into account when sketching in order to correctly calculate the proportions. The lower flat part of our wedge in the form of a truncated triangle is connected to the wings and the tip of the nose. The wings fold inward towards the septum to form the nostrils - note that the bottom view shows how the septum begins before the wings and connects to the face. It protrudes lower than the wings when we look at the nose in profile, which means that in 3/4 view the distal nostril is hidden by a septum.

Just like in the case of the eyes, detailing does not always give a good result. Therefore, it is more important to work out the proportions than to pore over the details, which in the end can disfigure the drawing. When drawing from the front, the nose looks better if you draw only the lower part of it. If you are drawing a 3/4 view, then most likely it will be better for you to draw the line of the back of the nose. You will have to examine and study a lot of noses in order to understand how and when to draw it.

Lips
- The line where the lips meet should be drawn first, as it is the longest and darkest of the three lines that form the mouth. It is not simple wavy line, but a whole series of thin curves. In the picture below, you can see an exaggerated example that will explain the movement of the mouth line to you. Note that there are different lip shapes, and that the main line can reflect the lower or upper lip. Lips can be softened different ways. The line in the middle can be very straight to reflect a sharp look, or very blurry to loosen the lips. It all depends on the shape of the lips, how plump they are. If you want to achieve symmetry, start from the center and draw one half of the lip and then the other.
- The two upper tips of the upper lip are the most obvious parts of the mouth, but they can also be pronounced or practically run in one line.
- The lower lip is a soft arch, but can also vary from almost straight to very rounded.
- The upper lip is usually thinner than the lower one and protrudes from the general relief of the face less than the lower one. Try to shade the upper lip with strokes.
- On the sides of the lips are in the form of an arrowhead and the fact that the upper lip protrudes slightly forward in this place is very clearly visible.
- The midline of the mouth at the ends deviates downward from the lips. Even if the person smiles, it curves down before going up again. Never draw this line straight up if you are drawing a face in profile.

The most important part of the ear is the long, C-shaped outer line. The inside of the ear is like an inverted U. There is also a similar curve just above the earlobe, connected to a small C-shaped arc. In general, the shape of the ear also varies.

When we see the face in front, the ears are visible in profile:
- The rim, which was previously U-shaped, is now a separate part - as happens when we look at the plate from the side and see its bottom.
- The earlobe will look more like a drop and will stand out.
- How thin you need to draw the line of the ear depends on how close the ears are to the head.
If you look at the head from behind, the ear looks as if separated from the head: the rim is attached to the head with a funnel. Don't be afraid to draw the funnel too big, as it really isn't small.
3. Angle
Having the shape of a ball with a few changes, the head is drawn easier than expected. But, despite this, you need to study how it looks from different angles. Of course, the appearance of the nose changes first of all, but the eyebrows, cheekbones, the central part of the mouth and chin also change.
When we drew a face in full face and in profile, we practically simplified it to a two-dimensional plane. For other viewing angles, we need to think in 3D space.
look down
- All details are rounded up and the ears are also moved up.
- Since the nose protrudes forward, it protrudes from the general line of the face and its tip is closer to the mouth.
- The eyebrow curve becomes more even. In order for it to take a reverse bend, you need to turn your face in some particularly unusual way.
- The upper eyelid becomes more visible and covers most eyeball.
- The upper lip almost disappears, and the lower lip protrudes more.
- Note that since the mouth follows a general curve, it looks like a smile has appeared on the person's face.

look up
- All details are rounded down and the ears are also moved down.
- The upper lip becomes fully visible and the mouth appears plumper.
- The eyebrow line becomes more rounded, but the lower eyelid is rounded down, giving the effect of a sharp look.
- The lower part of the nose is clearly visible, the nostrils are also clearly visible.

Side turn
When a person is seen almost from the back, all that is visible is the protruding line of the eyebrows and cheekbones. The line of the neck protrudes and tends to the ear. Eyelashes are the next thing you see when a person turns his face.
Then part of the eyebrow appears, and the protrusion of the lower eyelid and the tip of the nose protruding from behind the cheek also become visible.
When the face is already turned almost in profile, eyeball and the lips become visible (but the midline of the mouth is still small), and the line of the neck merges with the line of the chin into one line. You can still see the part of the cheek where the nostril is hiding behind.

Now we will learn the construction of a person’s face and how to draw a beautiful portrait (face) of a girl with a pencil in stages for beginners. As a girl, we will have a young Cameron Diaz. Cameron Diaz became famous as an actress after she starred in the film "The Mask" with Jim Carrey, before that she was a model, and in general she dreamed of becoming a zoologist as a child. From latest films I liked “I studied very badly”, I watched it four times, she played there just super. Now let's start drawing this actress.
Step 1. Draw a circle, draw a straight line in the middle of the circle, then Cameron looks straight, but a little down, so the eyebrow line, which is the top one, is shifted down a little. For convenience, I noted where the middle of the circle is, so that you understand how much lower we draw the curve. Further below, draw a line of eyes. Our nose will end right at the end point of the circle, measure the distance from it to the point of intersection of the eyebrow line. This distance is equal to the distance from the nose to the chin and from the point of the eyebrow line to the beginning of the hair.

All pictures enlarge when you click on them.
STEP 2. Now we need to mark where the eyes are located. To do this, divide the eye line into five equal parts, i.e. we get that the length of the eye is equal to the distance between them. From the beginning of each eye we lower the dotted line down. I remind you that we have the end of the nose at the end point of the circle. We lowered the dotted line so that the wings of the nose do not go beyond these boundaries, because such a structure of the face. Divide the distance from the nose to the chin into three equal parts.

Step 3. Draw the contour of the head, the contour of the eyes and the nose of Cameron.

Step 4. We draw pupils with patches of light and a mouth at the girl. The bottom line of the upper lip is on the first line.

Step 5. We draw eyelashes and eyebrows.

Step 6. We draw lines emphasizing the facial features of the actress (cheekbones, nose) and outline the curves of the hair, and also draw the ears.

Step 7 To draw the hair, we need to select the dark areas. We draw.

Step 8. To make the hairstyle more voluminous, draw additional lines on the head, then draw the neck and shoulders.
One of the most complex types art is . The physique must be studied in detail in parts. We have already considered some elements. Before you start, be sure to read these few recommendations from professional artists:
- First you need to think about the approximate location of all elements
- For sketching, take a sharpened pencil of medium hardness (I used HB and 2B, write in the comments which pencils you used), which will allow you to sketch thin lines.
- Do not erase the sketch lines until the desired result is clearly visible.
- Keep Proportions
- Note that the face has a pointed shape at the bottom and a more rounded one at the top.
- Practice! The more you train, the better you will learn to convey the necessary emotions and nuances of human facial expressions.
And now let's move on to the lesson.
How to draw a person's face step by step:
Step one. The face of this oval shape. First, make an oval and divide it with lines. The vertical line exactly in the middle crosses it, and the horizontal lines are arranged as follows. The first divides the face just below half, and the second still half from the remaining lower part of the face. We can't give exact measurements because everyone's faces are different. But the task of these lines is to outline (this is vertical), as well as the location of the lips (horizontal bottom line). Keep in mind that these will need to be erased later, so don't press too hard on the paper with the stylus. If you press hard on the paper, it will deform, and the drawing will look like a girl who is preparing for plastic surgery. (Will be )  Step two. Make indicative strokes at the place where. And also add lines for , and halfway between the nose and chin. Make the line that represents the lower lip wider.
  Step three. Let's move on to drawing. They are located just above the nose. The outer edges of the nose indicate where the inner corners of the eyes will go. Make a sketch as shown in the picture. There is another important factor to consider here. Human anatomy is arranged so that the distance between the eyes is equal to the size of another eye. This is indicated by the red arrow in the figure. Now let's add the eyebrows. Tip: even if one eyebrow is raised and the eyebrows are the same height, start drawing from the inside (points closer to the nose). To get an idea of how high the eyebrows are, add another imaginary eye above the left eye - this should give you more or less the correct height for the eyebrows.
  Step 4 Let's add a mouth. In the previous lesson, we already covered some points. For example, we tried to depict . But there is one more important point, a lot of questions from novice artists about how big the mouth should be? Draw mentally two lines from the inner corners of the eyes down. This will be the approximate size of the company, with a smile it can be a little wider.
  Step 5. Now Erase auxiliary lines, which we made in the first two steps. Let's see what we got. In principle, the sketch is ready. Now it remains to decorate, add shadows.
  Step six. Give the shape of the face more specificity. Pay attention to the cheekbones and the shape of the chin. This woman has a strong chin, but try not to make it too strong or she will turn into a man. Draw black pupils, and add eyelids. requires focus. This is the mirror of the soul.
  Look closely at the animation. You will see in what sequence it is best to do this.
 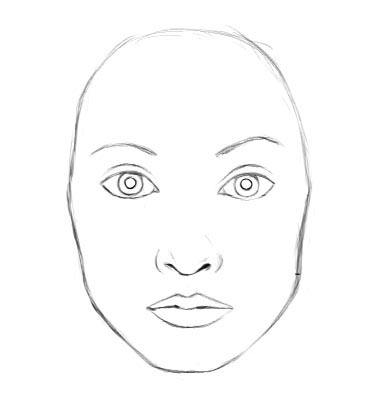 Step last. With a simple pencil add shadows to give the drawing volume and make it more realistic. That's all. More about other parts human body we will consider in next lessons. Leave also your work, and write comments about how, Only we have such lessons, see for yourself.
When there is a desire to draw something with a pencil, we are driven by our mood, fantasy, inspiration and associations. Of course, every novice artist remains satisfied if he successfully painted what he wanted and is satisfied with the result, and outsiders understand what he wanted to convey. However, there are situations when artists find themselves in the place of the protagonist of Exupery's "The Little Prince" Pilot. After drawing a boa constrictor that swallowed an elephant, he was outraged that others thought: "This is a wonderful hat, not a boa constrictor!" This situation is relevant among most beginning artists. And so that you do not end up in the place of the Pilot from " little prince”, we will show how to convey what was conceived with a pencil in order to get a recognizable result.
When drawing different objects, certain difficulties arise, but drawing a recognizable portrait is one continuous difficulty for many. In this lesson I will show you how to draw a portrait step by step without unnecessary complicated designs.
What you will need:
- a simple pencil with a hardness of H to 2H;
- a simple pencil with a hardness of B to 8B;
- paper;
- eraser.
- Take a pencil with a hardness of H to 2H. Divide the sheet horizontally into two parts so that the bottom is almost twice as large as the top. At the intersection of this division, draw two straight lines to place the eyes between them. By the way, the distance between the eyes is equal to the length of one eye (all of the above is illustrated in the picture).

- Spend two straight lines from the corners of the eyes down in order to indicate the boundaries of the width of the nose. Draw the eyelids and the shape of the eyebrows.

- Drawing a portrait with a pencil is not difficult if you follow our examples in pictures and recommendations. We move on and draw the rest of the nose, mark out the lips.

- Now outline the approximate boundaries of the forehead and the contours of the face as a whole. In order to avoid unnecessary errors, measure by eye, for example, with a pencil, how many times the height of the forehead will fit in the distance (plane) from the eyebrows to the lips. If you are painting a portrait of a specific person, then you can measure something with a pencil at arm's length, closing one eye, focusing either on the pencil or on the subject itself. If we are talking about a portrait from a photograph, then you can make a measurement either by placing a pencil on the photo, or by raising your hand in the same way. When it became clear, for example, that the length of one eye would fit in the distance between the eyes, then you check these parameters already in your drawing with a pencil.
Advice: You can apply a similar measurement method to any element in the drawing.

- You are probably wondering: how to draw a portrait of a person in stages so that he seems to come to life. To do this, we move on to the next stage in our work - we take a simple pencil with a hardness of B to 8B. We begin to draw the eye area with them, namely: start with the pupil, but do not forget to leave highlights in front of the eyes - white, unpainted dots (they create the effect of volume and naturalness of the picture). Darken the corners and draw a dark line in the lash area. Draw the main shadows around the eyes. BUT! Don't press too hard on the pencil.


- Sharpen well the pencil with which the shadows were drawn and draw hairs on the eyebrows with light but sparse strokes. And here, too, it is necessary to observe the laws of light and shadow: when drawing the lower part of the eyebrow, press the pencil harder, in this way a shadow effect will be created; in the middle part and on the sides, try not to put much pressure on the pencil and make the strokes lighter. At this stage, we also begin to draw a shadow in the nose area. Here you need to be especially careful, because the shadow on the nose creates its shape. So follow the example in the picture.

- To draw a portrait yourself, you need to have perseverance, so we hope that you are not tired and continue to make the portrait voluminous! Let's move on to drawing a shadow on the lips: the lightest part is the middle of the lower lip, and the darkest is the area under it.
In order to take a closer look at an example of how to draw lips and a nose, see our other articles on this: “,.

- It's time to draw the hair. For some, this task is difficult, but for some it is not. One way or another, we will tell you how to draw hair so that it seems the most believable in a portrait! To beautifully draw a portrait of a girl, it is important for novice artists to remember: 50% of the success of your work depends on drawing hair. And we are not talking about the main hairstyle and curls, but even about the small hairs that you see near the forehead. A little higher from them, the roots of long curls begin. To draw the hair, we again need to sharpen the pencil (B-8B). Here we can no longer make strokes at different angles - it is necessary that each line repeats the growth of hair and the shape of the hairstyle. From the roots of the hair it rises a little (respectively, the line too), and then we do not just straight strokes down, but as if we draw them in waves. The places where the curls intersect should be darkened (in order to create a volume effect). It is also very important to draw the hairs that stand out from the hairstyle. To do this, we again sharpen the same pencil and carefully, with a quick movement, draw hairs naturally sticking out of the hairstyle.
Why it is important to do this with a quick movement of the hand: the slower we draw the lines, the more unnatural they will look due to irregularities. After all, even the beating of the heart or our breathing can prevent us from drawing a straight line with a pencil..
When making careless hairs, the main thing is not to overdo it. After the work done on the hair, add shadows on the neck, as well as everywhere where the hair lay on top.
Well, I showed you how to draw a portrait of a person for beginners. I hope this photo lesson has become useful for you and will help you get rid of your unloved ones. difficult stages drawing portraits. In the article, I did not focus on the detailing of the drawing of the eyes, nose and lips, because previous articles are devoted to this.
Subscribe to groups in social networks and to my channel in YouTube. Stay up to date with new lessons!
It will probably surprise you that many artists find it difficult to draw not portraits, but ... nature! So, if you have a desire to try yourself as a portrait painter, do not let fears defeat this dream. And feel free to take on the study of the instructions, in which we will tell you how to draw a portrait with a pencil in stages for beginners.
Do you love geometry?
What do you need for beautiful portrait? Firstly, suitable model which you like. Yes, yes, the object of the image should really be liked, and this is not a red word. Proof of? Please! Salvador Dali painted several portraits of his wife Gala - a surreal story, perhaps not everyone understands. But the fact that the model evoked the warmest feelings in the artist will be felt by everyone.
Secondly, you will need basic skills geometric constructions. This is necessary in order to correctly calculate the location of the eyes, nose, mouth and depict the face as proportional and symmetrical. That, in principle, is all - it's time to move on to practice. Learn how to draw portraits with a pencil step by step for beginners.
In male faces, the lines are quite angular. But this does not mean that they are easier to draw. Therefore, do not spare paper, try to draw the outline of the face until its shape acquires the desired shape.
Instruction:

Thanks to this instruction, you will be able to understand how to draw a portrait of a man for beginners step by step without unnecessary difficulties with a pencil. It's just a matter of practice.
AT portrait of a woman the lines have smoother curves, here you should not make sharp corners. If in male portrait such touches add masculinity, then in girlish and ladies' clothes they will give the face unnecessary rudeness.

Instruction:

The mirror of the soul is that detail of the portrait that requires special attention. After all, this is usually the first thing that attracts attention in the picture. So the tips on how to draw a person’s eyes with a pencil in stages will allow you to create a very “lively” portrait.

Instruction:

top corner.
Secrets of a beginner portrait painter
As we have already found out, in order to draw a face, you need to love geometry, as well as have an idea about proportions. Just about the observance of proportionality and will be discussed further. Some features of anatomy will be very useful in the process of creating a portrait:
- if you draw a horizontal line in the middle of the eye, then it should be equal to the distance between the eyes;
- if you draw the same line between the upper and lower lip, then it will be equal to the distance between the pupils;
- the distance from the upper border of the mouth to the eyebrow is the length of the ear.
And most importantly: in order to see the shortcomings of the portrait regarding the ratio of parts of the face, bring the drawing to the mirror and look at the reflection - all errors will become very noticeable.


, poultry farming")


- Burns, Robert - short biography
- The concept of common vocabulary and vocabulary of limited use
- Nancy Drew: The Captive Curse Walkthrough Nancy Drew Curse of Blackmoore Manor Walkthrough
- Deadpool - Troubleshooting
- Won't start How to Survive?
- What to do if bioshock infinite won't start
- Walkthrough Nancy Drew: Alibi in Ashes
- Spec Ops: The Line - game review, review Spec ops the line crashes on missions
- Room escape level 1 walkthrough
- Processing tomatoes with boric acid How much will 2 grams of boric acid
- Cucumber Grass (Borago)
- Bioinsecticide Lepidocid: purpose, properties and application procedure Lepidocide waiting period
- How to change the language to Russian in steam
- Dendrobium noble: room care
- Morphology of plants general concepts - document
- Planting, propagation and care of bamboo at home, photo Growing bamboo from seeds
- How to strengthen the cellular signal for the Internet in the country
- Sanskrit reveals the forgotten meaning of Russian words (2 photos)
- The oldest language Sanskrit programming language of the future Dead language Sanskrit
- Who has dominion over all the earth?