Make a box with your own hands from an old box. Jewelry box: exquisite chests for every taste (23 photos)
In the house of every girl there are things that should be kept in a box. It can be small accessories, jewelry and other small items. If you can’t buy a suitable box, then a do-it-yourself box made of cardboard will be just right.
Making a decor element with your own hands is not very difficult, but it will take patience and time. The advantage of creating a box on your own is the ability to choose its shape, size and color to your liking. After all, the store does not always sell caskets that fully satisfy the needs of girls. The box can be small, inappropriate shape, and everything else - expensive. That's why home creativity will appeal to every craftswoman and lover of original things.
There are many ways to create a cardboard box at home. Therefore, you first need to decide on the shape, width and size of the box. You need to choose what kind of cardboard it will be made of, because it can be soft cardboard, hard or other material that can be pasted over with cardboard. Schemes for making caskets differ from each other, so at first it’s better to familiarize yourself with several, and only then choose the most suitable method and scheme.

The first method is considered the easiest, but also somewhat unusual. After all, to create a box, you will have to donate a book. The book will have to choose the one that is no longer needed, or just gathering dust in the closet. Of course, this option may seem strange to some, but still it has its advantages.
In order to make a box, you need to take a thick book and cut out pages from it with a clerical knife. You need to cut it so that the edges of the page remain, and you can choose the depth of your box yourself. You do not need to cut all the pages, as the box will lose its purpose.
After the pages are cut out, the remaining ones need to be glued together with liquid glue, leave the book to dry completely, and decorative elements, such as flowers, rhinestones or ribbons, can be glued to the cover. After the box is ready, you can put your jewelry or small things in it.

There is also a way to create a cardboard box or box. How to make a box of such material step by step, we will consider further.
For such a process, you will need a box of the right size or cardboard, from which you can make a box yourself. To learn how to make a box out of a box, you can watch a video that will show you how to make a drawing on cardboard and cut a box out of it.
All sides of the cardboard that are cut out must be folded together and glued together in the shape of a box. From the cardboard that remains, you need to create a box that will slide out of the box. It should be the same size as the box, but smaller in height. After the box is ready, it must be pasted over with paper, the color of which is chosen as desired. The same paper can be pasted over the box from the outside, of course, the color can change depending on the desire of the creator of the box.
Next, you need to take a flat piece of cardboard the same width and length as the box, and it also needs to be pasted over with colored paper. This cardboard will act as a partition between the boxes. You can choose the shape of your box, and its filling, for example, you can make two compartments, one of which will slide out, and the second one will simply be covered with a box lid.
In order to make a regular compartment in your box, you just need to glue another piece of cardboard, which will act as the front wall. And at the very end, you need to insert a drawer on the lower part and decorate the entire box with the desired decor elements. To decorate the box, you can choose different flowers, hearts, bright paper products and shiny hairpins. Inside the box, you can put jewelry, accessories, paper products, and even money.

The easiest option for making a box is to use a candy box. Only the box must be solid, that is, the lid of the box must be connected to its bottom. This option for creating a box will take a minimum of time, and you won’t need much material to decorate it.
It is necessary to empty the box of sweets, it will be especially convenient if there is a form for sweets in the box, which usually has several compartments. So, the box needs to be pasted over with colored paper, you can choose any color, you can even combine several colors to make the box brighter. If you glue the box in one color, then you need to take one big cut paper so that he can grab both the lid and the bottom of the box. You can learn more about how to decorate a box with colored paper by watching a master class from professional craftswomen.
After the box is pasted over with colored paper, it must be allowed to dry, and the paper should be smoothed from air bubbles. This can be done with glue, water and a brush. Next, you just need to insert a candy mold into the box, and you can put various decorations into it. The box can be decorated different colors, ribbons and other decorations.
Video related to the article
We already have a lot of master classes on making caskets from different materials and varying degrees difficulties, you can see them.
New master class how to make a box out of the box, from Anastasia Abdurashitova.
“This box is very easy to make. She is very roomy. She is not overweight. It will be a great storage addition to your home.
Do-it-yourself box from boxes
For manufacturing we need:
- 3 milk cartons, 1 liter
- cardboard,
- bead garland,
- wallpaper,
- universal glue "Titan",
- bow,
- paper,
- stapler,
- scissors,
- pen or pencil.

As you can see, you can buy beautiful handicraft boxes, or you can do it yourself. Both options have their advantages, the choice is yours.
If you find an error, please highlight a piece of text and press the keys Ctrl+Enter. Thank you for helping to make our portal better!
Box of postcards "Royal Throne"
We meet new master class from Julia from Kharkov - this is a box of postcards "The Tsar's Throne" ...
Mini garden in a pot
Mini-garden in a flower pot It is still winter outside, but do you want greenery, clean paths and dry benches? ...
How to make a beautiful pencil holder
How to make a pencil holder with your own hands Master class by Yulia Stepanova. This pencil holder and frame for...
This article will describe in detail how you can make a wooden box yourself, having a simple set of hand tools, great desire and skills in working with carpentry tools. For the manufacture of the box, you can take almost any tree - ash, oak, beech or even pine will do. The main thing is that the tree should not have knots and be dried very well.
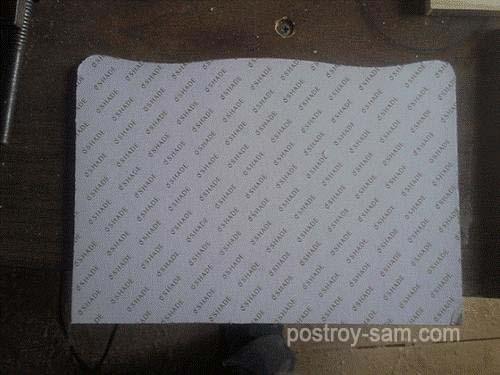
At the very beginning, you need to make a stencil for the lid and bottom of the box. You can choose any form according to your taste.

After the stencils are ready, you need to make two blanks from planks about 1.5 cm thick and, putting a stencil on top of them, draw a contour with a pencil.

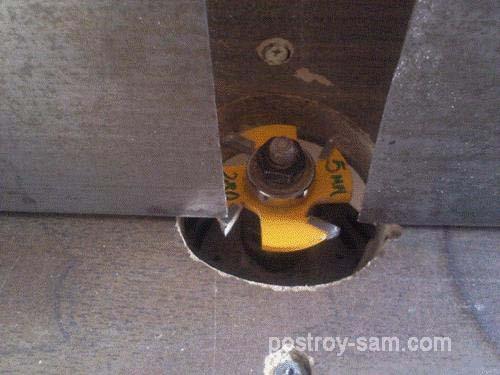
For turning workpieces, you can use, which must be fixed on the tabletop so that only working part cutters protruded above the surface of the table.

Turning must be done very slowly and carefully so as not to spoil the workpiece.

After the rough turning is completed, you can start grinding. For grinding, a wooden disc that needs to be wrapped with sandpaper is well suited. With it, you can make a perfectly even edge that will be perpendicular to the surface of our workpiece.

The edges must be turned with a cutter that has a curly shape. You can choose any cutter you like.
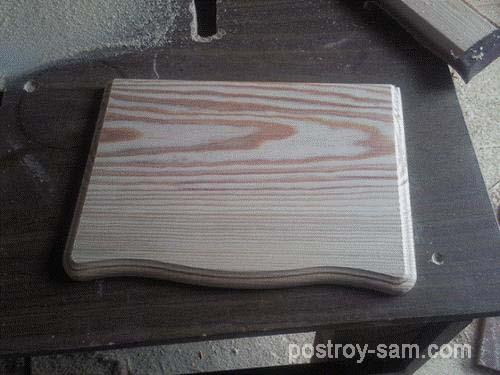
Ah, here is the result.

Now you can start manufacturing and assembling the body of the box. To do this, you will need three boards of the same height, about 1 cm thick. Using a miter saw, you need to cut them at an angle of 45 degrees, since such an angle will look better.
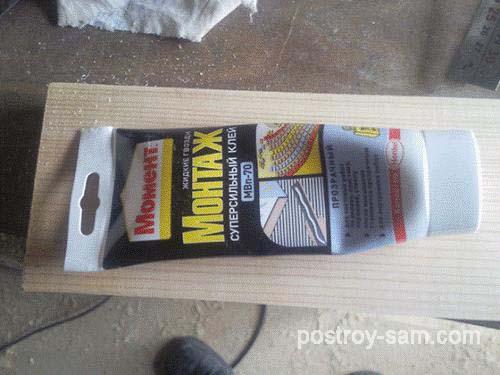
Then the resulting boards must be glued, for which any carpentry glue is suitable. One option may be Moment glue, which sets very quickly, and the board does not need to be held for a long time.
After that, you can start making the front of the box. To do this, you need to carve two boards with a thickness of about 1.5 cm. Using a special cutter, you can give the edges of the boards any shape.

The boards should be exactly the same.

After that, one board must be glued to the top of the box, and the second will be used for the bottom box. The back and side walls of the box must be machined to the same thickness - about 0.5 cm, and the bottom and front wall - 0.4 cm.

Then you need to glue the box, not forgetting to control the right angles, and after that you need to glue the front plate to the front wall of the box.

When the box is ready, you can make partitions in it, using planks 0.4 cm thick for this.
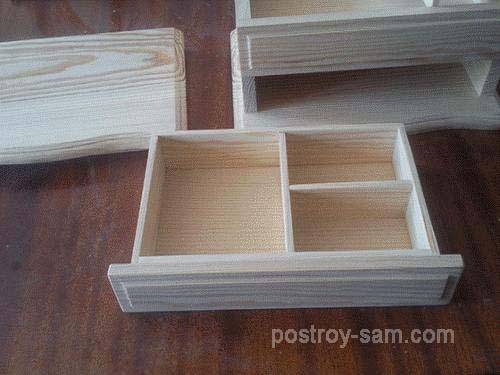
Glue the bottom into the top box and make partitions from planks 0.4 cm thick.

Then the bottom drawer is inserted into the box and the way it goes in the box is checked.

If the box goes tight, then you need to undermine it with sandpaper.

We also make partitions in the upper compartment. Hinge slots are hollowed out in the lid and the back wall of the box, then the hinges are screwed on and the lid is attached to the box.

We fix the lid.

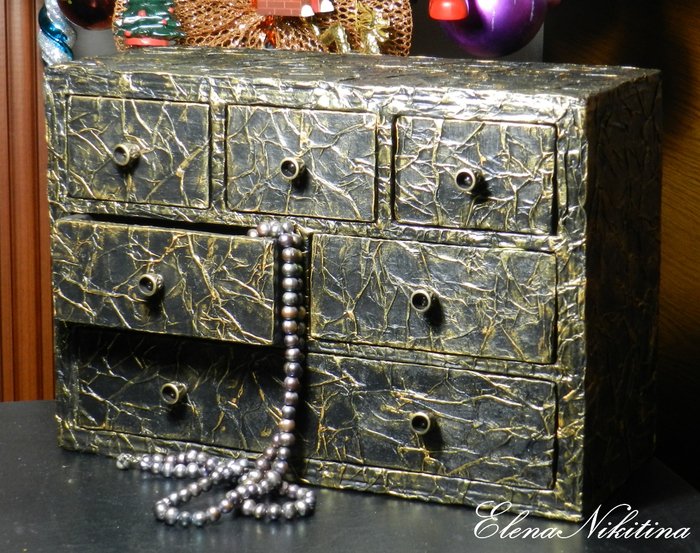
Now the box is ready. It remains only to paint and varnish it, as well as hang the handles.
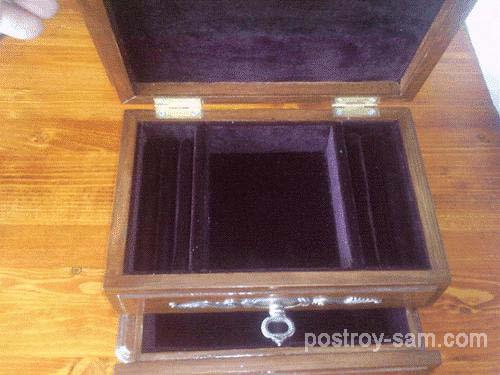
From the inside, the box can be finished with velvet glued to cardboard or velvet paper.
The box is one of the most popular items among those who work with wood. If desired, such a box can be easily made by yourself.
To make a wooden box with your own hands, you can use planks made of alder, linden or pine, as they are easier to cut and process. Also, you need to immediately determine the thickness of the walls of the box. AT this example a box with a wall thickness of 1 cm, having dimensions of 10x10x8 cm, will be considered.

You will need two boards - one with a size of 40x8 cm, and the second 10x20 cm. From the first board you need to cut 4 walls with a size of 10x8 cm, and from the second you get a bottom and a lid with a size of 10x10 cm.
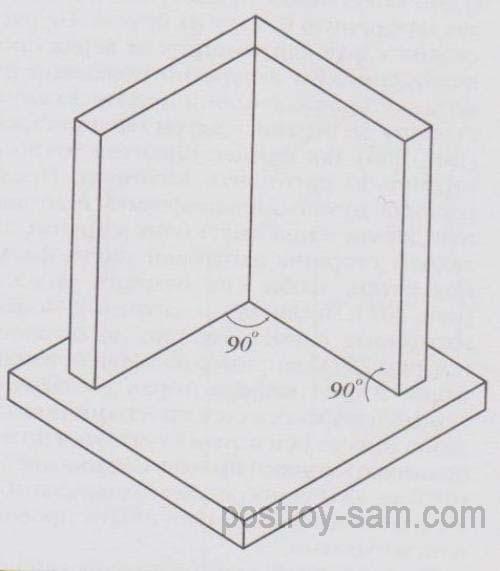
To join the sidewalls, it is necessary to mark the thickness for trimming from the inside. Then, using a joint knife, you need to make a bevel at an angle of 45 degrees and then fit the joint with sandpaper. The best way to assemble parts is to special device, which should have 90-degree corners and be fairly rigid. After completing the fitting of all sidewalls, you need to glue all the parts with PVA glue. Then you need to glue the top and bottom.

The resulting cube is left to dry for a day and after complete drying we bring it with sandpaper. After that, 2 cm from the top of the cube, you need to draw a line and very carefully saw through with a hacksaw along the line on each side.

The resulting parts must be sanded and then, on the back of the box, remove a small chamfer for the loops so that they sink. Loops can be purchased ready-made or you can make them yourself, for example, from a coffee can. A thin wire can be used as an axis for homemade loops. It needs to be laid in the middle, and then the blank for the loop is bent around it, squeezing it with pliers. In order not to move the lid of the box, it is necessary to drill small holes in the lid and the front wall and insert the dowel into the hole that is in the wall.

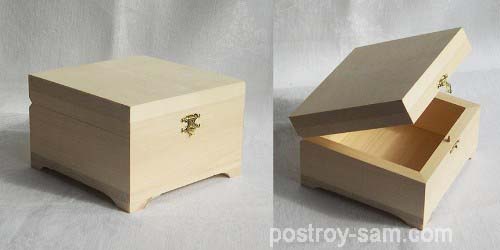
Now the box is ready and it remains only to decorate it. The box can be painted or simply varnished, it can be carved, burned or decoupage. How the box will look depends only on your imagination, as well as on your skills and capabilities.
From ancient egypt. It was in it, according to scientists, that they began to create caskets. Surviving examples made 3,000 years ago have been found. The drawings and records of the Egyptians show that most people stored in ceramic jugs.
But, representatives of the nobility could afford small chests made of dark wood, bronze and ivory, inlaid with gems, decorated. The caskets were made only by hand. Majority modern versions stamped. You can be sure of the uniqueness of the product only by making it yourself. Let's figure out how to do it.
Making a wooden box
The technology for creating wooden caskets appeared 2,000 years ago, all in the same Egypt. By that time, the country had become one of the Roman provinces. Mores have changed, but not the love of the population for caskets. They put not only jewelry in the usual sense. For example, papyri were worth their weight in gold.
They were also locked in chests. Men kept shaving accessories in chests. They were mandatory for warriors who could be grabbed by their beards by enemies. Alexander the Great ordered his warriors to shave. He also approved the rule of etiquette - to put the blades in leather cases, and those, in turn, in boxes. This is what the old ones look like:

Now let's figure out how to recreate this beauty in modern conditions. Woodcarving, its coloring, varnishing is a matter of fantasy and skill. But, there is, so to speak, an unshakable basis. The principle of its manufacture, in most cases, is the same. DIY box starts with wooden bars and related tools.
You will need a circular saw, angle cutter, sandpaper. You can get by with more primitive inventory, but this will increase the time of work. Their perfect move will be shown by Vladimir Zhilenko. In his carpentry workshop, he has already made more than a dozen chests.
DIY jewelry box can be made from any wood. The most durable samples are obtained from oak, ash and beech. Pine caskets dry out most quickly. After 3,000 years, they are unlikely to be found by archaeologists.
However, the chests will serve for several decades, remaining attractive in appearance. If you do not pay attention to small cracks, then wood box made do it yourself survive for several centuries.
Making a paper box
Caskets from are short-lived, but they are made elementary. Anyone can master the technique. The necessary inventory, as well, can be found in every home. Competent decor can turn sheets of paper into a real work of art. There is a chance not only to make a unique product, but also suitable for the interior.
Finding a sample of the desired design in stores can be difficult. For example, the house has a lot of burlap and rough textures. In this case, the body of the chest can be pasted over with a cloth based on hard bast fibers. The time has come not only to read, but also to see how it is done do-it-yourself cardboard box.
At first glance, it seems that the video fabric box. DIY You can also make a pure paper version. If you apply the quilling technique, you get a product that does not require additional design. The sheets will come out and building material and decor at the same time. The point is not only in the use of colored paper, but in a special way of twisting it. Twisted figures are obtained, from which compositions are formed. Here are just a few examples of such work:


One chest from the photo selection has a base - a box. It is easier to glue twisted elements on it than to fasten them together without support. Therefore, it is better to start with this option. It is enough to cut the paper into thin strips, wind them on a pencil and form a pattern on the base.
Do-it-yourself boxes from boxes not as openwork and "airy" as purely quilling models. They take more time and glue. But it's worth it. Not without reason, the art of quilling is already 5 centuries old. The technique was invented in Europe, named after the bird.
The fact is that before the paper was wound not on pencils or pens. They simply didn't exist. Feathers were used. Basically, monks were fond of quilling. They made compositions from golden sheets, decorating churches with them.
In modern times, both old and young are fond of paper rolling, regardless of occupation. It is time to move from history to practice. So, let's find out, without the base-box.
Here is created handmade box. Video serves as a guide to action. But, if you also need a community of like-minded people, join the Association of Paper Plastic Lovers. This organization was founded in South Korea, has a representation in the network. People from all over the world register, sharing new techniques for working with paper and everything that is made from it.
Vlad could also contribute to the common cause. This young guy offers to make a box from a book. Naturally, you need an old, outdated edition. It should be thick and tightly bound.
Book do-it-yourself box - an idea suitable for hiding place. The product is placed on a par with printed publications. Such a disguise will not betray the valuables stored in the casket. It can be love correspondence, photos. In the Middle Ages, poisons were also placed in caskets-books. Times were tough.
Poisoning was the standard way to get rid of enemies. Therefore, many wanted to have a cache of poisonous substances. Below is a picture of what the ancient cache boxes looked like and what modern versions look like.


You can also store money in a disguised chest. Fits casket for needlework. DIY it is possible to divide the inside of the publication into several compartments intended for certain things. Caskets based on prints are usually of interest to adults. Children are interested in less secret and more decorative boxes, for example, in the form. These are made from plastic bottles.
Making a plastic box
Required to work plastic bottle, or other plastic container. Suitable, for example, two small, deep cups. They will be trimmed with fabric and frills imitating a doll's skirt. The toy is taken real, more precisely, its torso. Legs are not needed.
An old, broken doll is ideal. How to deal with all this, Natalya Posypkina will tell. She became the heroine of one of the television stories. Do-it-yourself doll-box- one of the specializations of the master.
It can also be done differently do-it-yourself doll-box. Master Class shows how to work with plastic cups. Now, let's figure out how to deal with . The bottom is taken from it and the top. The lid area is cut off. The body of the toy is inserted into the hole formed and fixed with glue.
The bottle parts are also sheathed with fabric and frills. The skirt can be solid. It all depends on the imagination of the author. As a result, it turns out like this handmade boxes. A photo, as well as videos, can serve as a guide to action.


In resolving the issue how to make a box with your own hands» video does not always play a key role. Having stuffed your hand, you just need to look at the pictures a couple of times to understand the secrets of the work of other masters. But the secrets that the caskets hide, at times, are not so easy to unravel.
For example, a whole community of scientists puzzled over a tooth found in one of the ancient chests. The product was found in the tomb of the pharaohs. According to the records in papyri and drawings on ritual utensils, it was possible to determine that the box belonged to Queen Hatshepsut.
Then it became clear that the tooth, for sure, was hers. Having carried out a genetic analysis of the incisor and all the mummies in the tomb, it was possible to identify the sarcophagus with Hatshepsut. This is the role she played in scientific research casket. DIY master class for the manufacture of Egyptian versions can be prepared by anyone. There are even craftsmen who make models in the form of mummies and sarcophagi.

Such creativity is not to everyone's liking. Majority chooses DIY postcard boxes, or classic examples of wood and metal. But, if there is a product for an amateur, then there is an amateur. The main thing is to find in a variety of options those that you like and try to make them. Perhaps the hobby will grow into a business and begin to bring not only pleasure, but also income.


, poultry farming")


- Burns, Robert - short biography
- The concept of common vocabulary and vocabulary of limited use
- Nancy Drew: The Captive Curse Walkthrough Nancy Drew Curse of Blackmoore Manor Walkthrough
- Deadpool - Troubleshooting
- Won't start How to Survive?
- What to do if bioshock infinite won't start
- Walkthrough Nancy Drew: Alibi in Ashes
- Spec Ops: The Line - game review, review Spec ops the line crashes on missions
- Room escape level 1 walkthrough
- Processing tomatoes with boric acid How much will 2 grams of boric acid
- Cucumber Grass (Borago)
- Bioinsecticide Lepidocid: purpose, properties and application procedure Lepidocide waiting period
- How to change the language to Russian in steam
- Dendrobium noble: room care
- Morphology of plants general concepts - document
- Planting, propagation and care of bamboo at home, photo Growing bamboo from seeds
- How to strengthen the cellular signal for the Internet in the country
- Sanskrit reveals the forgotten meaning of Russian words (2 photos)
- The oldest language Sanskrit programming language of the future Dead language Sanskrit
- Who has dominion over all the earth?