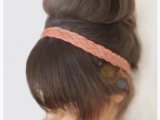
DIY Mickey Mouse ears: how to make a festive and original accessory yourself. Do-it-yourself Mickey or Minnie Mouse ears. Step-by-step master class on creating Minnie Mouse ears.
The Disney cartoon character with bright ears has long been a favorite of many children. different ages. On many festive events or theme parties and photo shoots, the funny Mickey Mouse costume is always the most beloved and popular. Of course, you can purchase a ready-made version of the outfit of the hero of the Disney cartoon in a specialized store. However, you can save your finances and make Mickey Mouse ears with your own hands at home from improvised materials.
We bring to your attention several detailed and accessible master classes on creating original Mickey Mouse ears for yourself or your child.

How to make DIY Mickey Mouse Ears Using Fabric and Paper
For the manufacture of such simple option with Mickey Mouse ears for you or your baby, you will need to prepare the following materials and tools:
- Headband in black shade;
- Sheets of cardboard or thick paper;
- Black fabric with a dense texture;
- Compass;
- Sharp scissors;
- Glue stick;
- Hot glue gun.
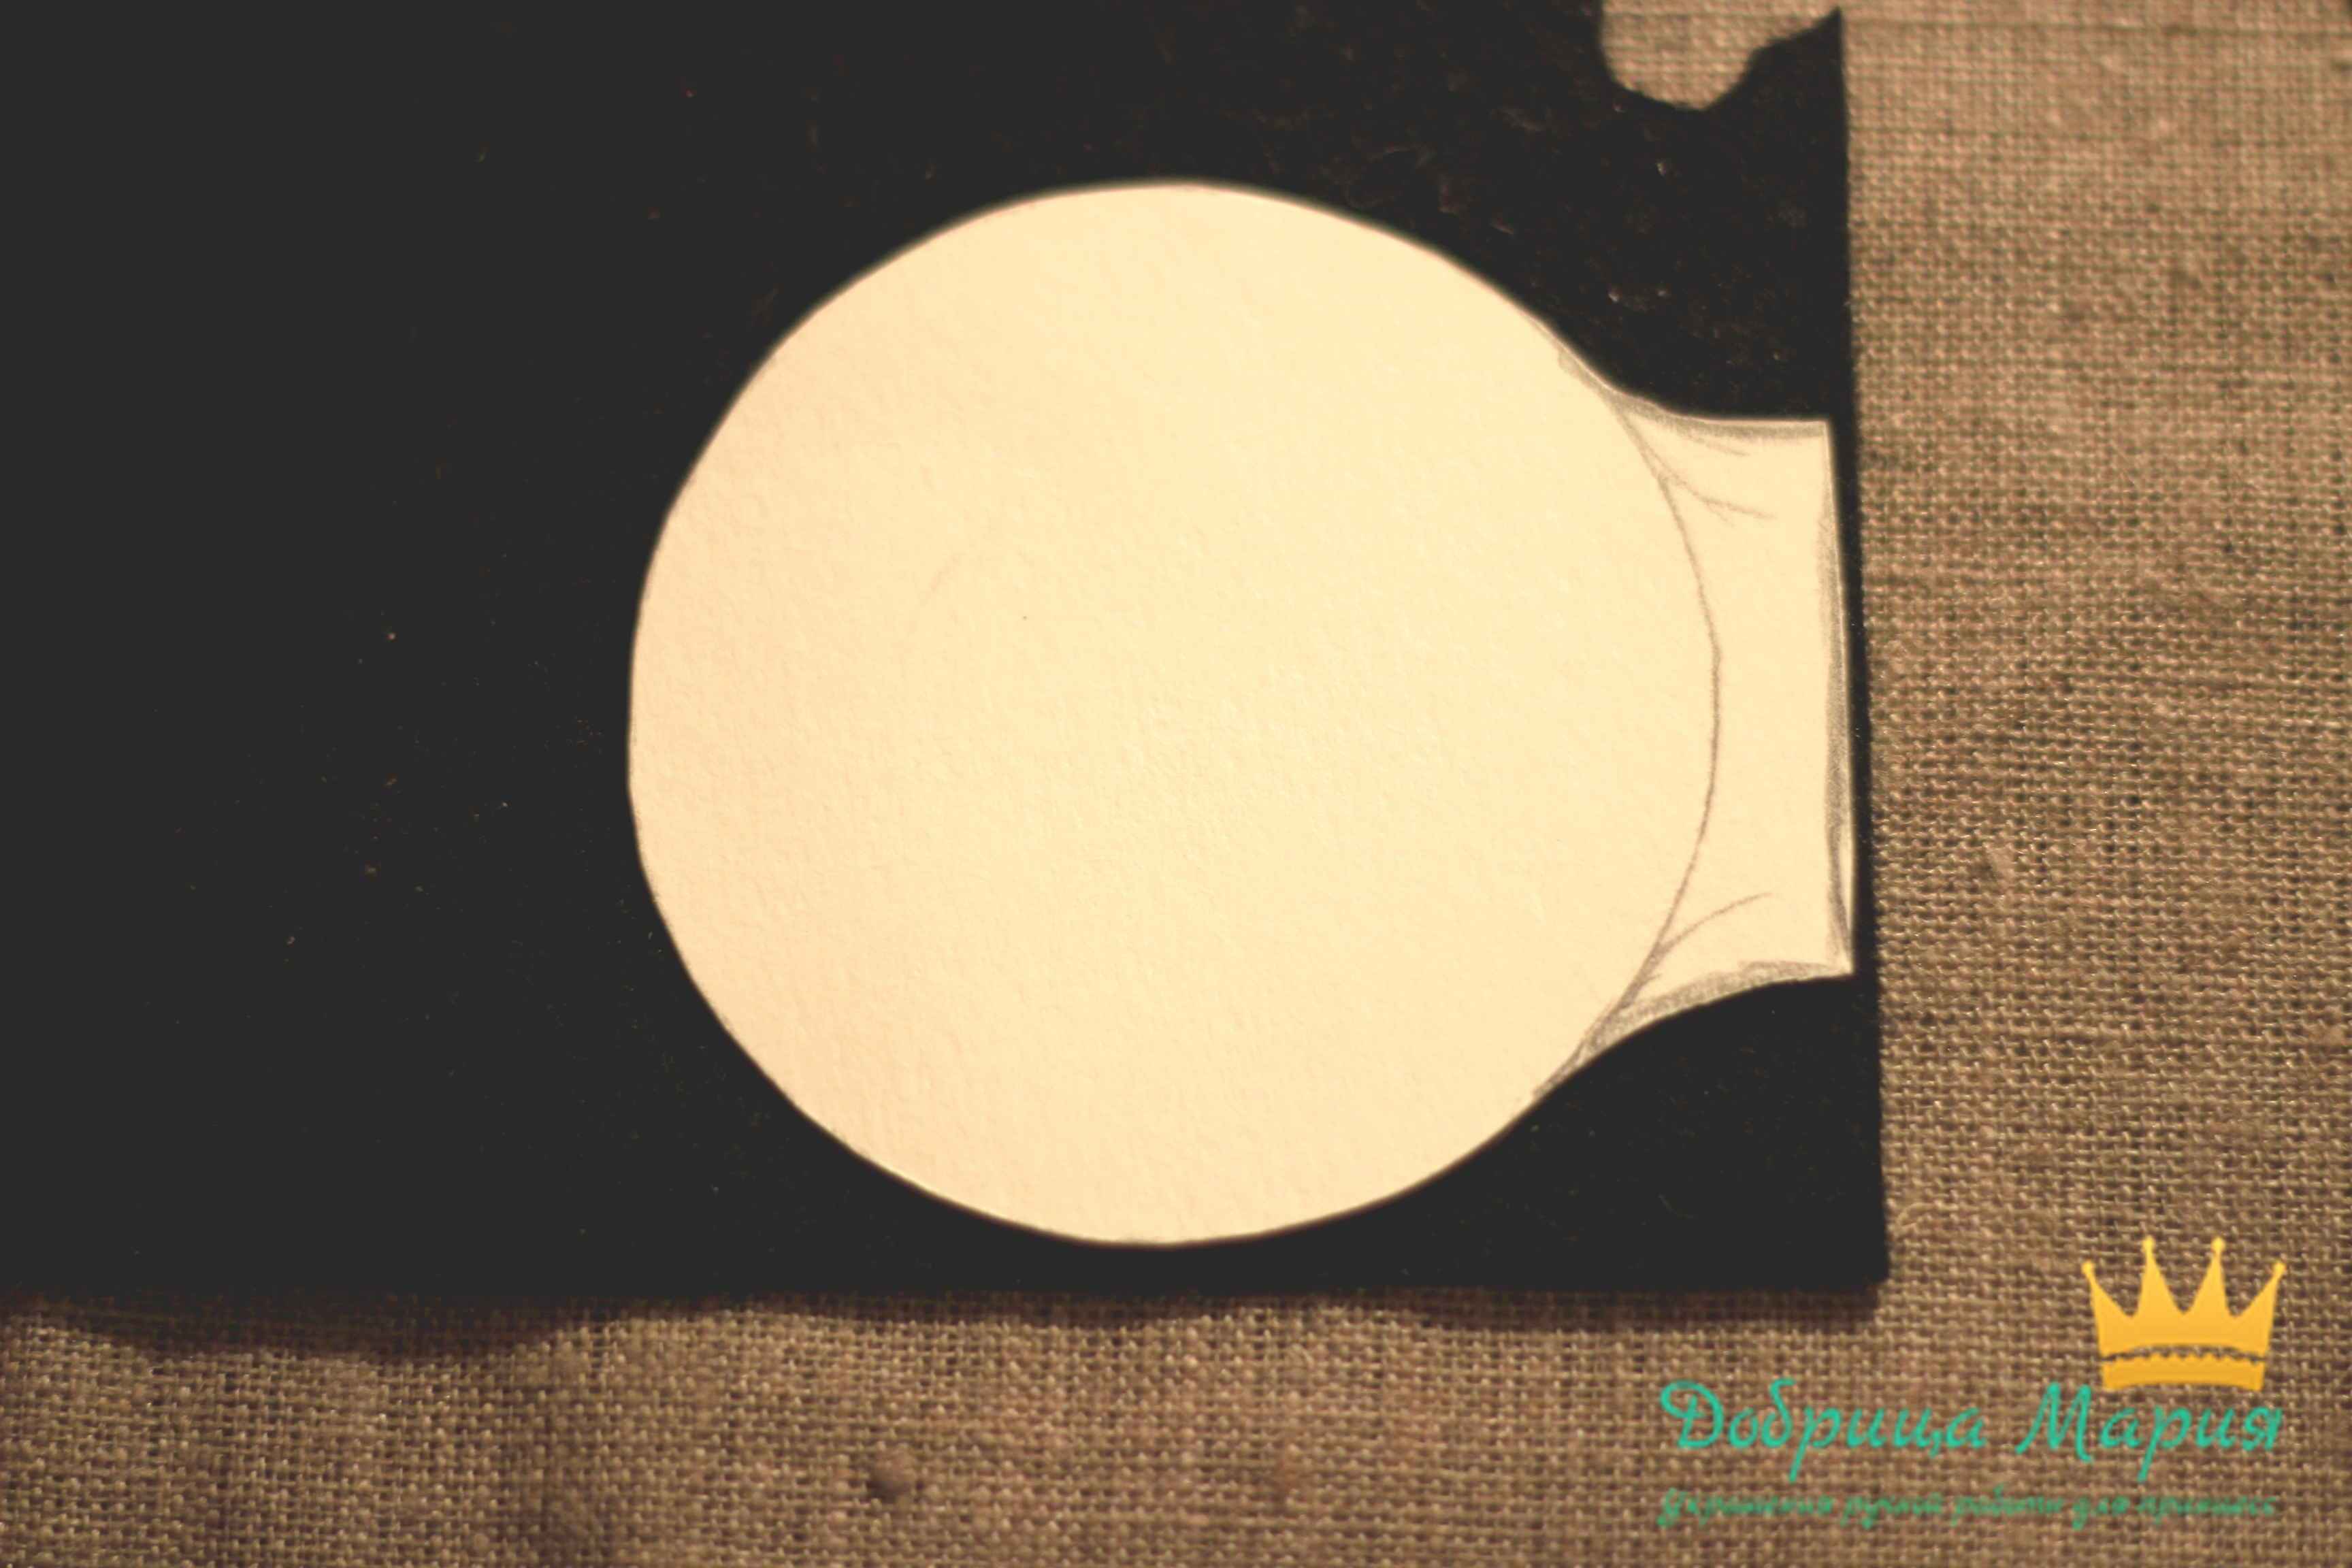
Before you start cutting out future mouse ears, you need to decide on the desired and required dimensions of the accessory. If you are making Mickey Mouse ears for a child, then the optimal diameter for hearing aids will be seven centimeters. If you want to make an original accessory for an adult, then it is better to use templates of a larger diameter, about fifteen centimeters. However, these numbers are guidelines and you can change them depending on your preferences.
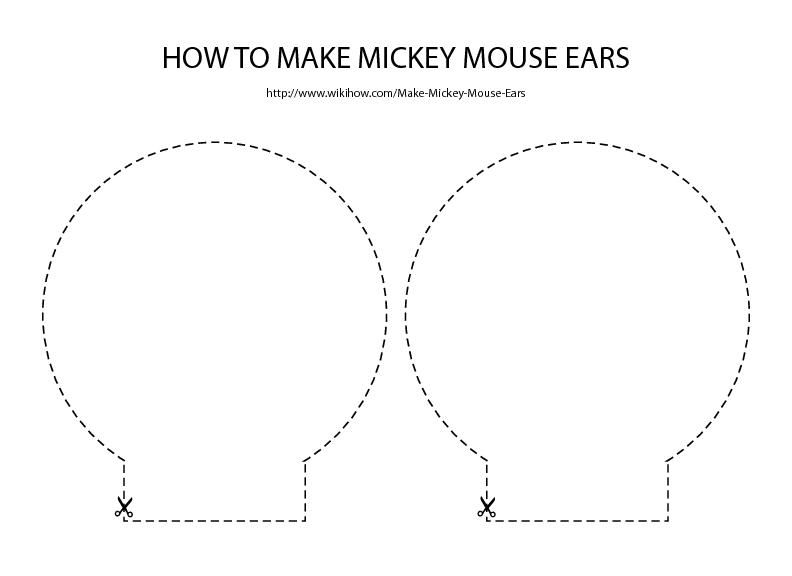
To draw the Disney mouse ear template, it is best to use a drawing compass. Use it to draw two circles on a sheet of cardboard or thick paper to decorate the ears. Then, for each of the circles, draw a rectangle with dimensions of two to three centimeters. These rectangles will allow you to attach the mouse ears to the headband. You can see the design and drawing of the template in the photo presented in our article below.
Now take the fabric templates and glue them with a glue stick to the cardboard sheets. Leave the resulting structure to dry completely. You can also put your ear pieces under a heavy press. This trick will prevent your templates from twisting or bending during drying.
And only now you can fix the ears to the headband using hot glue for this. Here it is important to determine how far the ears will be located from each other, which depends solely on their size, about four or eight centimeters.
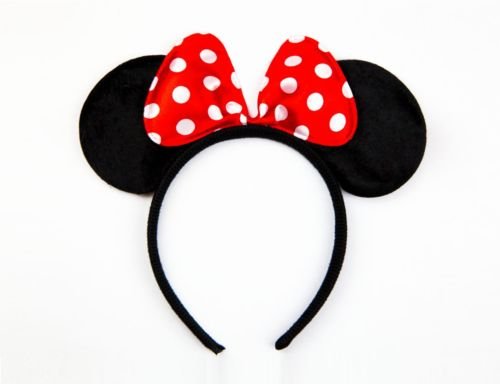
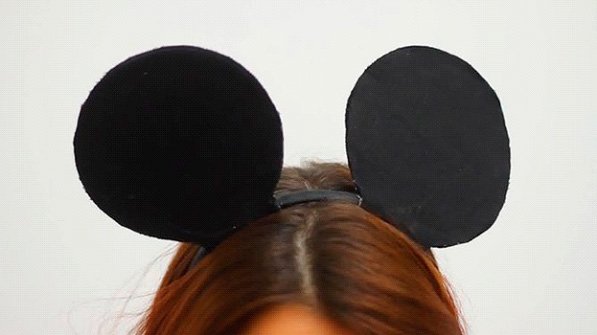
Elegant headband with Mickey Mouse ears for a little princess
For a girl, a headband with Mickey Mouse ears should be bright and elegant. We are offering to you detailed description the process of making such an accessory with your own hands. Prepare the following materials and tools for work:
- Sintepon or cotton wool;
- Two plastic circles with a diameter of 8.5 centimeters;
- Glue;
- Hair band;
- Four circles of black fabric;
- 17 centimeters of satin ribbon with a width of five centimeters;
- 5 cm satin ribbon with a width of 1.2 centimeters;
- Beads for the core;
- Cotton discs.
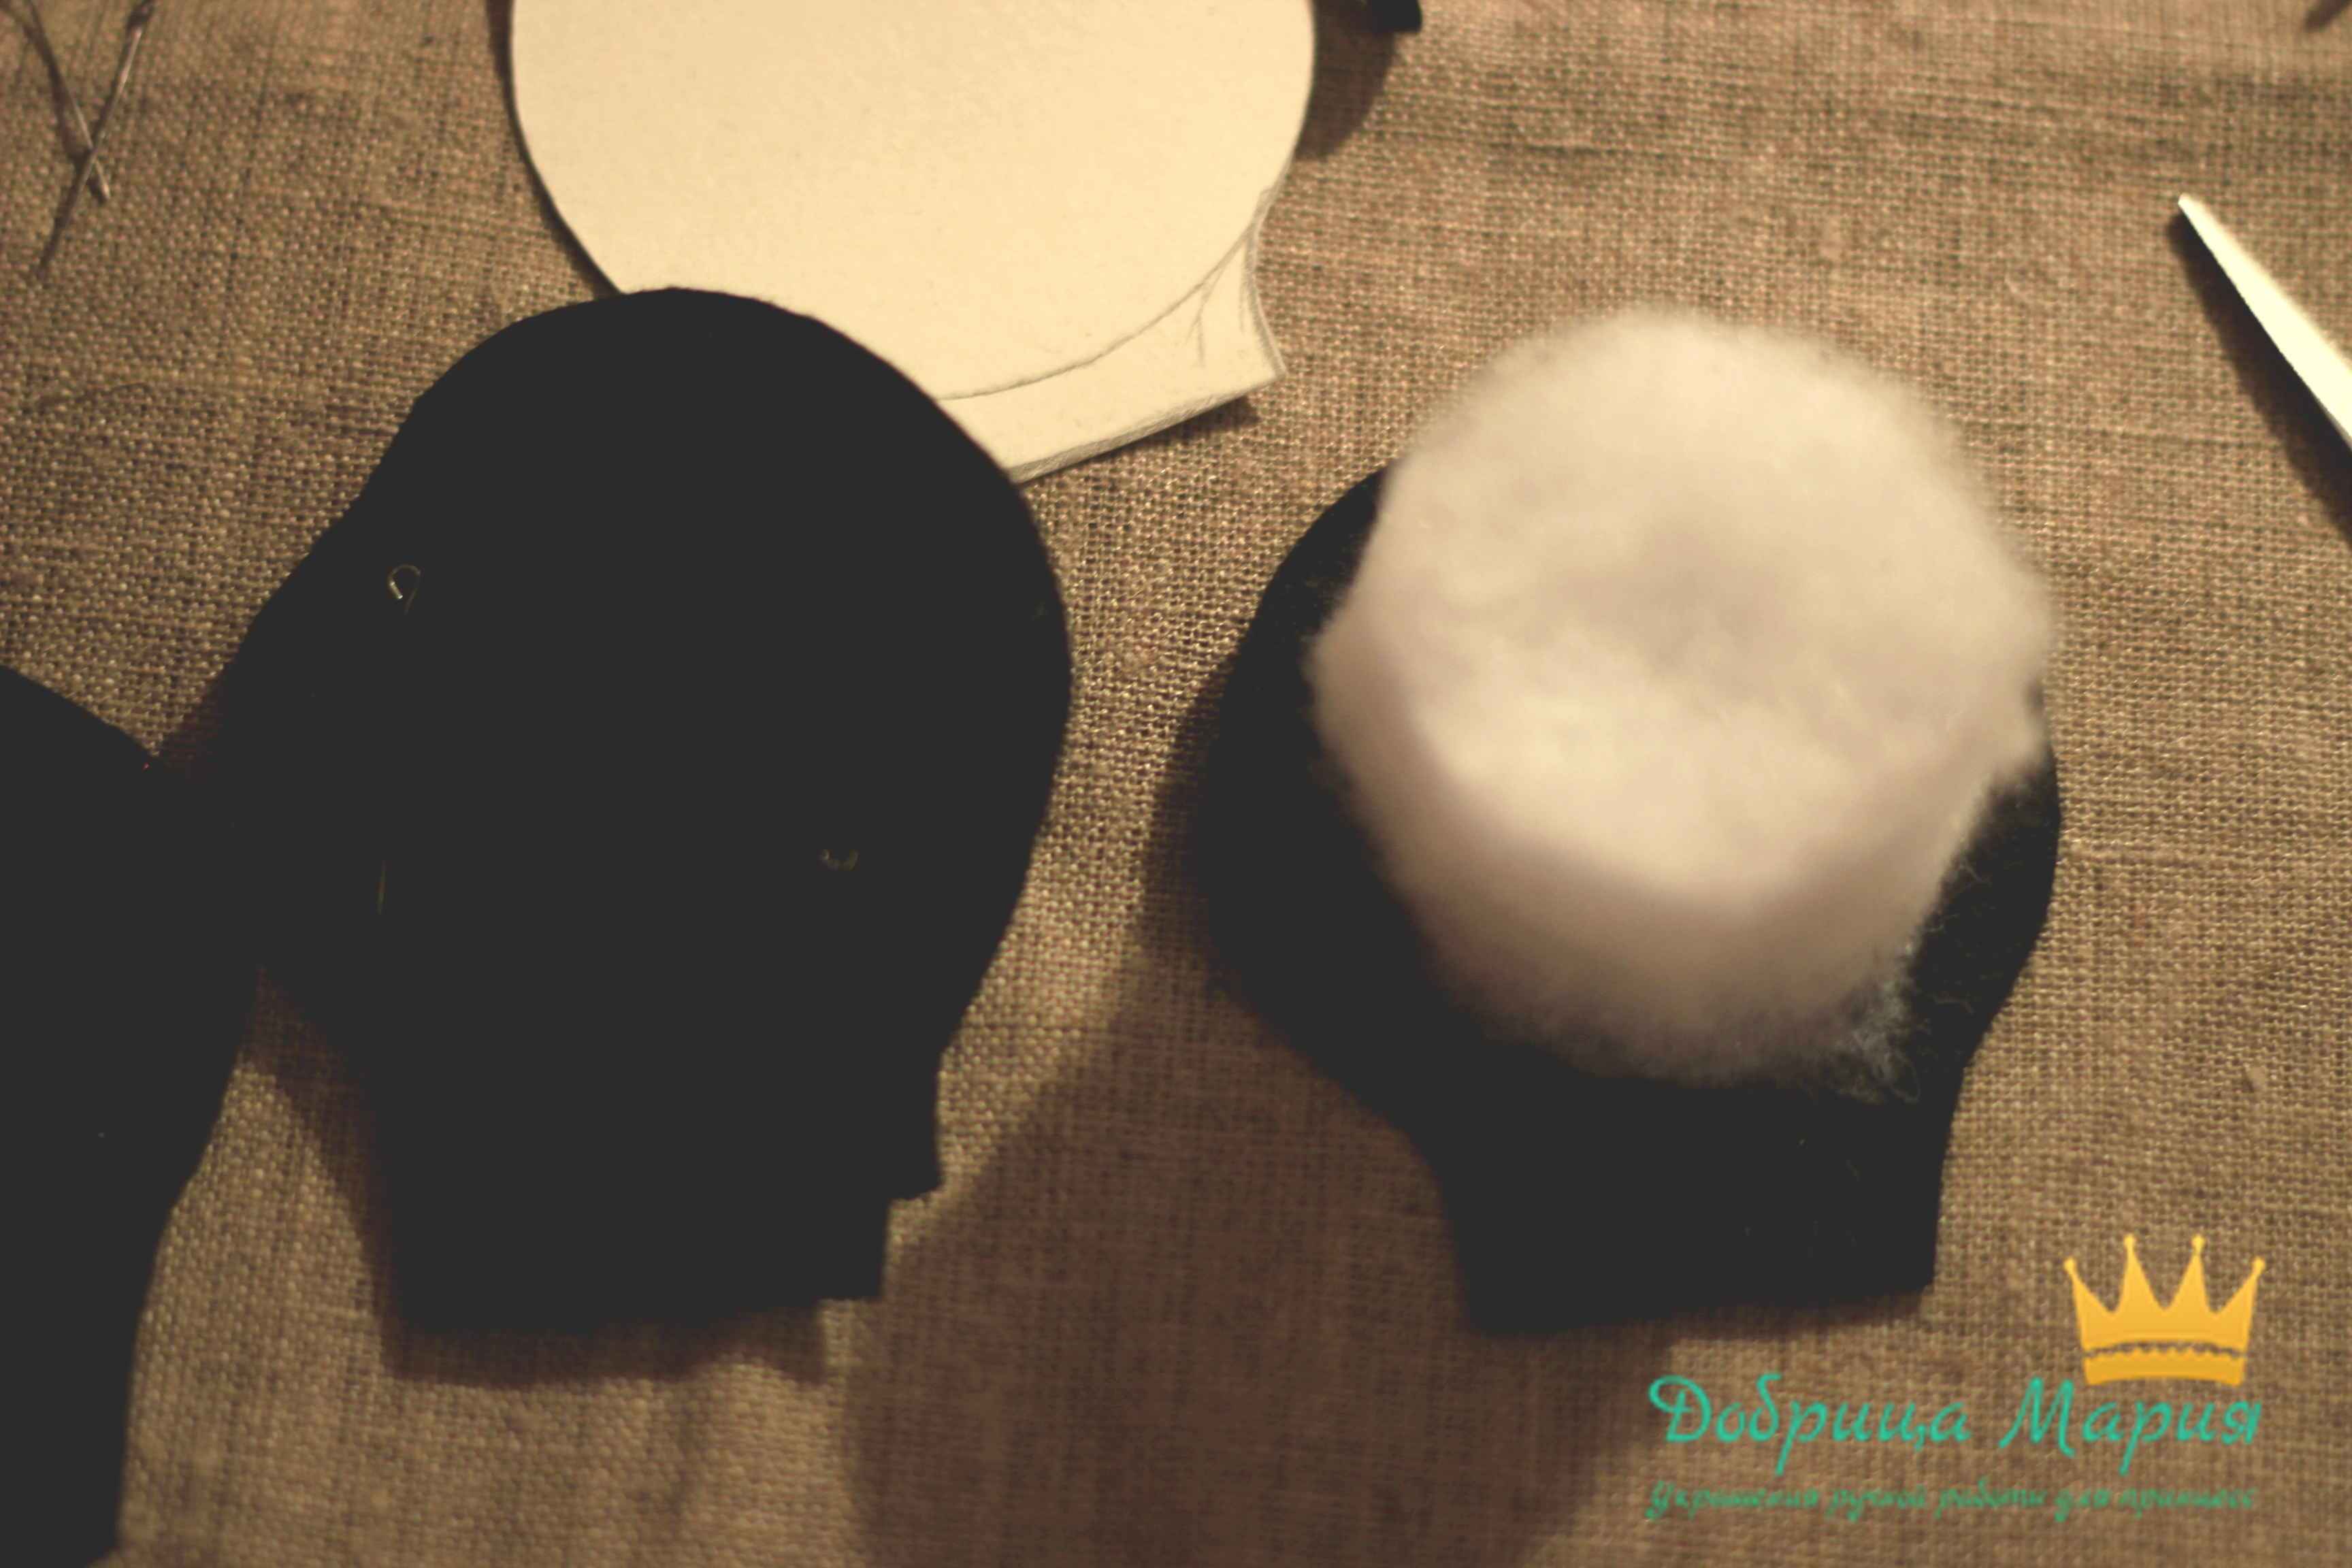
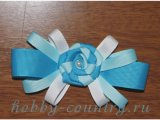
Take two circles of fabric and sew them from the wrong side, while about three millimeters must be retreated from the edge. Sew the fabric up to the dotted line. Now take plastic mugs and cut off about one-fourth of them (exactly as much as they didn’t sew on the canvas). Glue part of the cotton pad down to the plastic, and glue a synthetic winterizer or other filler on top of the plastic circle.

Turn the ear of the Mini Mouse right side out and insert the plastic circle into it. Slightly below the middle, drop a drop of glue and press well. Now the eyelet is ready for your headband. Repeat all the manipulations with the second ear of the mouse.
Next, start gluing the blanks to the rim. Apply some glue to the bottom of the fabric and press firmly. Glue the top of the ear in exactly the same way. The rim must be covered at the junction so that the accessory has a neat appearance. You can glue a small piece of black or white ribbon.
Now you need to make a bow. Take a satin ribbon and solder the edges of it. Then sew with the help of threads and needles the middle of the tape, pull it off. Sew on beads for the core. Fix the bows on the ears of Mickey Mouse.
Related videos
See a few interesting videos on the topic of the article.
Did you know that Mickey Mouse will turn 90 in 2018? This beloved and painfully well-known cartoon has not lost its relevance to this day, but on the contrary, its popularity is growing more and more every year. Today, many stores are full of images of the main characters on clothes, bags, and all kinds of interior items. Fashion designers arrange fashion shows in the costumes of the main characters, and parents with children arrange photo shoots in the form of Mickey and Minnie. It is very fun for both adults and children. Therefore, I propose to create a famous image with your own hands.
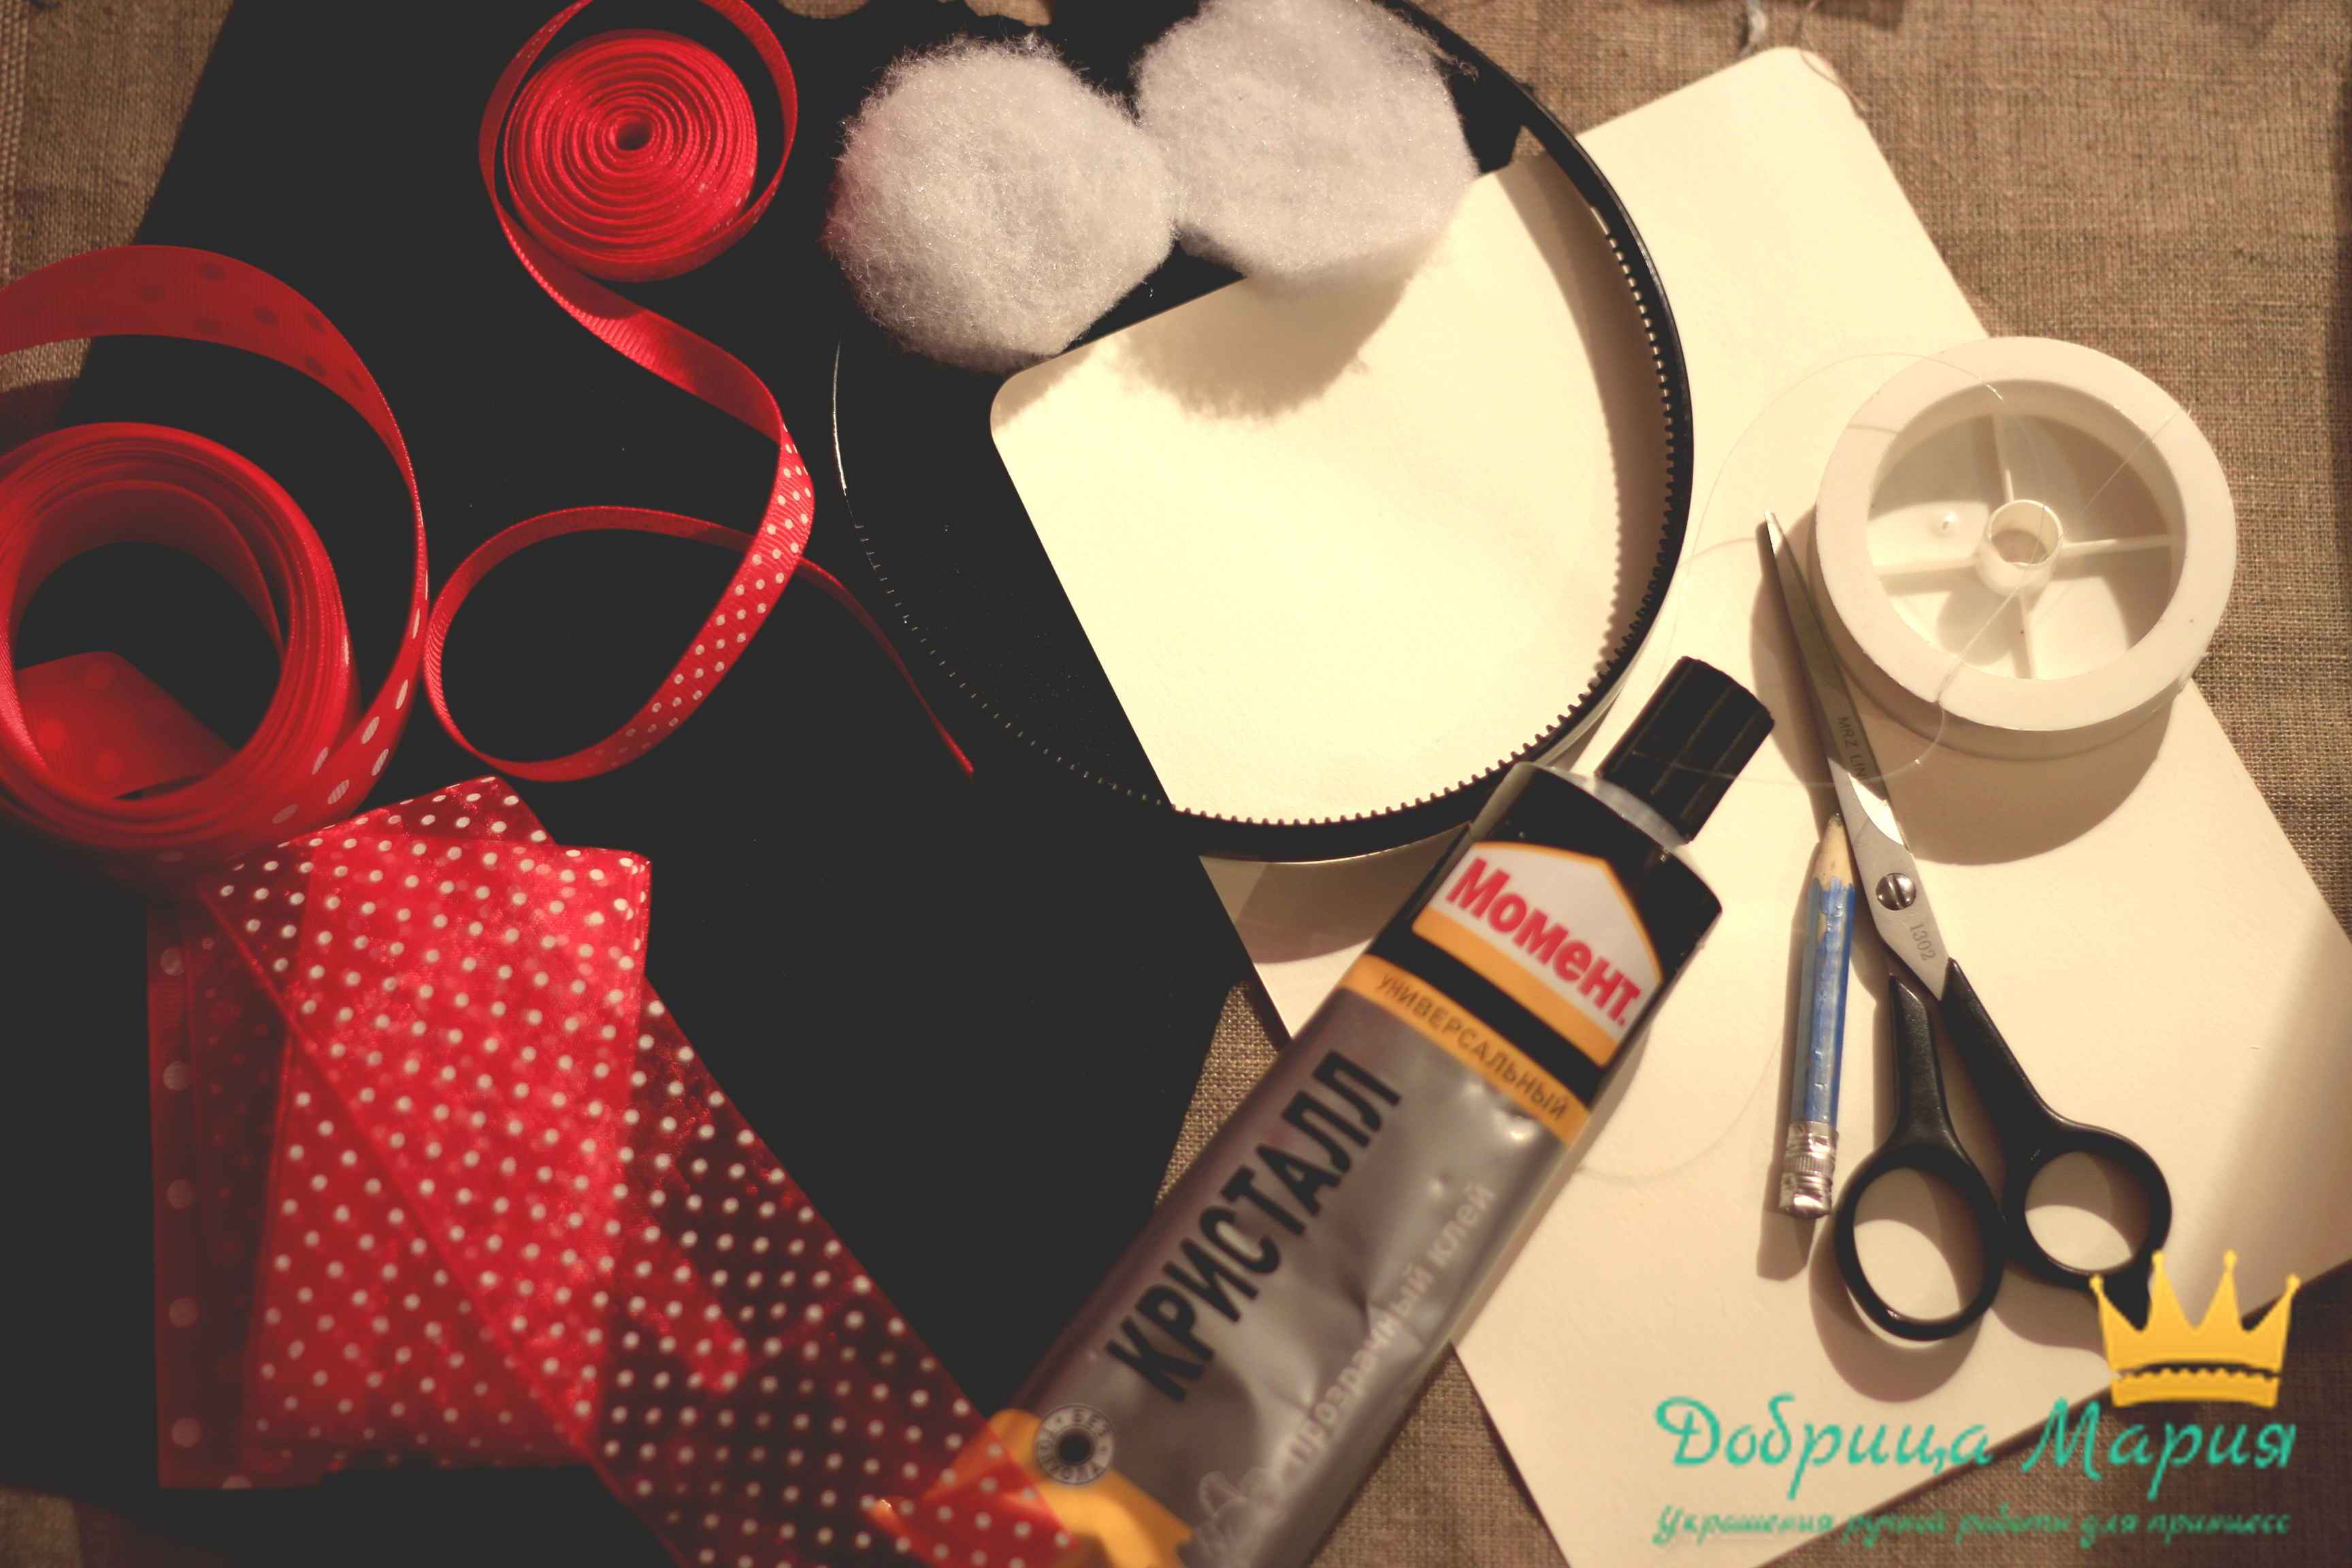
Materials needed to create ears and hair ties for Minnie Mouse:
1. Black felt
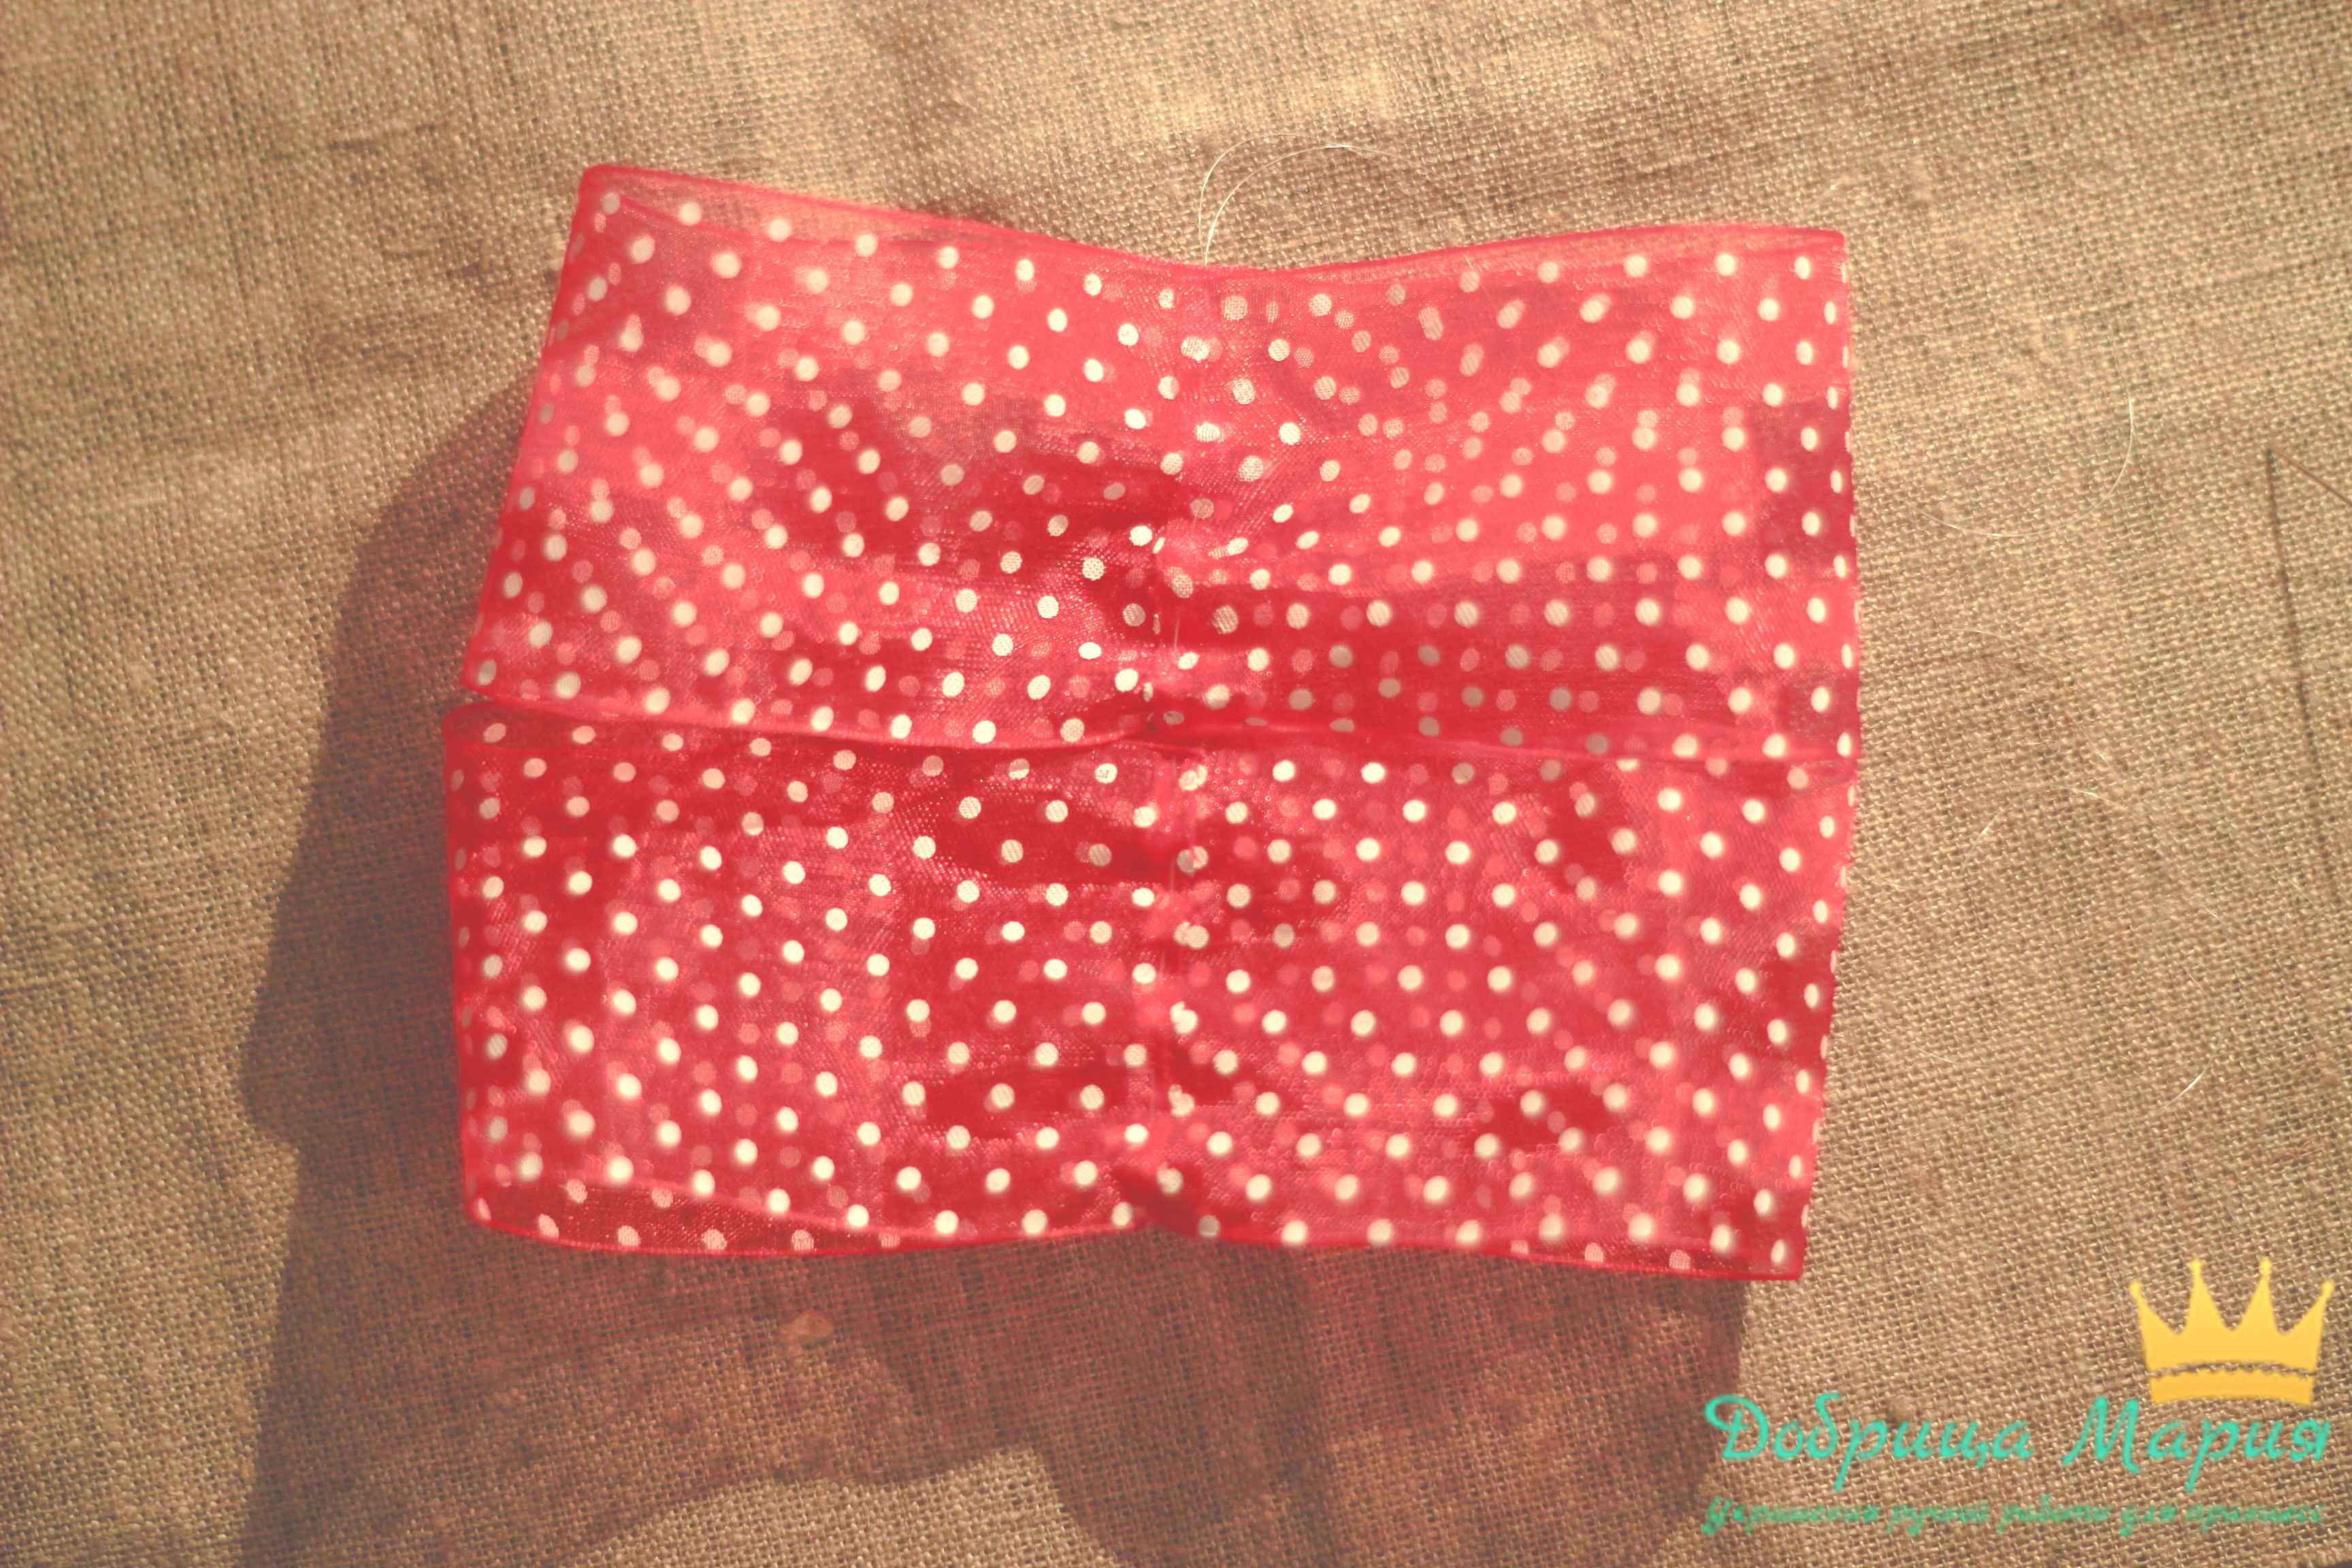
2. Ribbon red with white polka dots 5 cm and 1 cm wide
3.Rim and 2 elastic bands
4. Scissors
5. Sintepon
6.Threads with a needle
7.Glue
8. Cardboard for the ear template
9. Sewing machine (but you can do without it).
Begin:
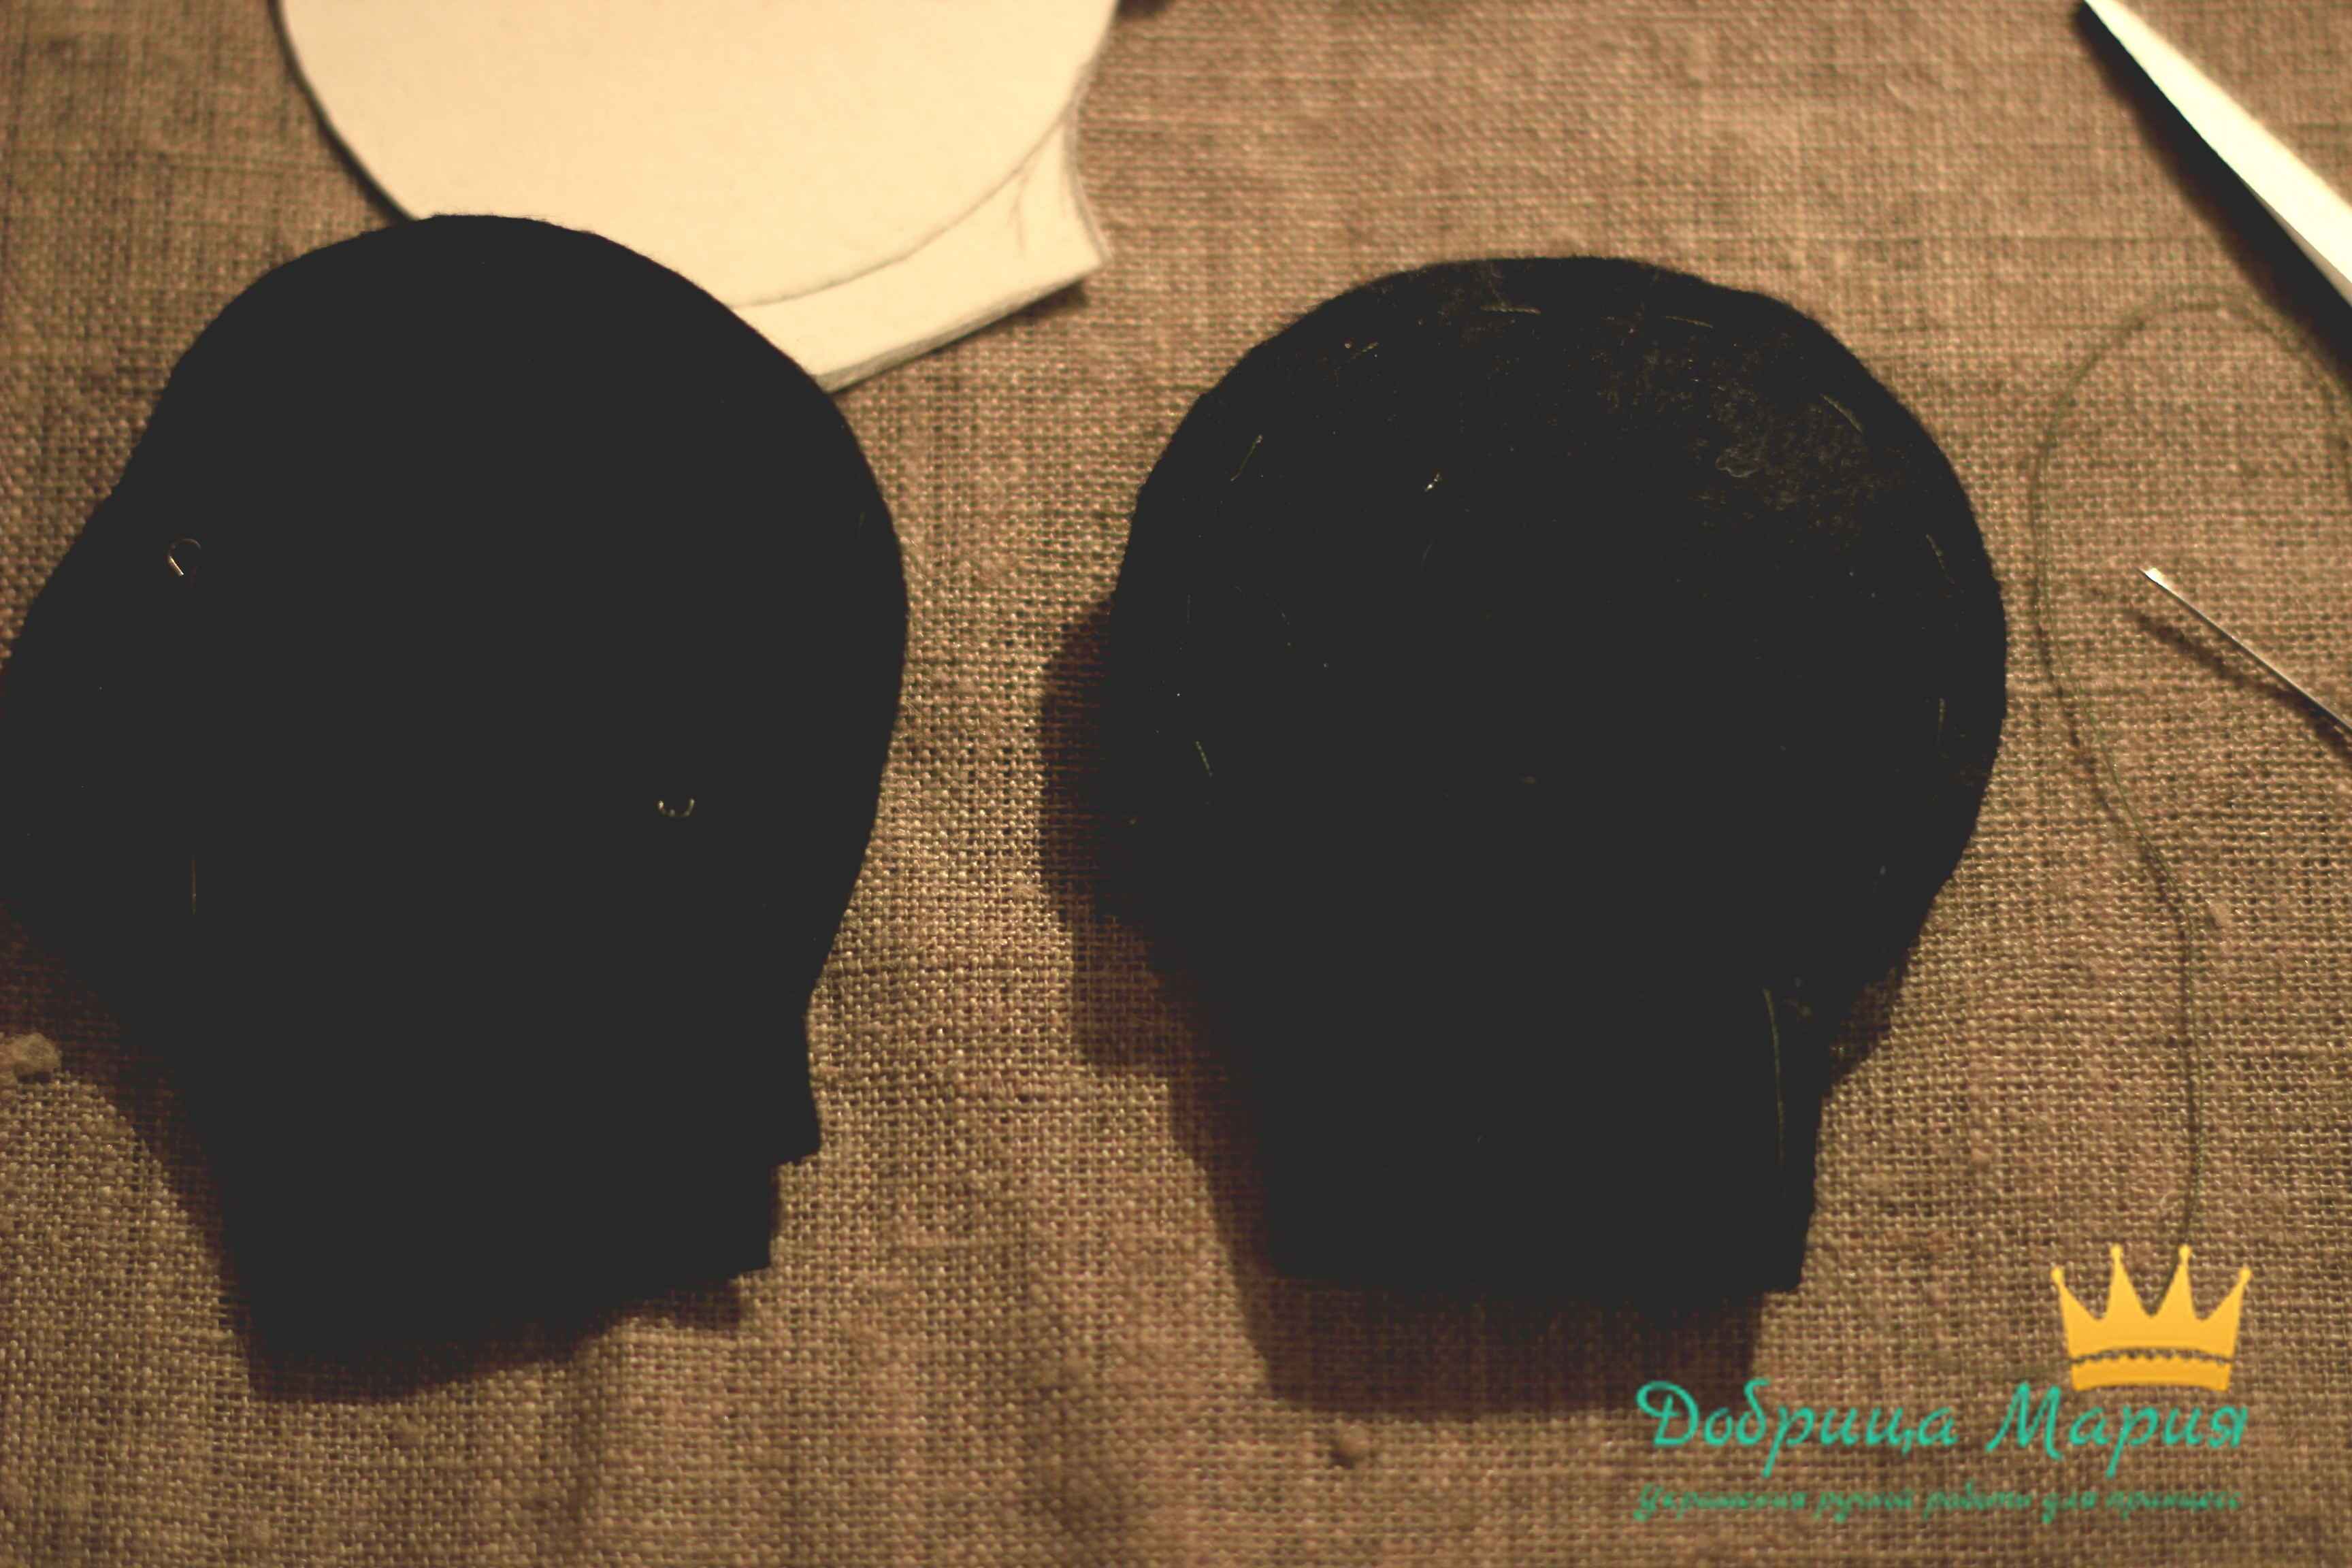
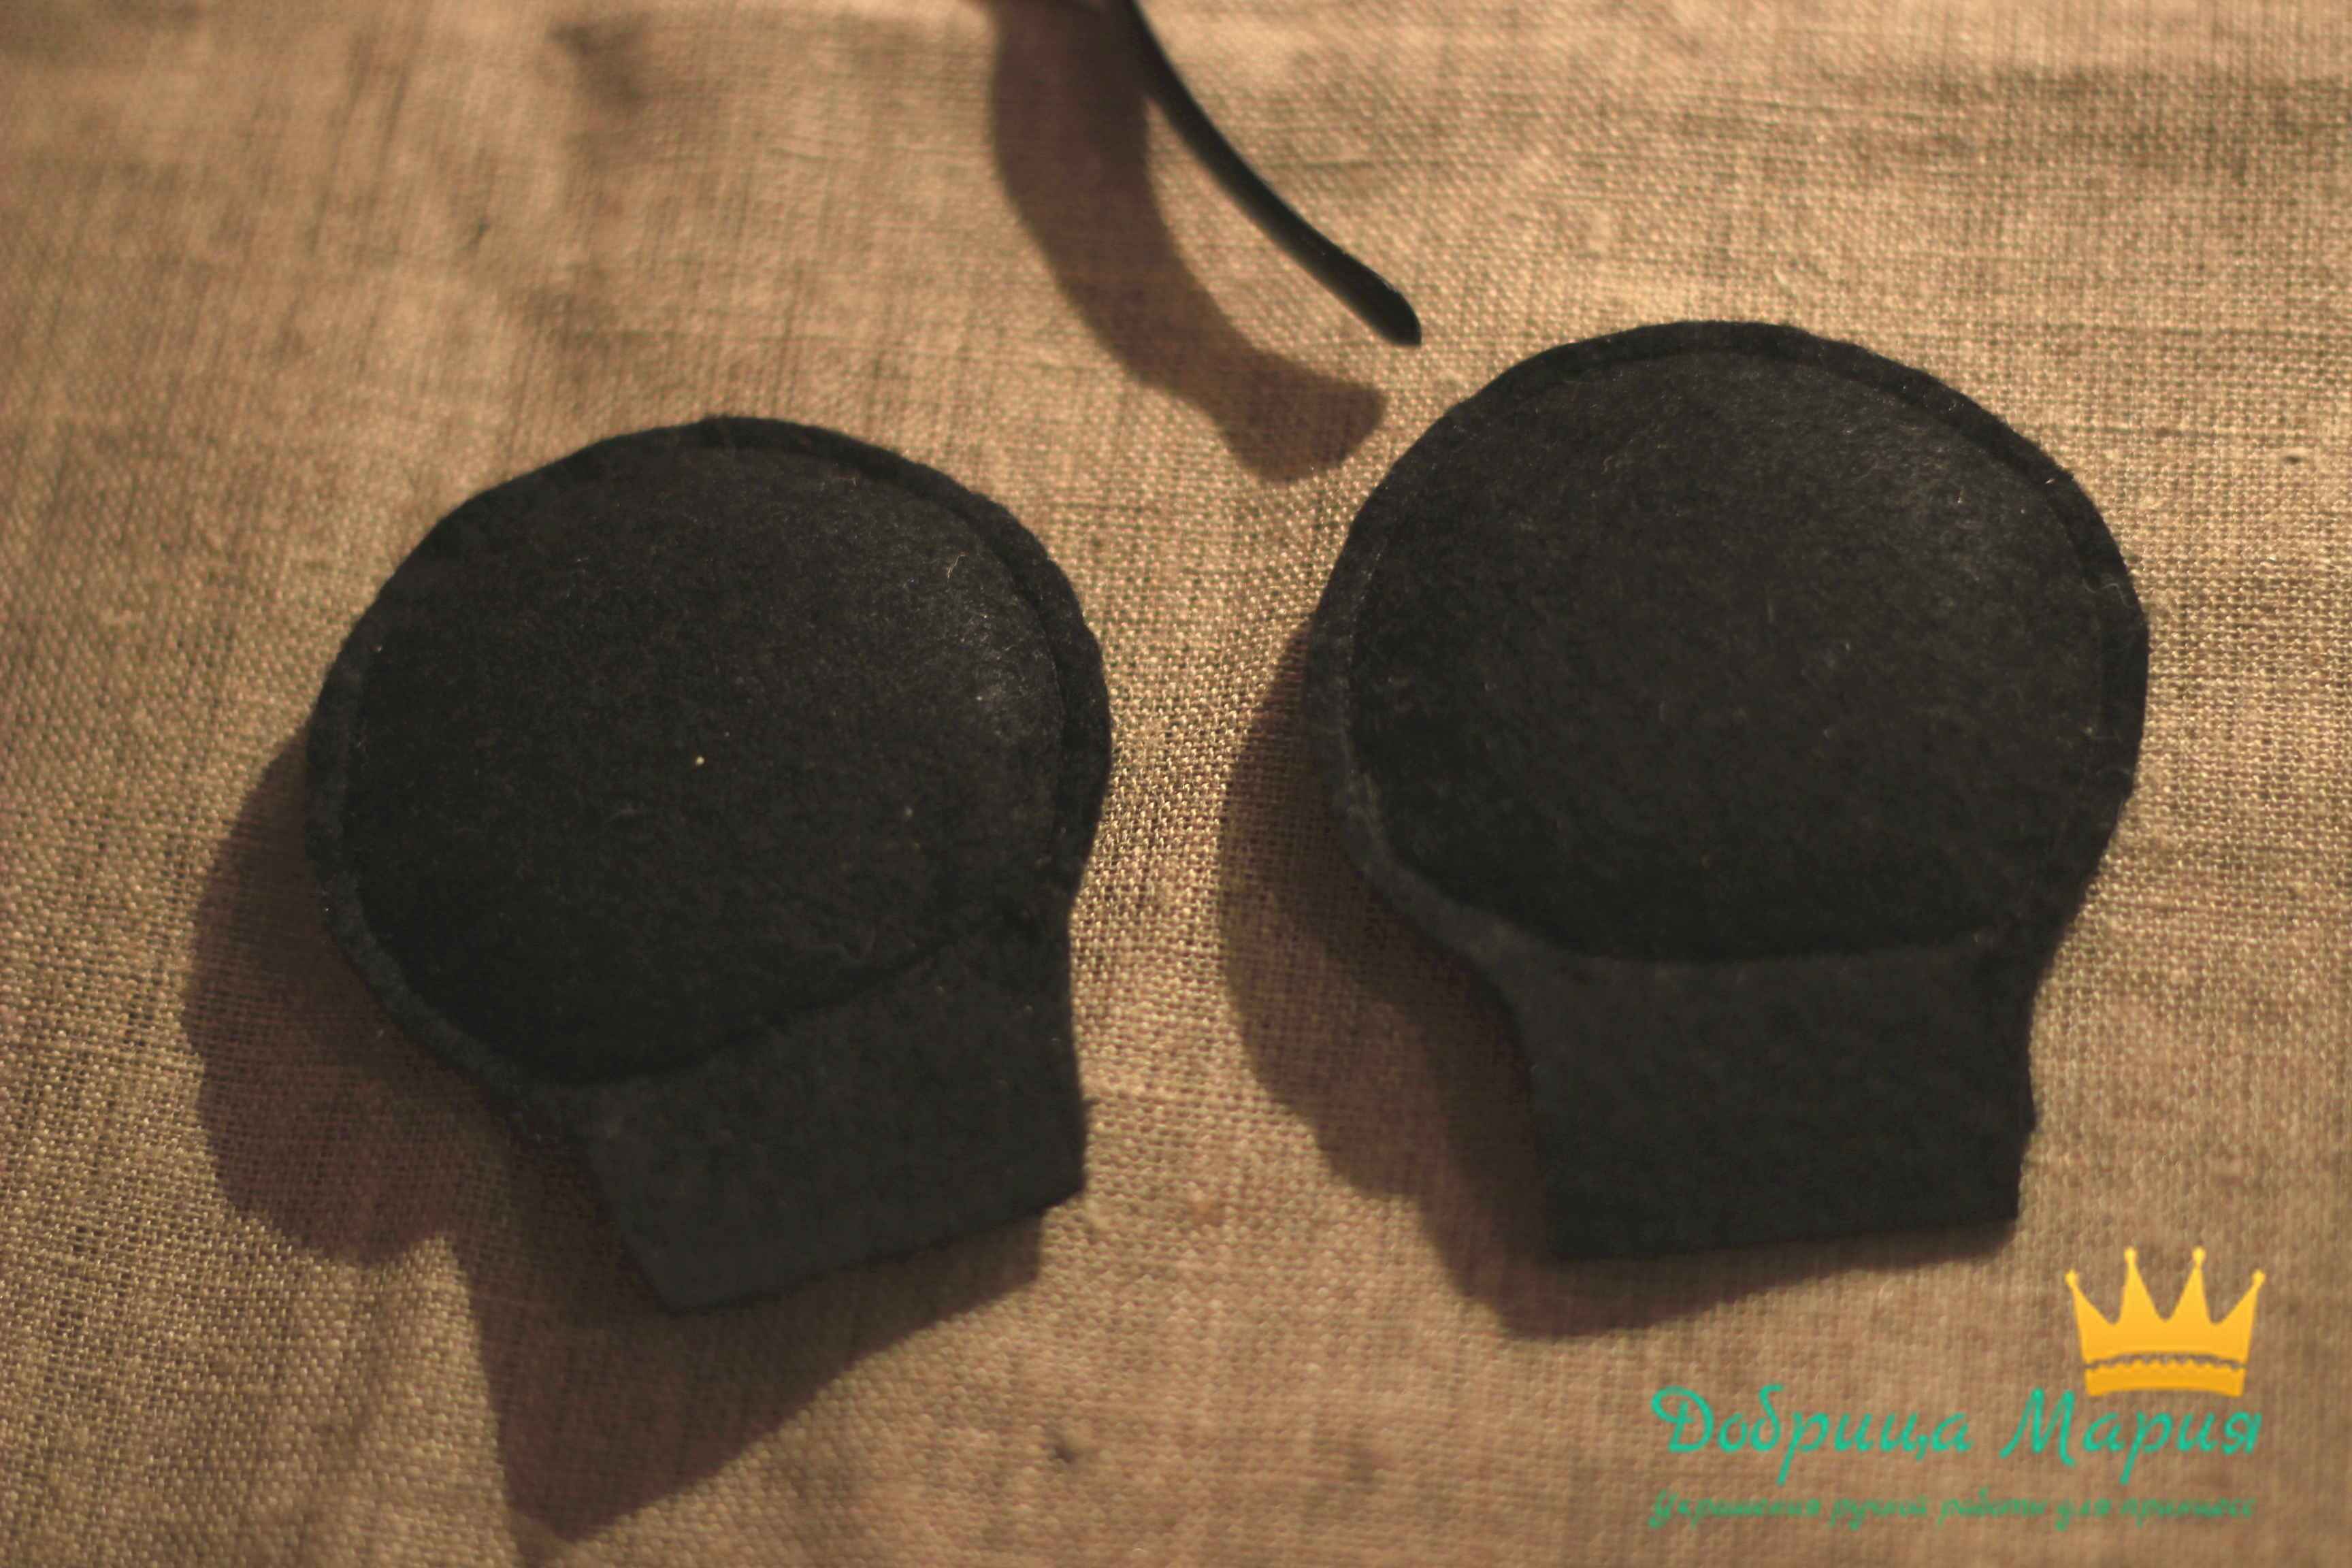
To begin with, we take cardboard and cut out a circle with a diameter of 7 cm from it. And on one side of the circle we make a protrusion of about 1 cm, the size of the protrusion depends on the width of the rim. We apply a cardboard template to the felt and cut out 4 such circles with a ledge.
From a dense synthetic winterizer we cut out 2 circles with a diameter of 5 cm. And we put it in the middle of the felt circle, and on top we cover it with a second felt circle and we sweep it with threads along the edge of the circle. The ledge does not need to be basted; it should be free, only we baste in a circle.
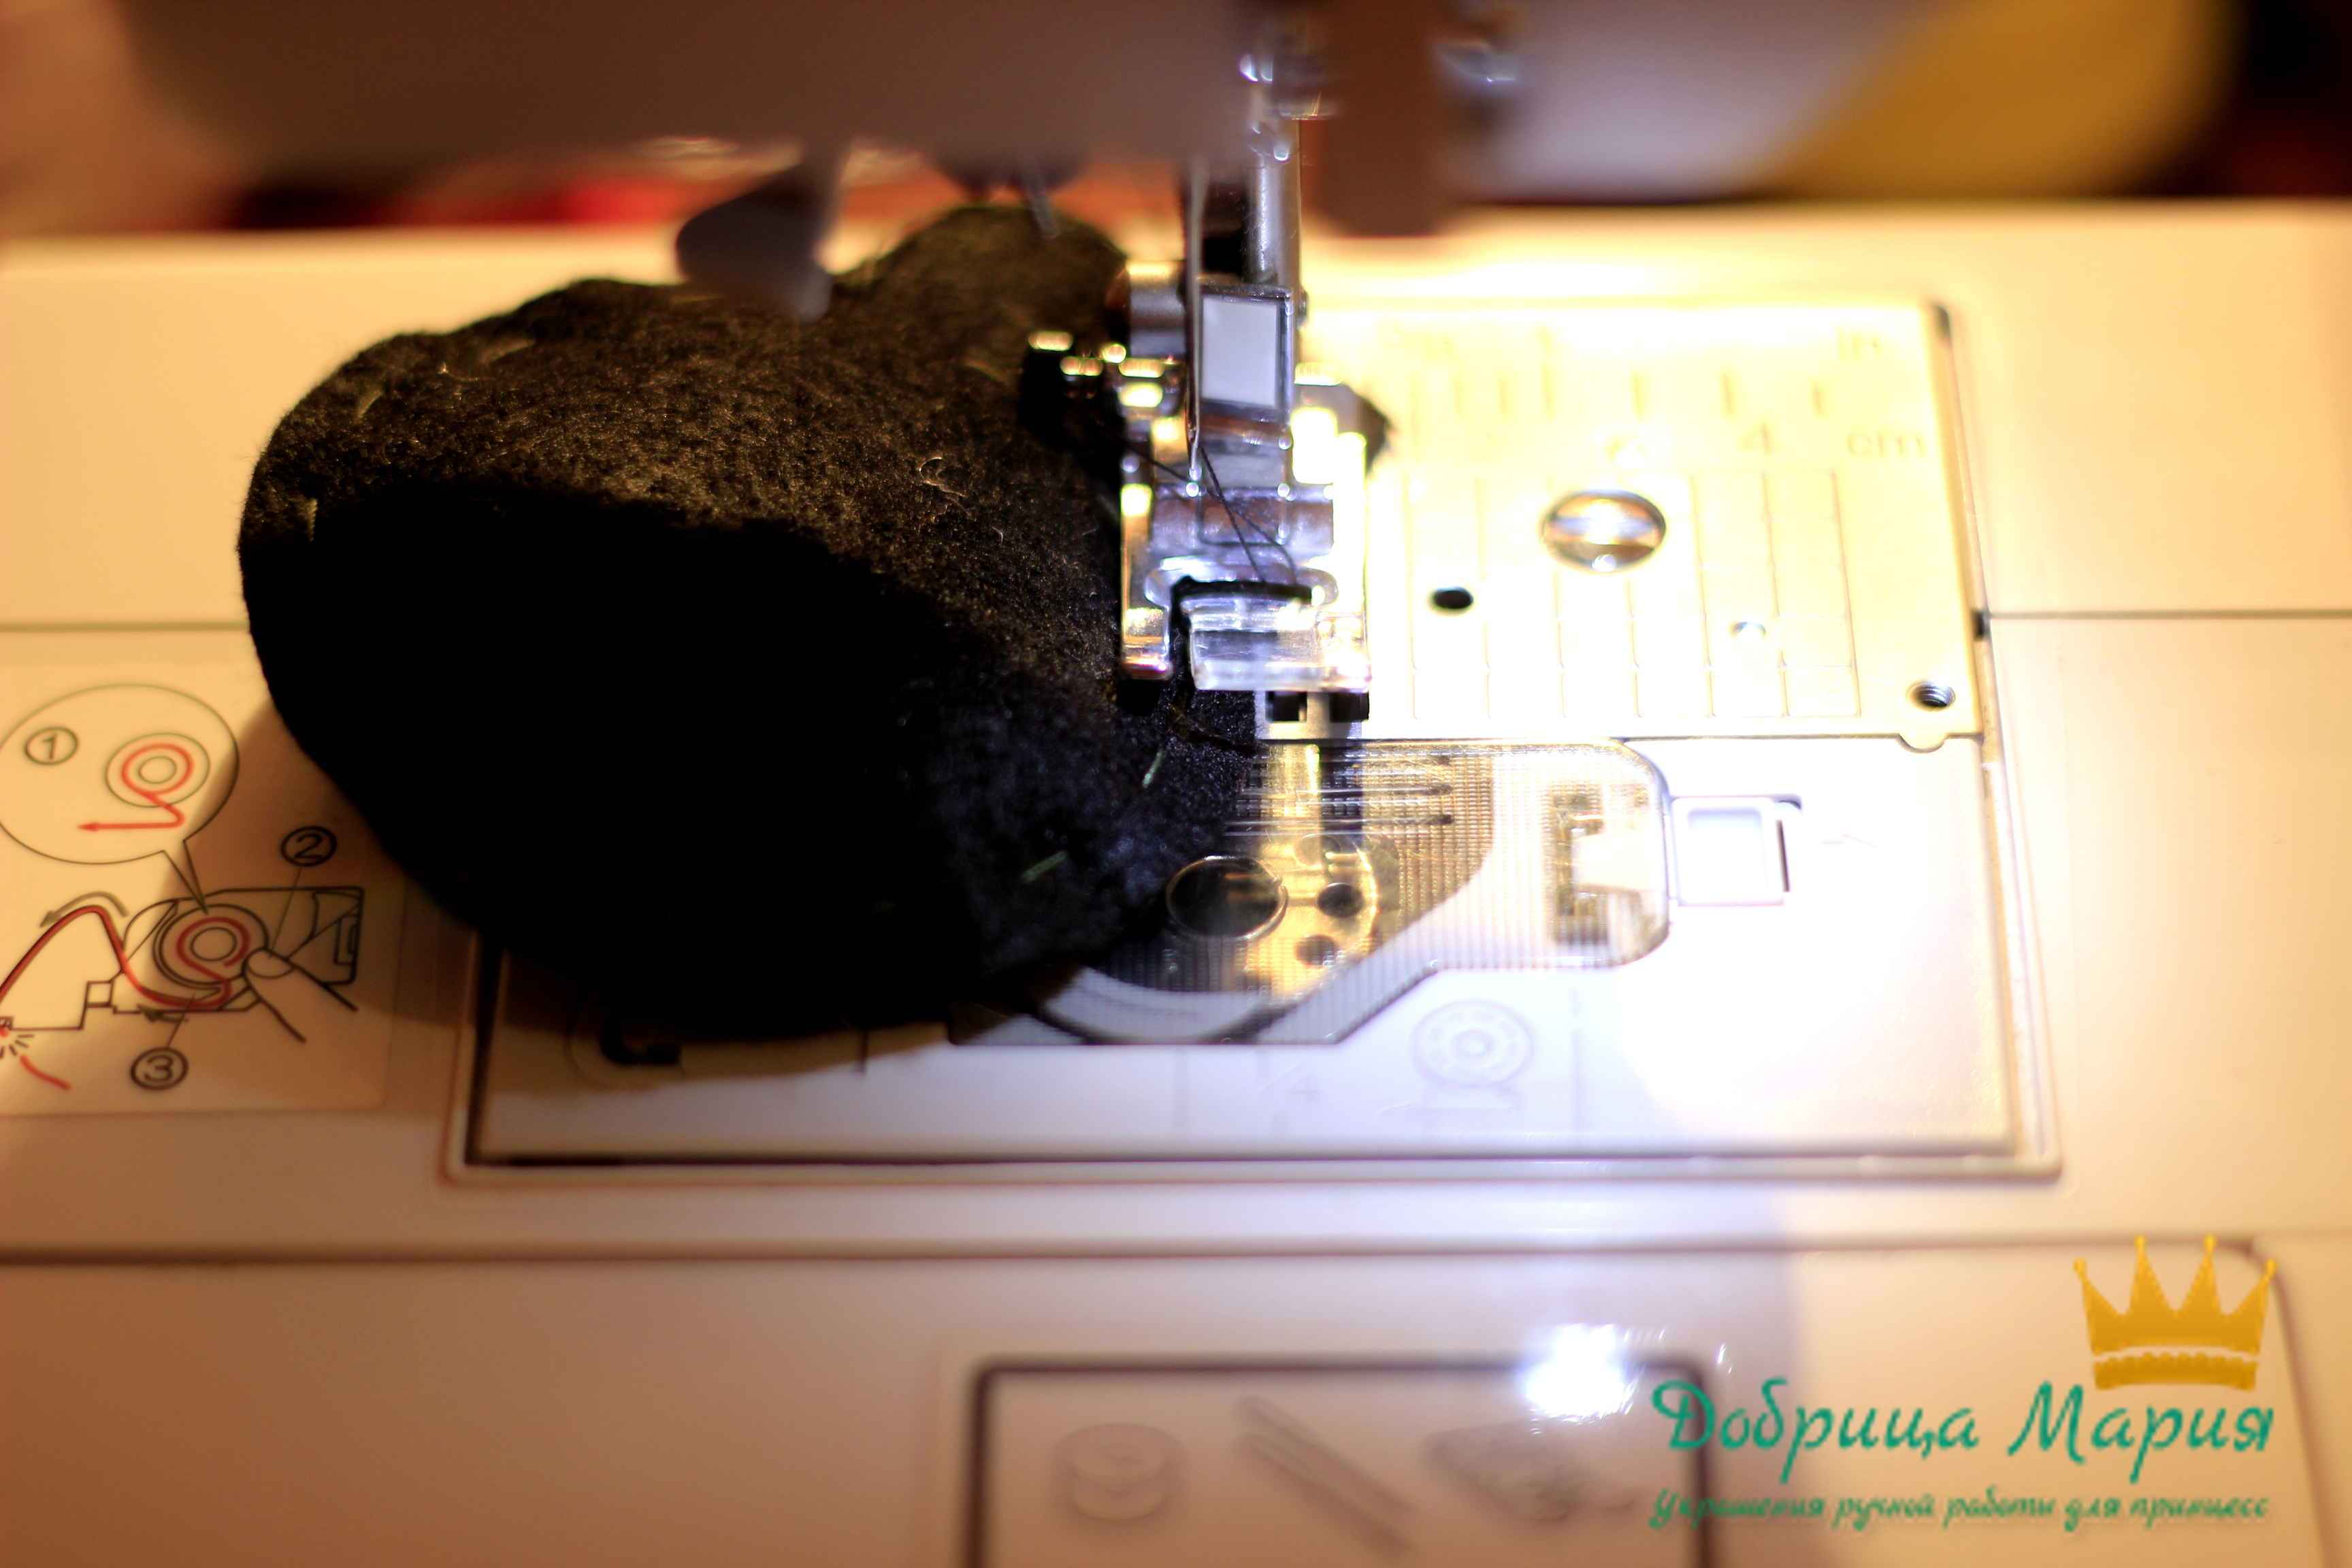
Sewing on a sewing machine...
These are the stitched ears we got
We outline on the rim the place where our ears will be located
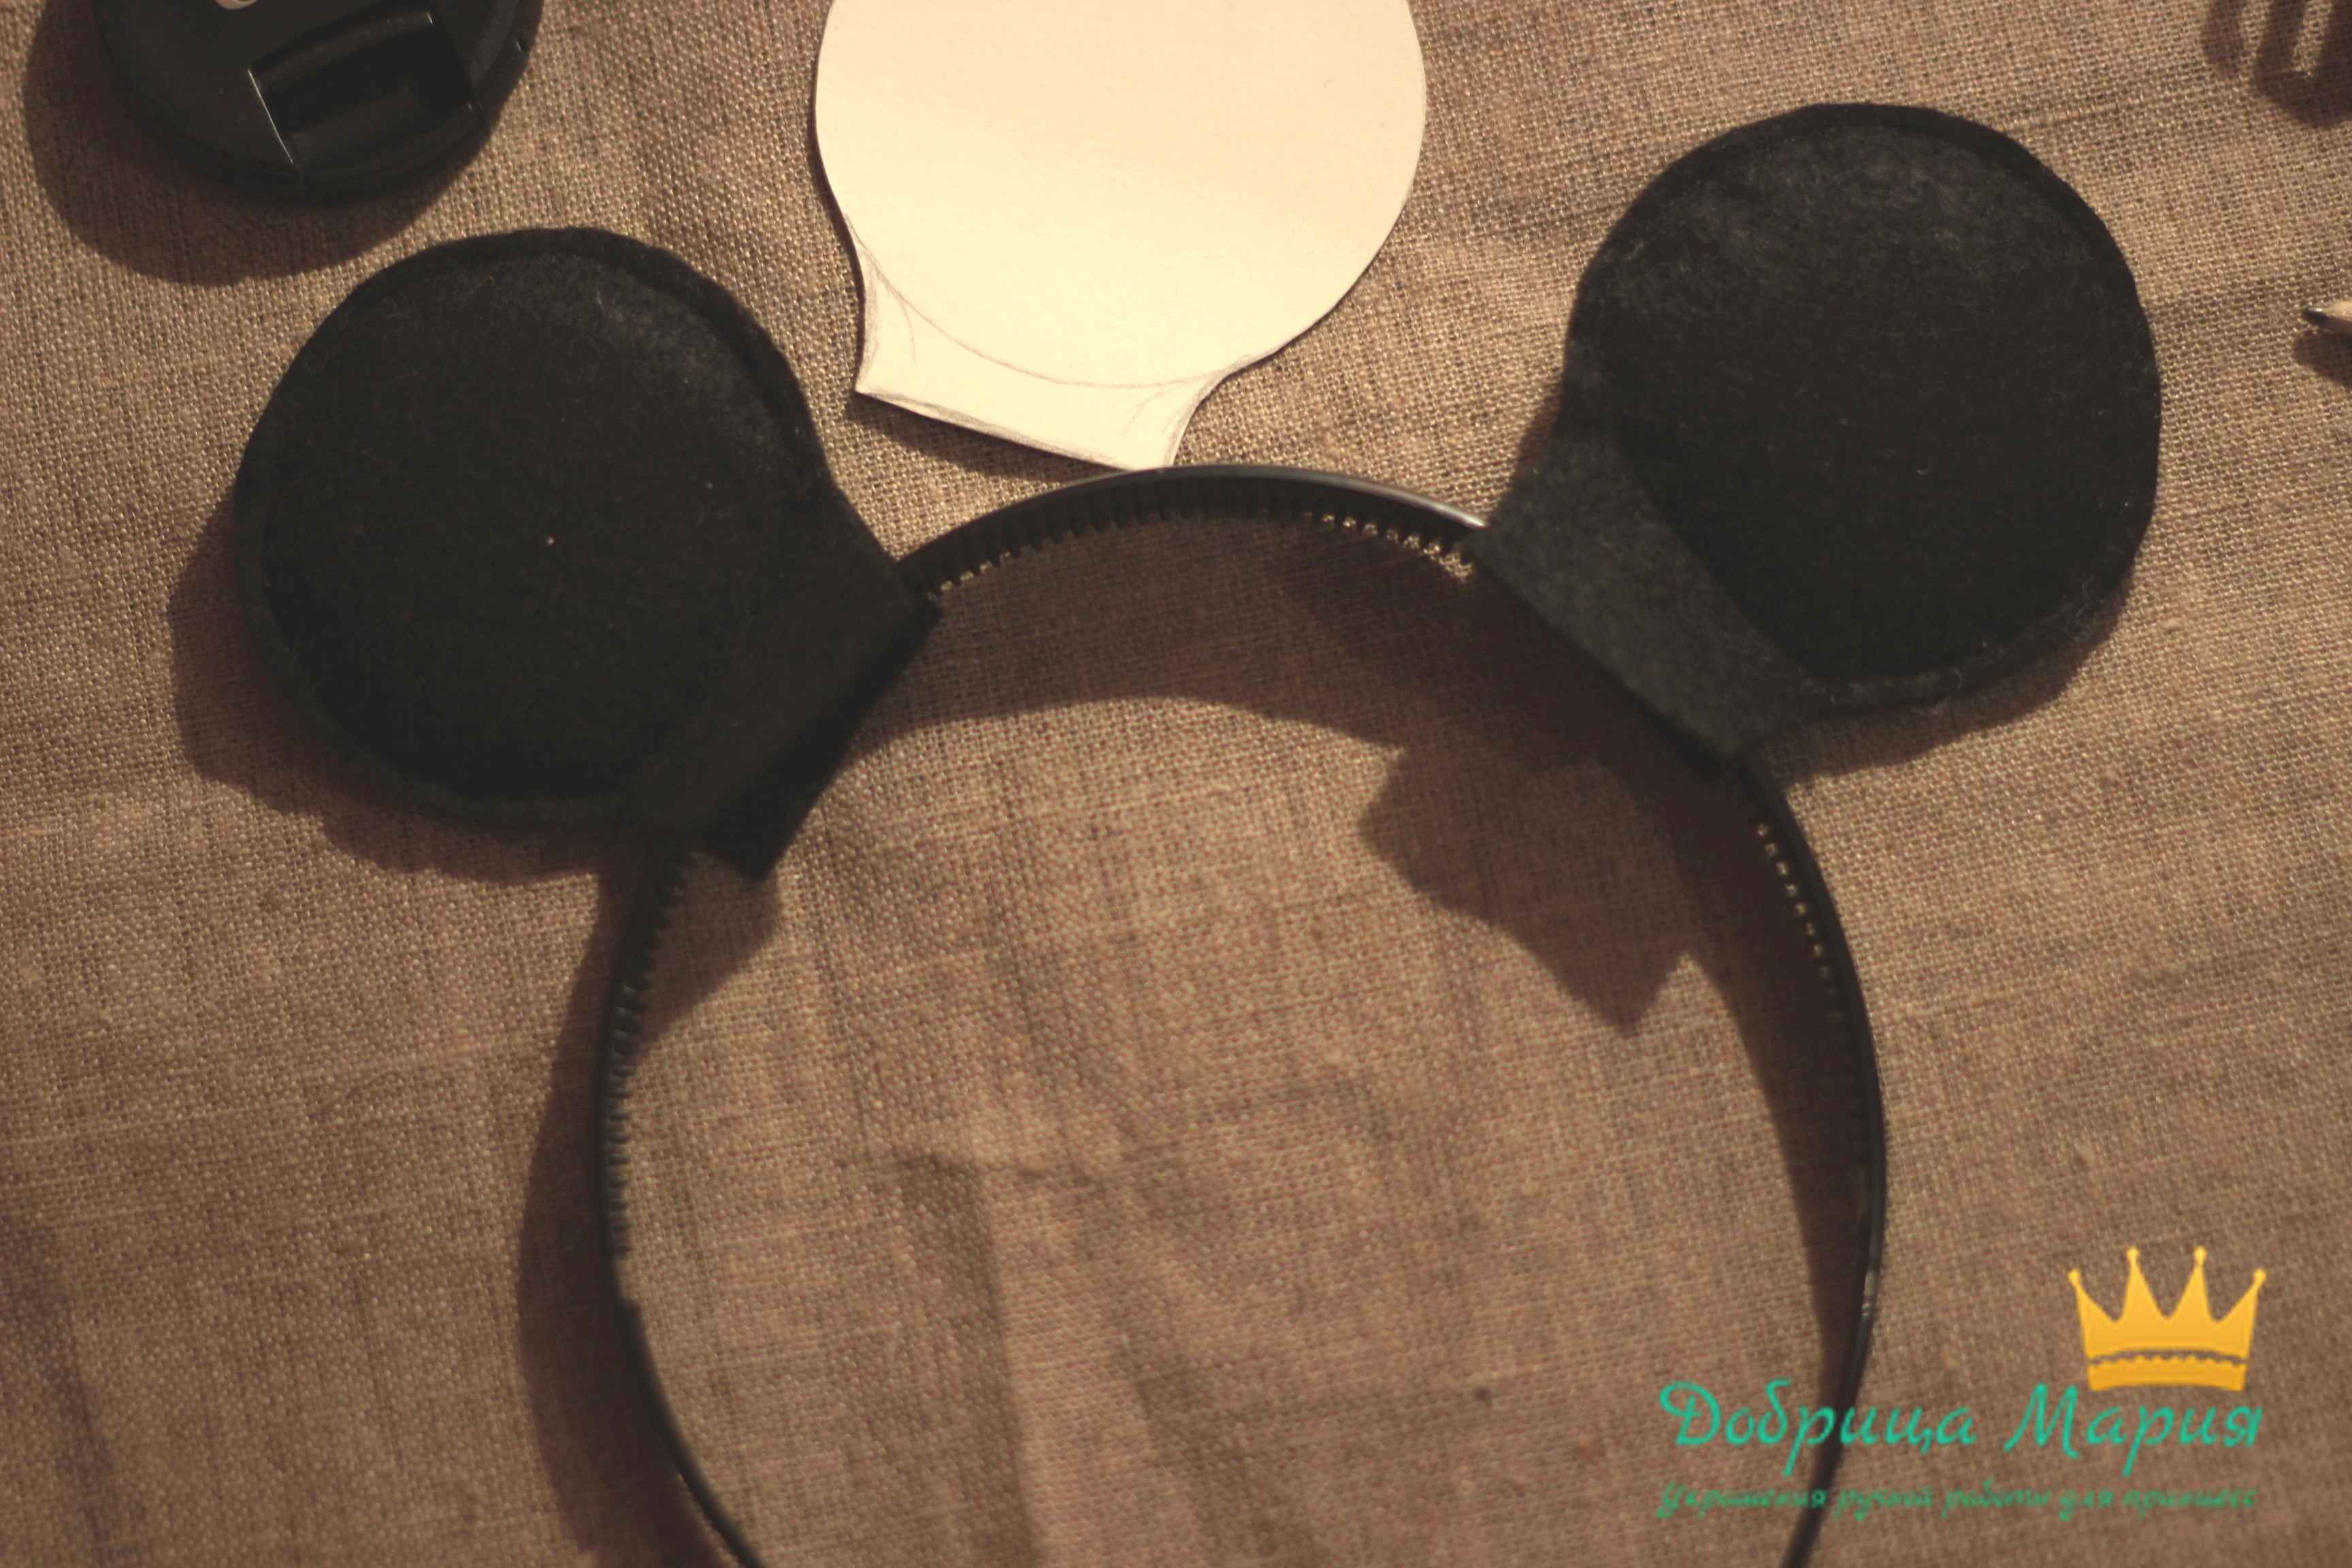
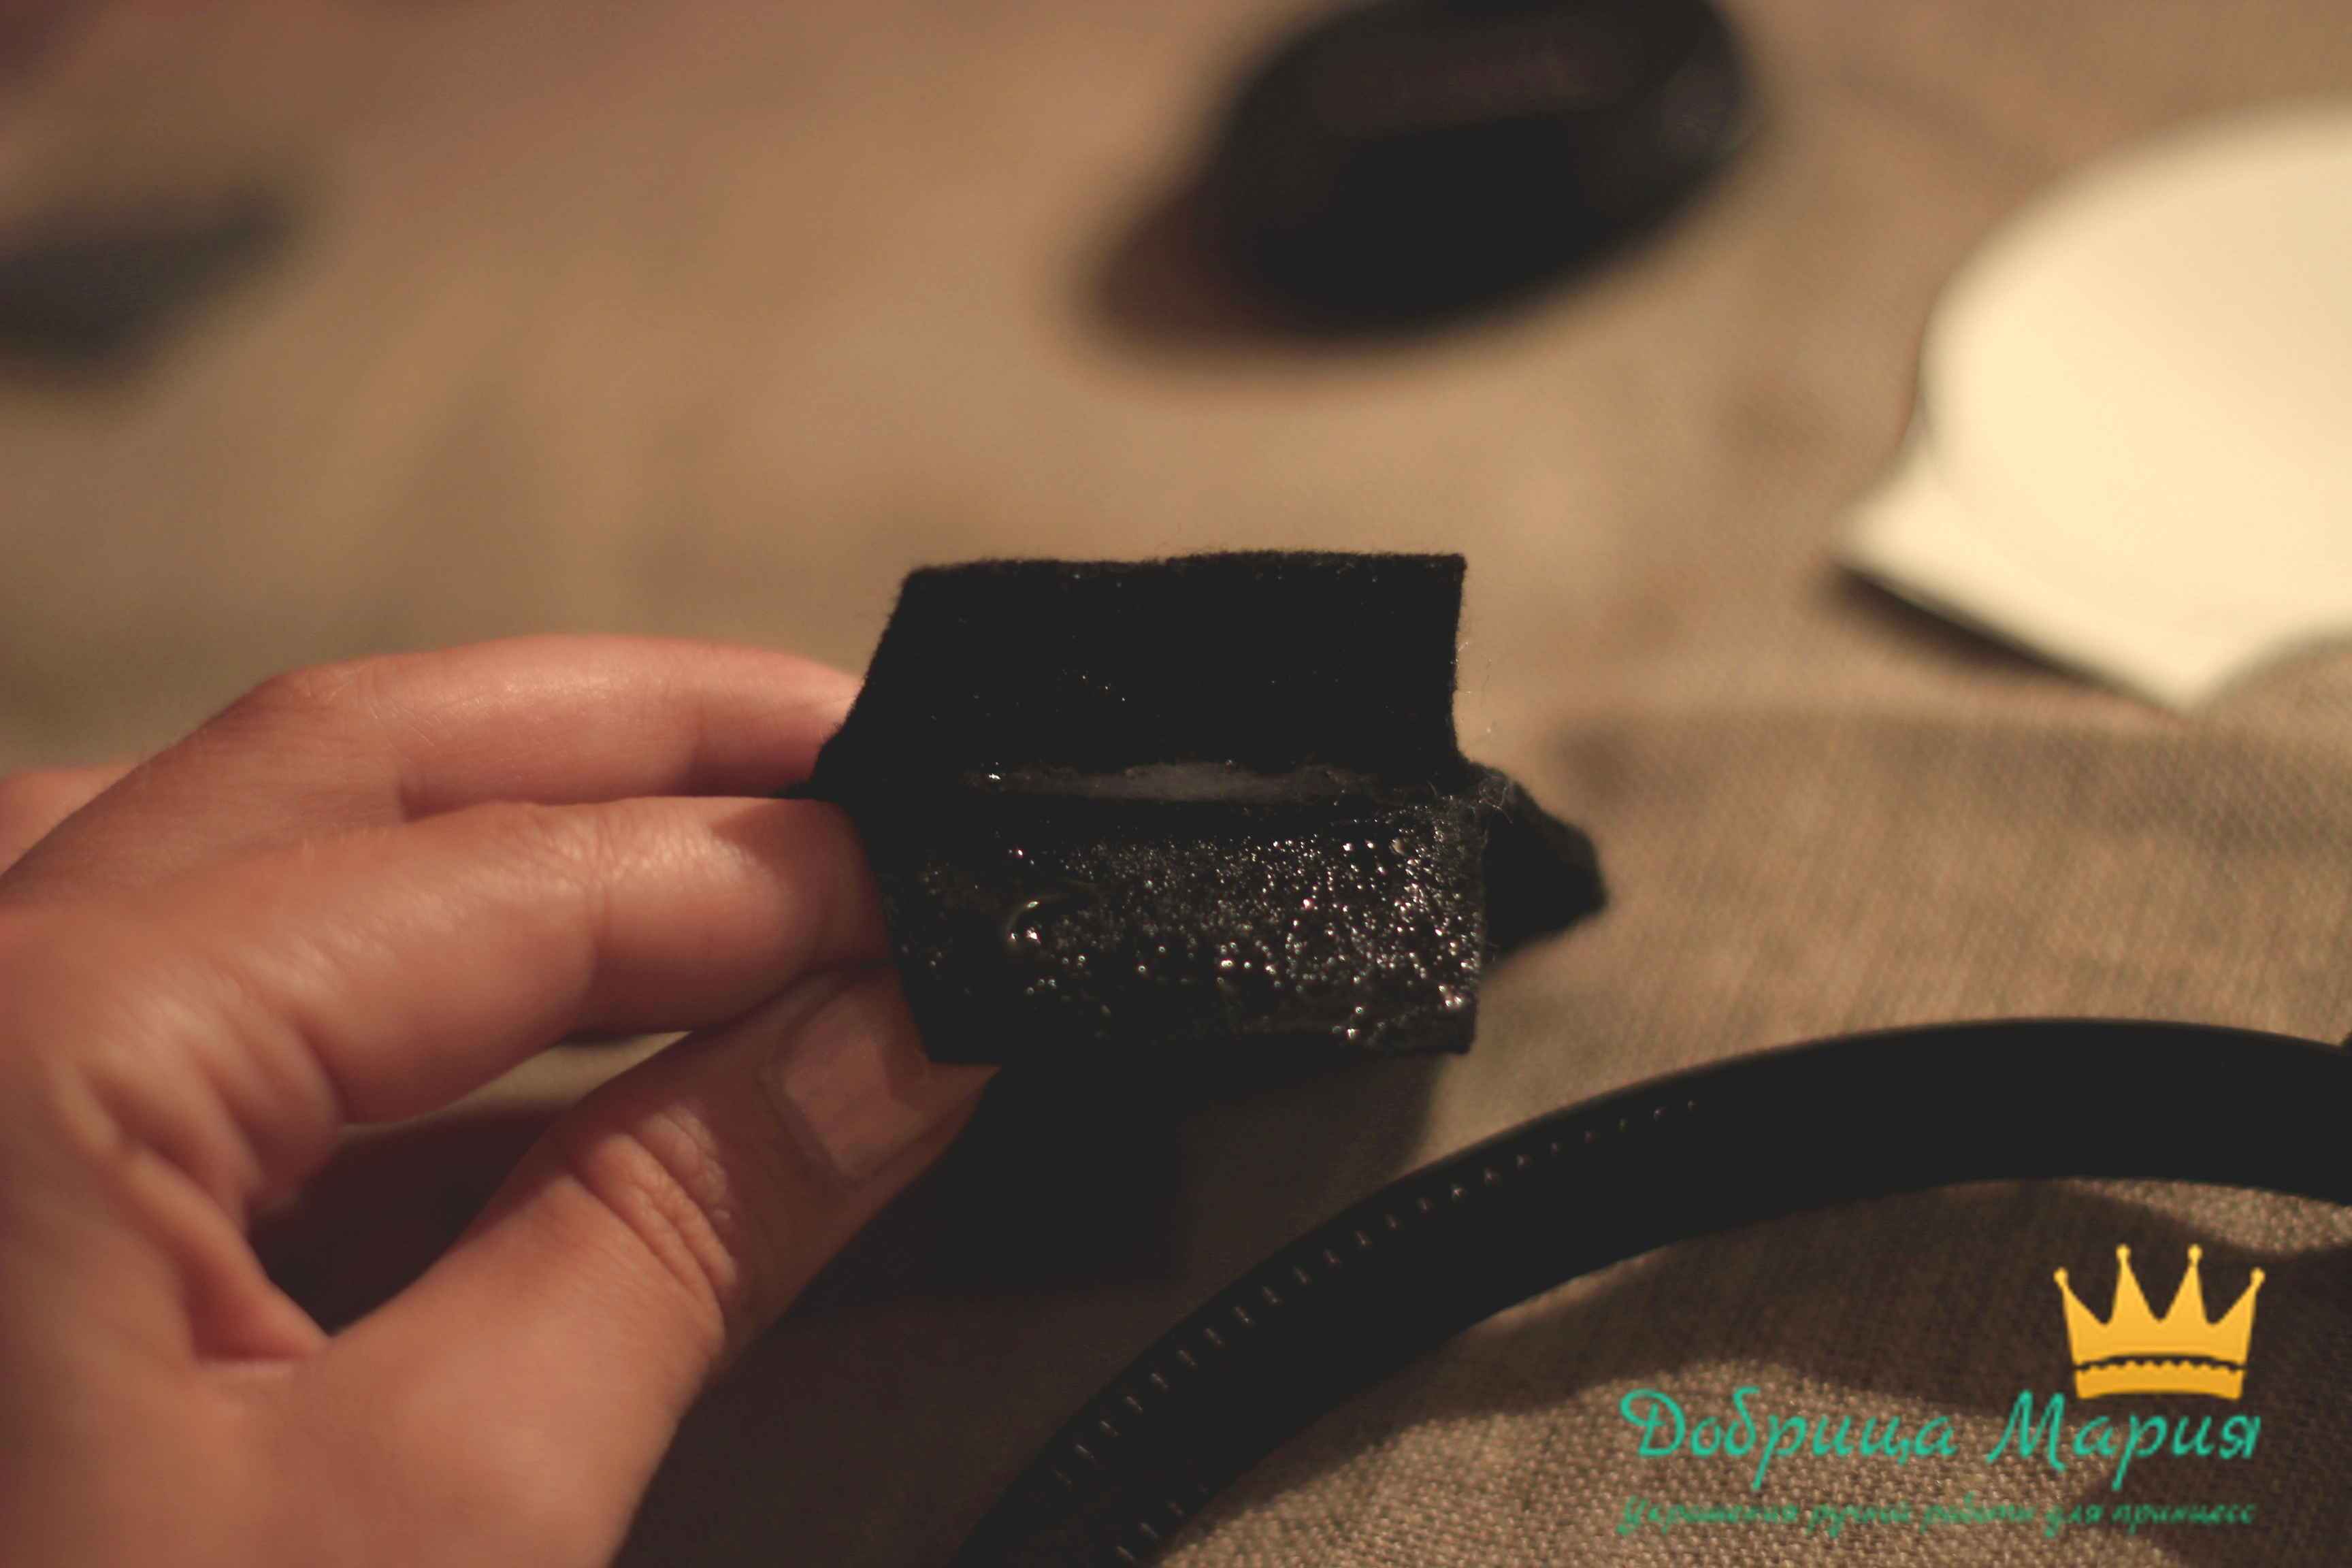
We apply glue to the indents that we left and glue to the rim
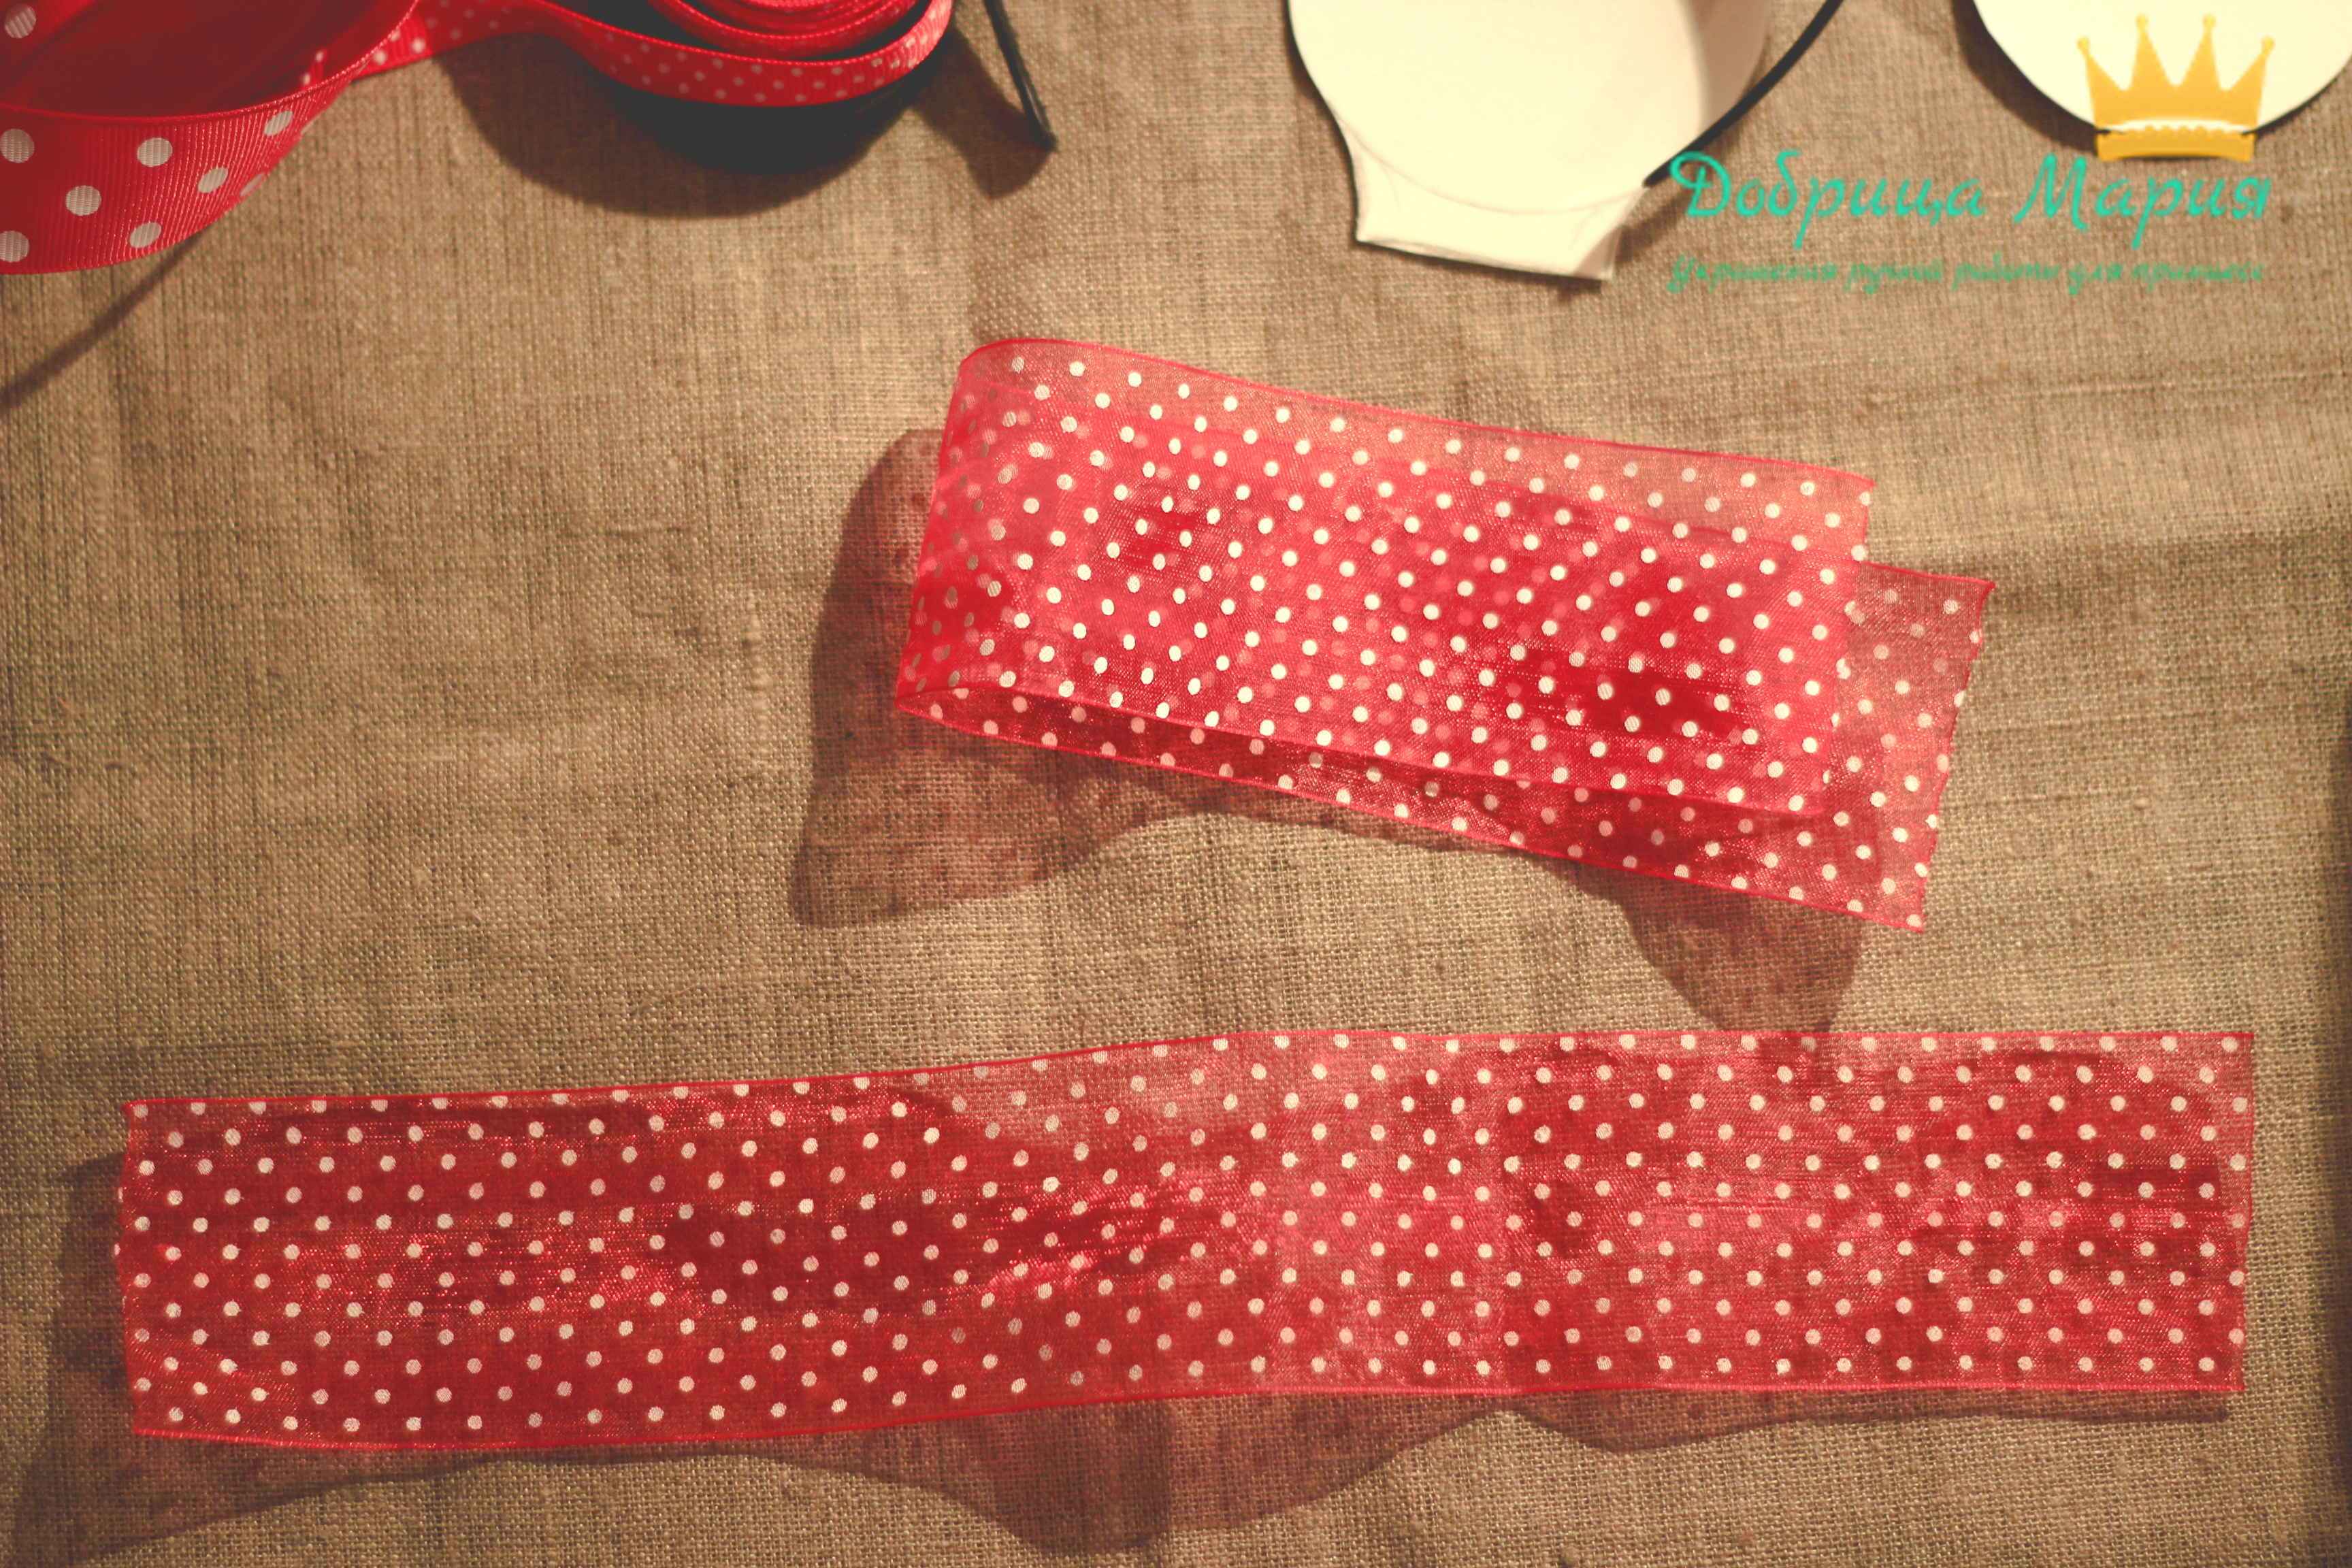
We mark the middle on the segments and to this middle we tighten both ends of the tape. We sew two strips together in the middle with a thread and then tighten and fasten the knot.
Related content:
Headband-crown independently. Hairband sugar berries on their own. A photo. Bezel crown yourself. Headband-crown independently. How easy it is to make a neat rim of sugar berries yourself. Master Class. It is important to know that each thing conveys the soul of the one who worked on it. It especially feels...
Headband with flowers yourself / How to make a headband with flowers. DIY Headband / Headband With Flowers by yourself. A photo. Video tutorial on how to make a hair band with your own hands. After watching the video, you will learn how to sew beautiful roses from chiffon and decorate the headband with them. Flower headband...
Master class Kanzashi. Rim on the head. Candy from satin ribbons / Christmas candy kanzashi. Headband for hair yourself. Kanzashi. A photo. Master class in Kanzashi technique. We decorate the headband with a beautiful candy made using the Kanzashi technique. We make Kanzashi candy from satin ribbons 0.6 cm wide, 1 cm, 5 cm wide, rep ribbon wide ...
Kanzashi master class. Ribbon flowers. Kanzashi bow. Scrunchie/Use it to tie back hair star. Hair bows yourself / Ribbon Hair Bow Tutorial / ✿ NataliDoma. A photo. Master class in Kanzashi technique. In the master class, we use a satin ribbon 5 cm wide, ...
Dandelions. How to make a bezel yourself. Master Class. Fabric flowers. How to make a quality headband with feathers. A photo. Video master class on how to make a high-quality headband with dandelions yourself. detailed wizard Class. Fabric flowers. Those who wish to help the master financially to purchase materials for future master classes. Dandelions. How right...
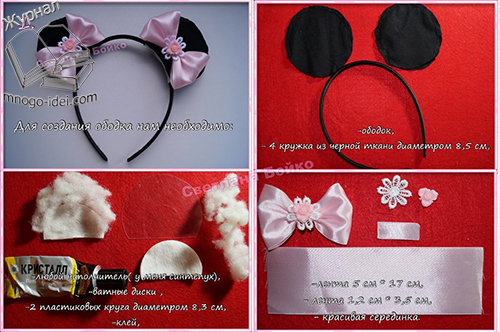
Good afternoon Dear friends, today we will consider a master class on creating a cute headband in the form of "Mickey Mouse" with our own hands. I think that any girl will be delighted with such a gift. The author of this master class is Svetlana Boyko. Svetlana really wanted to make a headband in the form of "Mickey Mouse" for her charming daughter, but unfortunately she did not find anything suitable on the Internet. Therefore, it was time to invent everything and do it myself.
To make a headband you will need:
* Filler (Svetlana used sintepukh)
* Two plastic circles with a diameter of 8.3 cm.
* Glue "Moment"
* 4 black cloth mugs.
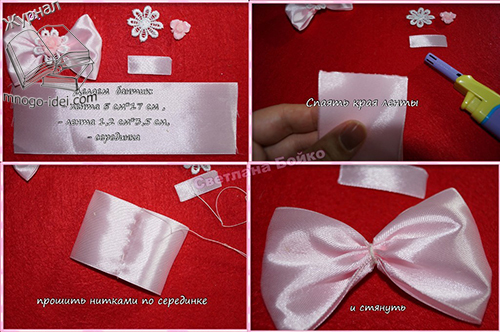
* Satin ribbon 5 cm wide. 17 cm long.
* Satin ribbon 1.2 cm wide. 3.5 cm long.
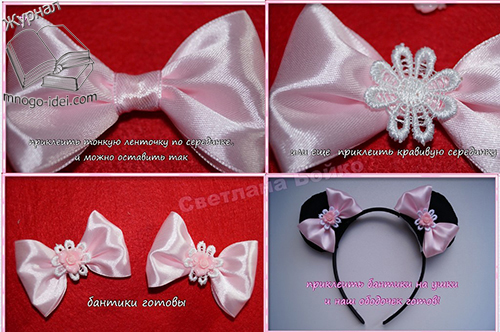
* Beautiful middle.
* Cotton pads.
How to make a Mini Mouse headband:
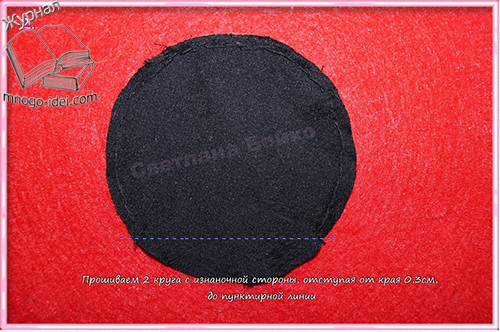
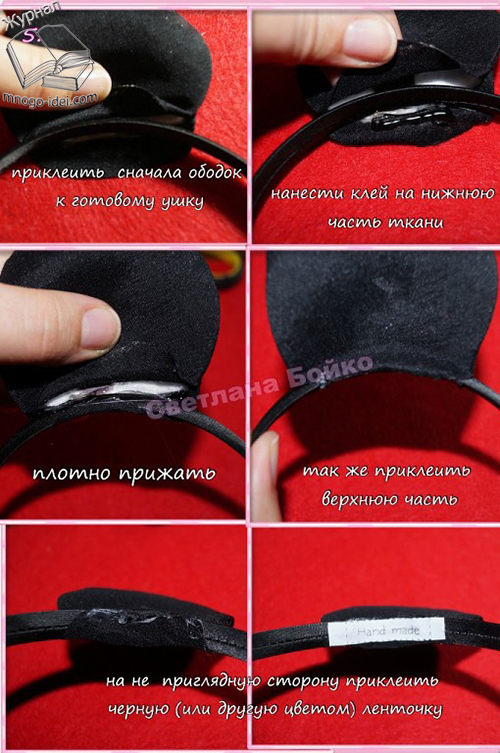
We take two black circles and sew them from the wrong side, while about 0.3 mm should be retreated from the edge. Sew to the dotted line.
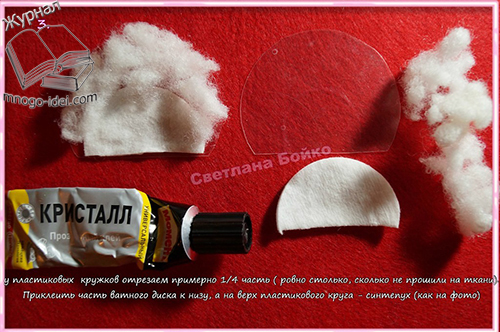
We take plastic mugs and cut off about 1/4 of them (exactly as much as they didn’t sew on the fabric). We glue a part of the cotton pad to the bottom to the plastic, and glue synthetic fluff or other filler to the top of the plastic circle. See how it should turn out in the photo.
We turn the ear of the "Mini Mouse" on the front side and insert a plastic circle into it. Slightly below the middle, drip a drop of glue and press well. So the ear for our headband is ready. We do the same with the other ear.
![]()
We begin to glue the ears to the rim. Apply a little glue to the bottom of the fabric and press firmly. Glue the upper part of the ear in the same way. The rim needs to be covered at the junction so that it is beautiful. You can glue a small piece of black or white ribbon.
Now let's make a bow. We take a satin ribbon and solder the edges of the ribbon. Then we take a thread with a needle and sew in the middle. Then we tighten it well and wrap it with threads.
On the finished bow we glue a narrow, thin ribbon in the middle and you can leave it like that. You can also glue a beautiful center. All bows are ready. We glue the bows on the ears and the rim "Mini Mouse" is ready. Be sure to make such a gift for your baby, your child will be delighted with it.
We thank the author for interesting master a class on creating a Mickey Mouse headband and are waiting for new interesting ideas.

Copyright © Attention!. Copying text and photos can only be used with the permission of the site administration and an active link to the site. 2016 All rights reserved.


, poultry farming")


- Burns, Robert - short biography
- The concept of common vocabulary and vocabulary of limited use
- Nancy Drew: The Captive Curse Walkthrough Nancy Drew Curse of Blackmoore Manor Walkthrough
- Deadpool - Troubleshooting
- Won't start How to Survive?
- What to do if bioshock infinite won't start
- Walkthrough Nancy Drew: Alibi in Ashes
- Spec Ops: The Line - game review, review Spec ops the line crashes on missions
- Room escape level 1 walkthrough
- Processing tomatoes with boric acid How much will 2 grams of boric acid
- Cucumber Grass (Borago)
- Bioinsecticide Lepidocid: purpose, properties and application procedure Lepidocide waiting period
- How to change the language to Russian in steam
- Dendrobium noble: room care
- Morphology of plants general concepts - document
- Planting, propagation and care of bamboo at home, photo Growing bamboo from seeds
- How to strengthen the cellular signal for the Internet in the country
- Sanskrit reveals the forgotten meaning of Russian words (2 photos)
- The oldest language Sanskrit programming language of the future Dead language Sanskrit
- Who has dominion over all the earth?