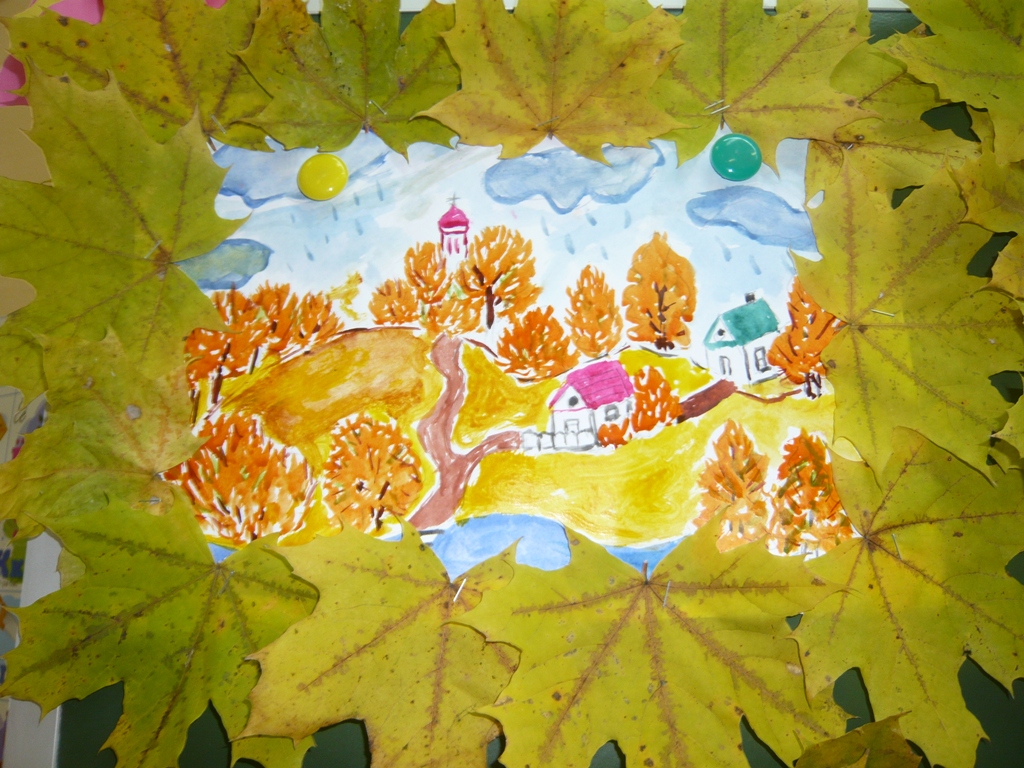
Drawing on Whatman pencil autumn. Master class "Learning to draw an autumn landscape" (using natural material)
It is an obligatory part of the educational program, as it allows you to better study the main autumn signs, master the palette of autumn shades, consolidate the ability to work with different artistic materials.
Autumn drawings for kindergarten can be done in a variety of techniques, using an unconventional approach, but taking into account the age characteristics of the children.
Finger drawing "Autumn tree"
For example, children 3-4 years old will be quite capable of depicting an autumn tree by applying droplets of rich colors to the main trunk with their fingers.

For such work, it will be necessary to prepare in advance a palette and templates for drawings of tree trunks with branches. We invite the kids to cover the tree with leaves, choosing the most autumn colors from the palette.

Children 4-5 years old can be offered more complex drawing techniques:
Drawing with a white wax candle
For work, we prepare thin paper, real autumn leaves (which we collect during the walk), a candle, a brush and paints.

We put a sheet with thick veins under a sheet of paper and draw a candle over it.

We cover the entire sheet with paint.

Where the candle has come into contact with the veins of the leaf, its contour will appear.

Draw vegetables and fruits:
Vegetables and fruits are another popular theme for drawing in the fall.
Drawing with wax crayons
Again we use the leaves that were collected during a walk in dry weather. They do not need to be dried because they will become brittle during the drying process. You will also need thin white paper and wax crayons.

We put a piece of paper under a sheet of paper and carefully paint with chalk all the space above it.

Where the chalk touches the veins, the clear contours of the leaf appear.

To make the drawings look more impressive, we fix them on a bright background - for example, sheets of colored cardboard.
Drawing in kindergarten (video):
Look at the video for beautiful and vibrant ways to draw on the theme of "autumn":
Autumn drawing with prints
Again we use freshly picked autumn leaves. We cover each of them with a layer of colors of the autumn palette and carefully turn it over onto a sheet of white paper. Carefully lift the sheet - a multi-colored print remains in its place.

From these drawings you can organize a real autumn exhibition.

Coloring the leaves
Children 5-6 years old can already cope with more jewelry work. We use well-dried ones, which must be handled carefully, as they easily break in the hands. We cover the leaves with different shades of paint.

It is better to use gouache or acrylic paint, watercolor often rolls off the surface of the sheet.

Having painted one side, dry it and paint the second.

In this case, the leaf itself is an autumn picture.

It turns out bright autumn leaves that can be used to create various decorative compositions.

From the painted leaves, you can make an original autumn pendant on a branch.

Coloring paper leaves
This work also requires concentration and perseverance, but less caution - paper sheets cannot be broken and are difficult to wrinkle.
We color each leaf on both sides.

We dry them and use them to decorate a group or a hall.

Autumn drawing with crayons
We cut out patterns of autumn leaves from thick paper in advance.

I put the template on the landscape sheet.

We carefully paint over the entire space around it with wax crayon, directing the strokes from the center to the periphery. We color the birch leaf.

Coloring the maple leaf.

We raise the sheet - only its contours remain, around which we see a real explosion of bright color.

Such non-standard drawing on the theme of autumn in kindergarten will help develop a child's interest in creativity and arouse in him the desire to create new interesting compositions and paintings.

Drawing and application "Autumn fly agaric"
With the help of real leaves we draw a colored background. We are waiting for it to dry. We cut out a fly agaric hat from red paper, and cut a leg from white paper. From the napkin we cut out the fringe on the leg of the fly agaric. We combine all the elements of the craft on a colored background and complement it with a dried maple leaf. It remains to color the fly agaric hat with white dots. Our autumn fly agaric is ready!

Application and drawing "autumn fly agaric"
Watch the video on how to make a beautiful autumn landscape from leaf prints:
And here is an example of a wonderful autumn drawing, painted with watercolors and crayons. First, the contour of the drawing is applied with a pencil, then patterns are drawn on bushes, trees and grass with white or yellow chalk. After applying watercolor, the pattern will become bright and clear.

How to draw a colored leaf step by step

What is the most remarkable in autumn? Of course, autumn leaves! In autumn, the leaves are not green, as in summer, but bright, multi-colored. Leaves on trees, bushes, fallen and lying on the roads, on the paths, on the grass... Yellow, red, orange... At this time of the year, even if you are not a photographer or an artist, you just want to pick up a camera or a brush with paints to capture this wonderful time of the year in all its glory.
Autumn drawings. Draw autumn
Method 1.
Under a sheet of plain paper for printers, place the sheet with the veins up, then shade it with wax crayon, located flat. You will see how a leaf pattern with all the smallest veins appears on paper.

To add some magic, you just need to take a white crayon and run it over white paper, and then let the child paint over the sheet with paint using a sponge. see link>>>>

By the way, there is an interesting way of coloring with colored corrugated paper. You must first draw the leaves on paper in the same way with white wax crayon. After that, tear the corrugated paper of autumn colors (red, yellow, orange, brown) into small pieces and, wetting each piece well in water, stick them on the drawing. Make sure that there are no two pieces of paper of the same color next to each other. Let the paper dry a little (but not completely!), Then remove it from the drawing. You will get a wonderful multi-colored background. Leave the work to dry completely, then put it under the press.

Method 2.
An interesting autumn craft will turn out if you put a leaf under a thin foil. In this case, the foil should be placed with the shiny side up. After that, you need to gently smooth the foil with your fingertips so that the pattern shows through. Next, you need to cover it with a layer of black paint (it can be gouache, ink, tempera). When the paint is dry, rub the painting very gently with a steel dishcloth. At the same time, the protruding veins of the leaf will shine, and dark paint will remain in the recesses. Now you can stick the resulting relief on a sheet of colored cardboard.

Autumn leaves. How to draw autumn
Method 3.
A very simple and at the same time effective technique is to print leaves on paper, on which paint is previously applied. Any paint can be used, only it must be applied to the side of the leaves where the veins appear.

Link >>>>
Here are the imprints of rowan leaves. And any kid can draw rowan berries - they are made with a cotton swab with red paint.

Link >>>>
A beautiful autumn drawing will turn out if you print the leaves with white paint on a sheet of dark-colored cardboard. When the paint dries, it is necessary to color the leaves with colored pencils. It will turn out beautifully if some leaves are left white.


The background can be left as is, or made colored by painting with paints with a sponge. In this case, it is necessary to leave a small unpainted space around the leaves.


If you decide to make the background colored, then the leaves themselves can be left white.

How to draw autumn leaves. Autumn crafts
Method 4.
To give volume to your drawings, you can use the following interesting technique. You will need thin wrapping paper or white crepe paper.

1. Tear it into pieces of irregular shape and stick it on a thick sheet of paper with PVA glue. Try to get more "folds", "wrinkles" at the same time, they will subsequently give the picture texture, volume.
2. When the glue dries, use http://www.dltk-holidays.com/fall/images/bfallwreath.gif "target="_blank">stencil , draw and cut out three maple leaves from this paper (large, medium and small).
3. Paint them with colors in autumn colors, then stick them on a sheet of black cardboard.
For more detailed instructions with photos, see the link>>>>
DIY autumn crafts


Method 6.
Another original autumn drawing, made in warm and cold colors. The leaves themselves are drawn in warm colors (yellow, red, orange), the background - in cold colors (green, blue, purple). You will need a compass to do this job.

1. Draw several leaves of different shapes on paper.
2. Now, using a compass, draw a circle with a small radius in the lower left corner of the sheet of paper. Next, adding about 1 cm, draw circles of larger and larger radius, as far as the compass will allow.
3. Now do the same in the upper right corner.
4. Finally, color the autumn leaves with felt-tip pens or pencils in warm colors (the colors should alternate sequentially), and the background in cold colors.
Maple Leaf. maple leaf drawing
Method 7.
Help your child draw a maple leaf on a piece of paper. Divide it with veins into sectors. Let the child color each sector of the leaflet with some special pattern.


You can combine two methods.


Autumn crafts for kids
Method 8.
Another unusual autumn drawing.

1. Draw leaves of various shapes on paper. They should occupy the entire sheet of paper, but not touch each other. Part of the leaves should start from the borders of the sheet of paper. Draw only the contours of the leaves, without veins.
2. Now, using a simple pencil and a ruler, draw two lines from left to right and two from top to bottom. The lines should cross the leaves, dividing them into sectors.
3. Choose two colors for the background and two colors for the leaves. Color them in the chosen colors in the same way as in the picture.
4. When the paint dries, trace the outlines of the leaves and the drawn lines with a gold marker.
Drawings on the theme of autumn
Method 9.
To make this autumn craft, you will need a regular newspaper and paints (including white paint).
1. Draw a maple leaf on a piece of newspaper.

2. Color it with paint and after the paint is dry, cut it out.


3. Take another sheet of newspaper and draw and paint over a large square on it with white paint.

4. Lay your sheet over the paint and wait for it to dry completely.

5. This is what you should end up with!
The golden time of nature, replacing the hot, sunny summer, brings with it not only the beginning of the school year, but the opening of the season of numerous holidays and solemn events for children and youth. They are carried out on a large scale both in schools and in kindergartens. The program necessarily includes poetic and song numbers and thematic exhibitions, at which children exhibit original crafts made by themselves and drawings on the theme of autumn, drawn in pencil and paints. If your child has already been assigned to prepare something similar, then our interesting ideas will help determine the plot of future work. We offer options for autumn drawings for preschool children, students in grades 1-3 and 5-6. Choose a master class in your age category and, together with the younger generation, create small masterpieces with your own hands.
Drawing on the theme of Autumn with a pencil step by step with a photo - a master class
Autumn is a wonderful time of the year, inspiring creative impulses of writers, poets, photographers and artists. Creative people, not sparing epithets and colors, enthusiastically sing the golden hues of falling leaves, the gray-blue sky depths, the light transparency of the cooling air, thick clouds hiding the sun and the monotonous sound of the November rain. However, not only delicate watercolors, bright gouache and rich-hued oil paints have the ability to convey all the charm of delicate autumn moods. The most prosaic simple pencil does just as well with this. With it, you can quickly and without much hassle create a very colorful and atmospheric drawing, almost with perfect accuracy reproducing on paper a fragment of an ordinary autumn day in a quiet corner of a large city park. A lonely bench, an umbrella forgotten by someone in a hurry, puddles and fallen maple leaves lying lonely on the asphalt ... A typical, but very touching landscape that causes a slight sadness ... Do you think that only a person who has the talent of a painter can draw it on paper paper? By no means, no. Even a schoolboy will cope with the task if he strictly follows the advice and recommendations of the master class below.

Necessary materials for a phased pencil drawing on the theme of autumn
- simple HB pencil - 1 pc
- simple pencil 2B - 1 pc
- eraser - 1 pc.
- A4 drawing paper sheet - 1 pc.
- ruler
- compass
- protractor
Instructions for drawing with a pencil on the theme of autumn for schoolchildren in stages

Drawing with paints on the theme of autumn in kindergarten - "October motives" - a step-by-step master class

The program of traditional autumn holidays, held at the beginning of the new school year in many preschool children's institutions, almost always includes exhibitions and reviews of thematic children's creativity. On them, kids demonstrate various crafts and drawings on the theme of autumn. Preparing for such events usually causes a lot of trouble for parents. After all, most boys and girls of preschool age are not yet able to draw even, clear lines, mix watercolor shades correctly and skillfully cope with colored pencils or felt-tip pens. The drawings of preschool children more often resemble "kalyaki-malaki" and very rarely look like a beautiful, eye-pleasing image. Moms and dads have to make a lot of efforts to help their child create an exhibit worthy of the exhibition. We invite you to master a very interesting master class on drawing, but not with a brush, but with foam swabs. Even the smallest child will be able to wield them, and the result will look very bright, unusual and original.
Necessary materials for drawing on the theme of autumn for kindergarten
- paper sheet
- gouache paint set
- pencils - 6 pcs
- rubber bands for money - 10 pcs
- foam squares 10X10 cm - 10 pcs
- wide brushes - 2-3 pcs
Step-by-step instructions on how to make a drawing in kindergarten on the theme of autumn "October motives"
- Each pencil is wrapped at one end with a piece of foam rubber and firmly fixed with a rubber band for money. These are drawing tools.
- Work begins from the sky. Mix blue and white paints on the palette and paint over the upper part of the sheet with a wide brush. Then a pencil with a foam edge is dipped in white paint and clouds are made in a circular motion in the sky.
- The lower part of the sheet is tinted with dark green paint, and yellow and orange strokes are randomly placed on top. This is the earth strewn with leaves.
- When the general background of the drawing dries up, tree trunks are marked in brown.
- With the help of foam rubber, they are “dressed” in bright yellow and crimson foliage. When the paints dry, the work will be suitable for exhibiting at a children's art exhibition.
Drawing step by step on the theme of autumn for children in grades 1-3 of the school - a master class on video
This short video tells in an accessible way how to draw a drawing on the theme of autumn with children in grades 1-3. The author advises to approach the issue creatively and allow children to create bright pictures not only with a brush, but also with their fingers. Kids really like it, and they are happy to dip their pens in paints to create their unusual pictorial masterpieces.
Drawing step by step on the theme of autumn to school with paints for grades 5-6 - a master class with a photo
For thematic school exhibitions, students in grades 5-6 can prepare a drawing on the theme "Golden Autumn" with paints. It will not be difficult for children at this age to make a quick sketch of the plot on paper with a pencil, and then paint the picture with delicate watercolors or juicy gouache. Kids in kindergarten will not yet be able to cope with such work, and children in grades 1-3 will definitely need the help of teachers or parents.
Necessary materials for painting with paints on an autumn theme
- paper
- paints
- brushes
- simple pencil
- maple leaves
Step-by-step instructions for students in grades 5-6 for drawing with paints on the theme "Golden Autumn"
- On a sheet of paper, a preliminary sketch of the drawing is made with a simple pencil.
- Color the picture with the desired colors and let it dry completely.
- Small drops of Moment glue are placed along the perimeter of the drawing every 5-7 centimeters and freshly picked maple leaves are applied to them. Gently press them to the paper and wait for the glue to grab. To speed up this process, an impromptu oppression from several books is placed on the leaves. After a couple of hours, the drawing with paints on the theme "Golden Autumn" in a frame of live maple leaves will be ready.
Did this master class help you make a drawing on the theme "Autumn"?
I dare not tell my story, how I painted the autumn landscape in watercolor, a master class ... In my opinion, a master class is when you already masterfully draw some kind of plot, have a clear plan of action and have the right to teach this to others.
I paint an autumn forest in the open air extremely rarely, it’s good if it’s one or two studies a year, so every time for me it’s the same search as for a novice watercolorist.
However, the last etude turned out to be quite successful, on my Instagram it was a success, and I promised that I would show the stages of writing this sketch. I'm keeping my promise.
Marina Trushnikova "Autumn Forest", watercolor, 22x25 cm
I consider the purpose of this demonstration not only to show you how I painted the autumn forest in watercolor in stages, but also voice your thoughts, why I took this or that step in my work.
I guess understanding "WHY" is more useful than knowing "how the author did it".
I'll start with a description of the materials, because anyway, someone will ask... 🙂
Etude "Autumn Forest". Materials:
I painted on Arshes watercolor paper, 100% cotton, 300 g/m, Grain Fin texture (medium grain).
Paints "Nevskaya Palitra":
- Indian yellow
- Indian golden
- Venetian red
- Lilac quinacridone
- Blue
- Sepia
- Large round squirrel
- Medium round with a fine tip, synthetic
- Fine brush with an elongated bristle (liner brush or needle brush)

What is the difficulty of drawing an autumn landscape with limited space?
That is why I approached the study with caution and a willingness to spoil everything...
Let's see how I managed as a result to maintain the integrity of the perception of the picture and not to dry the watercolor.
HOW TO DRAW AUTUMN LANDSCAPE WITH WATERCOLOR IN STEP:
Preparing paper for watercolor painting
I consider this moment technologically important.
Empirically, I came up with the following option for preparing paper in the open air: moisten the reverse side of the sketch, wait for the paper to stretch and attach the sheet with masking tape to the tablet. The top of the sheet remains dry.
So the sheet will not go in a wave, the paint will spread evenly inside the paper layer, it will not form sharp borders.
At home, I wet both sides of the paper, but in the open air there is no time to wait for drying.
Autumn landscape drawing
I am doing a light drawing. In this case, it is not difficult. It is important to find the ground line and place the main tree trunks.
I paint all the small details right away with a brush.
I did not photograph the drawing, because I was not sure of the result. After the first fillings, a work plan matured in my head, and I began to photograph the stages. So there will be more photos.
First fill
- I begin to paint an etude of an autumn landscape from a light layer of the sky behind the trees.
I'm doing a very liquid fill with a gradient from pale blue at the top of the leaf to slightly warm near the horizon line.
2. Below is the surface of the earth. I stretch from a pale solution of Venetian Red to its mixture with Indian Gold at the bottom of the leaf.
When I paint the ground, I leave gaps between the horizontal strokes of the brush, so that there is a light effect on the lying leaves. This gives luminosity and airiness.

How to paint autumn trees with a splash
Since the trees here are in backlight, against the light, the distant leaves glow more, they are light, and the front ones are dark.
This is very handy when painting an autumn landscape in watercolor, because in watercolor we move from light to dark.
That's why I paint the crown, gradually increasing the tone of the foliage. I start with Indian yellow, then I mix with Indian golden, and in the end I will write the brightest crimson leaves simply with Indian golden.
I love this paint from "Nevskaya Palitra" - it is very juicy and allows you to give both light and dark shades of yellow!

And now, attention, how I drew the crown to get away from detailing!
I sprayed it!
To repeat this trick, take a large soft brush that takes a lot of solution, and shaking it, splash paint from it onto the wet surface of the study.
This method does not give you tight control over the image of the foliage, it eliminates the detail.
Ink on wet paper begins to disperse in larger spots.
The second layer of spray is darker and a little thicker, the paint spreads less, the spots are more pronounced:

But cotton paper makes itself felt - it is still wet inside, and the paint spreads quite well.
To restore more gaps between the leaves, I stick a paper towel to the wet layer. She both dries and selects part of the layer:

When the layer is a little more dry, I sprinkle the brightest crimson leaves of Indian golden.

By the way, as you can see above, while I was waiting for the crown to dry out, I painted the ground with fallen leaves.
How to draw the surface of the earth in an autumn landscape
Remember a simple rule that will allow you to depict the earth as a lying, and not standing on end, horizontal surface.
The ground in the foreground should be darker than in the distance.
Those. at the bottom of the study, the color of the earth should be much darker:

I used a mixture of Venetian Red and Sepia to represent the ground. More sepia in the foreground to make the color darker.
Draw an autumn forest in watercolor:
tree trunks

I start painting tree trunks. Peering into the color of birches, I understand that they are shade pink! That's why you need to paint in the open air - no photo will show you such subtle nuances of color!
Therefore, I take Venetian red as the basis of the birch trunk.
For dark markings and other types of trees, I use a mixture of Blue and Sepia.

At the same time, with a paler solution of this color, I paint an array of trees in the distance, in the gap between the trunks.

To separate the tree trunks from the background and show the backlight, I scratch light lines along the outline of the trunk on the left with a map:


In the main color of the trunk, as it dries slightly, I enter black marks.
tree branches

The crown is dry. You can draw branches. To do this, I use a thin brush with a long bristle, which allows you to make calligraphically light flying lines.
Crown of trees. Using spray

Once again I return to the spray.
With a concentrated solution of Indian yellow, I spray on the crown of birches. Now the spots do not blur. So I spray thoughtfully. For this I tap with a large brush with paint on the shaft of another brush.
I add sprayed leaves on the foreground shrub. I use Indian yellow for this.
The final stages of DRAWING AUTUMN LANDSCAPE:
Generalization
At the end of the work, it is necessary to step back from it and see if there is any fragmentation, what can be combined?
In my case, I didn't like the rhythm of the trees on the right. (When I was drawing them, a local alcoholic approached me and tried to buy this sketch for 100 rubles. 🙂 I got excited and bumped the trunks as I saw them, without thinking about the composition...)
Therefore, I decide to darken the background behind the trunks and thereby combine the obvious stripes of the trunks into a larger mass. So the viewer's attention will be more drawn to the left side of the study, where the sunlight is clearly visible through the trees.
Therefore, in the end, I intensified the dark tones of the black birch branches and marks on the trunks.
(If drawing trees and landscapes with them is difficult for you, check out the master class below!)
So let's recap.
I solved the difficult task of a study with limited space by correct distribution of tone: distant plans are light, near ones are dark. This helped backlight.
In order not to go into detail, I did most of the work in a raw way, I used a spray instead of painting the crown with strokes.
For a harmonious perception of the landscape, do not forget about the stage of generalization and the placement of accents in the darkest and lightest colors.
If you found this demo helpful, feel free to leave a comment. This will give me an understanding that I am on the right track.
Draw autumn with colored pencils
Master class in drawing. Landscape "Native expanses"
Kokorina Elena Yuryevna, teacher of fine arts, Slavninskaya Secondary School, Tver Region, Torzhoksky District.
Purpose of work: the master class is intended for children of middle and senior school age, teachers of fine arts and teachers of additional education. It can also be used in classes with younger children, if you offer them a ready-made rendering.
You can decorate the interior with a drawing, or use it as a gift, as well as to participate in competitions and exhibitions.
Target: making an autumn landscape with colored pencils on the theme "Native expanses"
Tasks:
- draw an autumn landscape with colored pencils;
- to promote the development of the creative imagination of children, the formation of the ability to convey their observations and experiences in drawings;
- to form the ability to see the beautiful in the phenomena of reality of the surrounding world of the native land;
- to cultivate interest in landscape painting and in the process of drawing itself.
For work we need: landscape sheet, a set of colored pencils, a black helium pen or a simple pencil.

... If you see a river in the picture,
Or spruce and white frost, or a garden and clouds,
Or a snowy plain, or a field and a hut,
The picture must be called - landscape.
A landscape painting enables the artist to express his attitude to the world in a broad sense, to the world of nature that surrounds us. Nature brings people together, often gives them similar moods, thoughts and experiences.
How beautiful are the beloved expanses,
Blue was given a calling spill,
The rustle of herbs and birch trees are dear to me,
Memory with tenderness in the heart keeps!(Oleg Mandrakov)
Our beautiful nature often changes outfits.
I love you dear expanses,
the greenery of the forest and the smell of the fields,
blue lakes, majestic mountains,
the diversity of my Russia.
And the dawn among the curly birches,
and the sunset by the blue river,
the noise of acacias and tired maples.
I am happy to live on the sidelines of my native.
Spring waters spill
or golden leaf fall is circling.
All the whims of nature are good,
enjoy any weather.(Alexey Luchinin)
Golden autumn is joyfully lavishly dressed, rich in harvest, they love it for its generosity, for the wealth of fields, gardens, for the clear days of the azure-blue sky, for the beauty of the forests painted with gold and crimson paint.
Today I propose to draw an autumn landscape with colored pencils. The main characters of our landscape will be birches on the banks of the river, and in the background - the church.
To begin with, we will sketch the main plot of the future picture. You can use a simple pencil, but I took a helium black pen.

With a blue pencil, we begin to tint the sky and the river. Strokes are placed horizontally.

With a darker blue pencil, changing direction, put the second layer of hatching.

We introduce a purple pencil into the sky and the river, at the same time we paint over the birch trunks.

With a yellow pencil, we begin drawing the crown of a birch. We put the strokes horizontally.

In yellow, paint over the ground under the birch, the nearby hill on the opposite bank and two trees in front of the church.

We shade the leaves in the crown of birches with a brown pencil. We put short strokes in different directions. The same color is slightly introduced into the river under the birch and under the trees near the church.


We introduce green color into the birch crown.

We paint over the distant hill with a burgundy-brown pencil and introduce this color into the river under the birch.

With a dark green pencil we draw the foliage of the bushes, tall grass along the river bank and paint over the foreground of the bank where birch trees grow.

Draw blades of grass with a brown pencil. We put the hatching in different directions - this creates the feeling of swaying grass. Hatching emphasizes the tops of the hills.


We also put a light brown hatching behind the birches.

With a black pencil we make a drawing on the trunks of birches.


We introduce black strokes into the crown of birches.


With a green pencil we make a mesh hatching in the background, behind the birches, and paint over the black background.

We make burgundy spots.

We introduce a red pencil into the foliage of the bushes.

We decorate the church and the trees in front of it.


We decorate the river: with a light blue pencil we make horizontal and vertical strokes. We paint over the space unevenly to create a feeling of water movement.


In the background, behind the birches, draw spruces with a black pencil.


Now with wide strokes we paint over the entire crown of birches with a yellow pencil. And we introduce the same color into the river.

I'll take a pencil and draw a forest
I will draw the fields and the snake of the river.
So that peace and tranquility be on this Earth ... (Terenty Travnik)
The drawing is ready, but at the very beginning, for a sketch, I used a helium pen. In some places of the picture, the drawing line comes to the fore. I suggest to smooth these transitions. To do this, using the same black pen, we emphasize the pattern on the birch trunks and the conspicuous line of the river with hatching.


, poultry farming")


- Burns, Robert - short biography
- The concept of common vocabulary and vocabulary of limited use
- Nancy Drew: The Captive Curse Walkthrough Nancy Drew Curse of Blackmoore Manor Walkthrough
- Deadpool - Troubleshooting
- Won't start How to Survive?
- What to do if bioshock infinite won't start
- Walkthrough Nancy Drew: Alibi in Ashes
- Spec Ops: The Line - game review, review Spec ops the line crashes on missions
- Room escape level 1 walkthrough
- Processing tomatoes with boric acid How much will 2 grams of boric acid
- Cucumber Grass (Borago)
- Bioinsecticide Lepidocid: purpose, properties and application procedure Lepidocide waiting period
- How to change the language to Russian in steam
- Dendrobium noble: room care
- Morphology of plants general concepts - document
- Planting, propagation and care of bamboo at home, photo Growing bamboo from seeds
- How to strengthen the cellular signal for the Internet in the country
- Sanskrit reveals the forgotten meaning of Russian words (2 photos)
- The oldest language Sanskrit programming language of the future Dead language Sanskrit
- Who has dominion over all the earth?