We look through the microscope. Master class on using a microscope
So, we needed:
- microscope - I have a good, albeit rather shabby microscope with three objectives: eight times, forty times and ninety times; the last of them will not be needed - we will not look at bacteria, and I don’t have immersion oil; we will use the remaining two;
- glass slide and cover glass - I have one of both, this is quite enough;
- clean water - very little is needed;
- iodine - I will color the preparation with it, since I don’t have special dyes, but you can do without dyes at all;
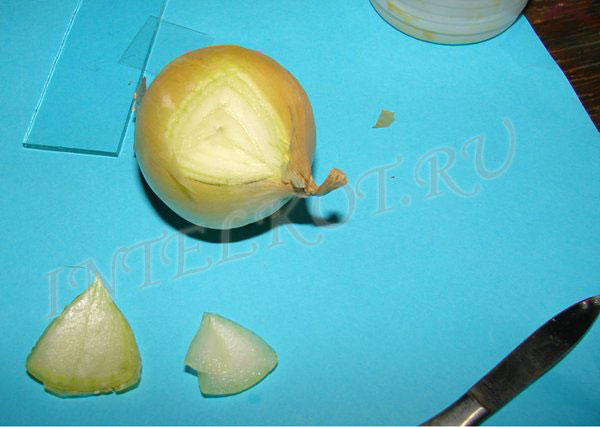
- onion head - you can take a very small or even spoiled one, a tiny piece of film is required;
- scalpel - can be replaced with a knife for cutting paper, at worst, a kitchen one will do;
- tweezers - it is convenient for them to remove the film from the bow, but you can simply pick it up with your fingers;
- needles - one larger (I added water to the preparation), the second is smaller (this one can be manipulated under a microscope);
- child - we will show him everything, I took two.
Cut out a piece of juicy onion scales and peel off a small film from it with tweezers.
The film is placed on the center of the washed and carefully wiped glass slide.

Now we cut the film with tweezers so that a very small piece remains, a large uncut film forms folds, it will be inconvenient to examine it.

Now we drip water on the film (7 drops) and cover with a coverslip.

Coloring. Place a drop of iodine at the junction of the coverslip and slide.

Iodine will gradually penetrate under the glass and color the preparation. Depending on the situation, water or iodine can be added. It will turn out something like this.

The temporary preparation is ready. We put it on the subject table. Set up the lighting (I rotate the mirror at the base of the microscope so that the beam of light reflected from the table lamp hits the preparation). Then, looking into the eyepiece and rotating the main screw (I have the largest one), we ensure that the image is in the best focus, that is, as sharp as possible. Now we move the preparation, looking into the eyepiece, choosing the best picture.

Everything is ready, we arrange the child in front of the microscope so that he can look into the eyepiece while sitting.


- The latest methods of teaching traffic rules
- How to draw pictures by numbers
- Do-it-yourself home digital microscope
- How to choose the right paint for drawing
- When is the best time to sunbathe?
- What kind of bird is better to have in an apartment?
- We put an apostille on the birth certificate on our own
- Is it possible to give flowers in pots - signs
- How to make cat ears
- Gray bag: what to wear and combine?
- How to get started with Faberlic: tips for new consultants
- Bioinsecticide Lepidocid: purpose, properties and application procedure Lepidocide waiting period
- How to change the language to Russian in steam
- Dendrobium noble: room care
- Morphology of plants general concepts - document
- Planting, propagation and care of bamboo at home, photo Growing bamboo from seeds
- How to strengthen the cellular signal for the Internet in the country
- Sanskrit reveals the forgotten meaning of Russian words (2 photos)
- The oldest language Sanskrit programming language of the future Dead language Sanskrit
- Who has dominion over all the earth?