How to make a do-it-yourself puppet theater for kindergarten
Preschoolers are very impressionable and respond well to emotional influences, so they perceive the bright colorful puppet theater as a real fairy tale come to life. Playing with dolls, the child abstracts himself from the environment, which helps him express all his problems and fears. If there are any conflict situations in the family or kindergarten, child psychologists recommend playing them out in a puppet theater, giving the child the role of different participants in the conflict. Children's participation in puppet theater helps them develop coherent speech, train memory and attention.

Buying a puppet theater is not a problem now, but good toys are expensive and out of reach for the average family. That is why many parents are interested in the question of how to make a puppet theater with their own hands for kindergarten?
VIDEO INSTRUCTION
Making dolls
VIDEO DESCRIPTION
Homemade toys for the puppet theater have the highest educational value. Making theatrical puppets develops creativity, imagination, and thinking. And a good kindergarten definitely uses this kind of benefits.

Toys can be made from any materials: foam rubber, fabric, paper, wire, cardboard, etc. Let's look at the manufacturing technology of the most common theatrical puppets.
- Flat dolls
The character is drawn on cardboard and cut out. The finished figure is placed on a second sheet of cardboard, traced and cut out. Images are colored with paints, pencils or felt-tip pens. Both parts are glued together by inserting a stick between them (glued together paper tube, ice cream stick, etc.). The resulting figures can be placed on a stand (thread spools or plastic plugs).
- Cylindrical (cone-shaped) dolls
Using a stencil or compass, circles of different diameters are cut out, cut in half and glued together in the form of a cone - this is the character’s body. The head is made of newsprint, which is torn into small pieces and filled with water. When the paper gets wet, drain off the excess water, add flour in a 3:1 ratio (3 parts newsprint, 1 part flour) and knead the dough. Roll the dough into balls, put them on a cone and sculpt a head. The heads should dry on the cone. After the heads dry, they are removed, and the cone is decorated with lace, braid, various fabrics, beads, etc., depending on the character. All decorative elements are glued with PVA glue. You can make slits on the cones and insert handles, paws or tails. When the body is ready, the doll's head is glued onto the cone.

- Foam dolls
First of all, the pieces of foam rubber need to be painted. This is done with aniline dyes dissolved in water. The foam rubber must be dipped into the dye solution several times, squeezing it out each time. After drying, the foam rubber is given the shape necessary for the doll: cuts are made, constrictions are made, some parts can be sewn.

The process of making such dolls depends entirely on the imagination of the master; we will look at just a few examples. To the glove we sew a stocking or a piece of tights, to the heel of which we glue or sew beads (eyes) - we get a snake. The snake can crawl and talk thanks to the movement of its hand.
An animal can be sewn from two gloves; to do this, we tie the middle finger of one glove to the index finger, and the ring finger to the little finger. We fold the glove and hide the extra parts inside, cut off the thumb. We pull back the ears (the ends of the ring and middle fingers) and sew the parts together. So we have the head of the animal; we sew it to the middle finger of the second glove. We sew the thumb of the first one onto the second glove - this is the tail of the animal. All that remains is to sew on the eyes and nose (beads), change the shape of the head and tail. If you put the doll on your hand, then all its parts (head, tail and legs) will be movable.

The mitten can represent the whole doll, in which case the thumb can be the tail, or just the doll’s head, then the thumb is the nose.
VIDEO
Making decorations
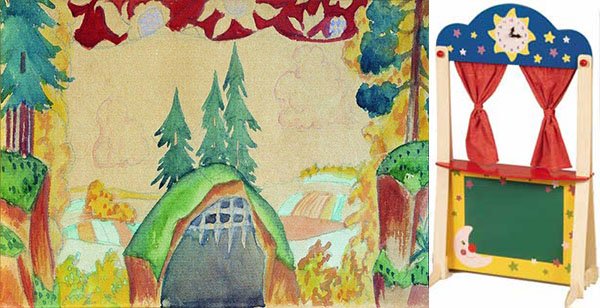
When interested in how to make a do-it-yourself puppet theater for a kindergarten, parents and educators often have in mind making puppets, but forget about such an important theatrical element as scenery. The simplest decorations are made from cardboard boxes, which are painted, covered with colored paper, and additional elements are attached.

To ensure a quick change of scenery, they need to be glued onto sheets of cardboard bound in the form of a book. Such a book can be placed behind a screen. Another option for changing the decorations is to mount them on a pinwheel, which is a thick wire driven into a round wooden base. On the back side of the turntable there is a screen consisting of 3 stretchers covered with fabric.


- The latest methods of teaching traffic rules
- How to draw pictures by numbers
- DIY home digital microscope
- How to choose the right paints for painting
- What is the best time to sunbathe?
- What kind of bird is best to have in an apartment?
- We put an apostille on the birth certificate ourselves
- Is it possible to give flowers in pots - signs
- How to make cat ears
- Gray bag: what to wear and combine with?
- How to start working at Faberlic: advice for new consultants
- Cat ears: a master class on making them in various ways
- Preparing a birthday party in a pirate style
- Experiments with a microscope
- A schoolchild’s spine is still developing and will only get stronger during adolescence
- Bell pepper for children: benefits and harm
- DIY leather watch strap
- Which Lego is better to buy: what to look for when choosing a set?
- What to wear with a polka dot blouse
- How to choose a brush for acrylic paint?